How to get started with Tip Jar WP
1. Getting the plugin installed
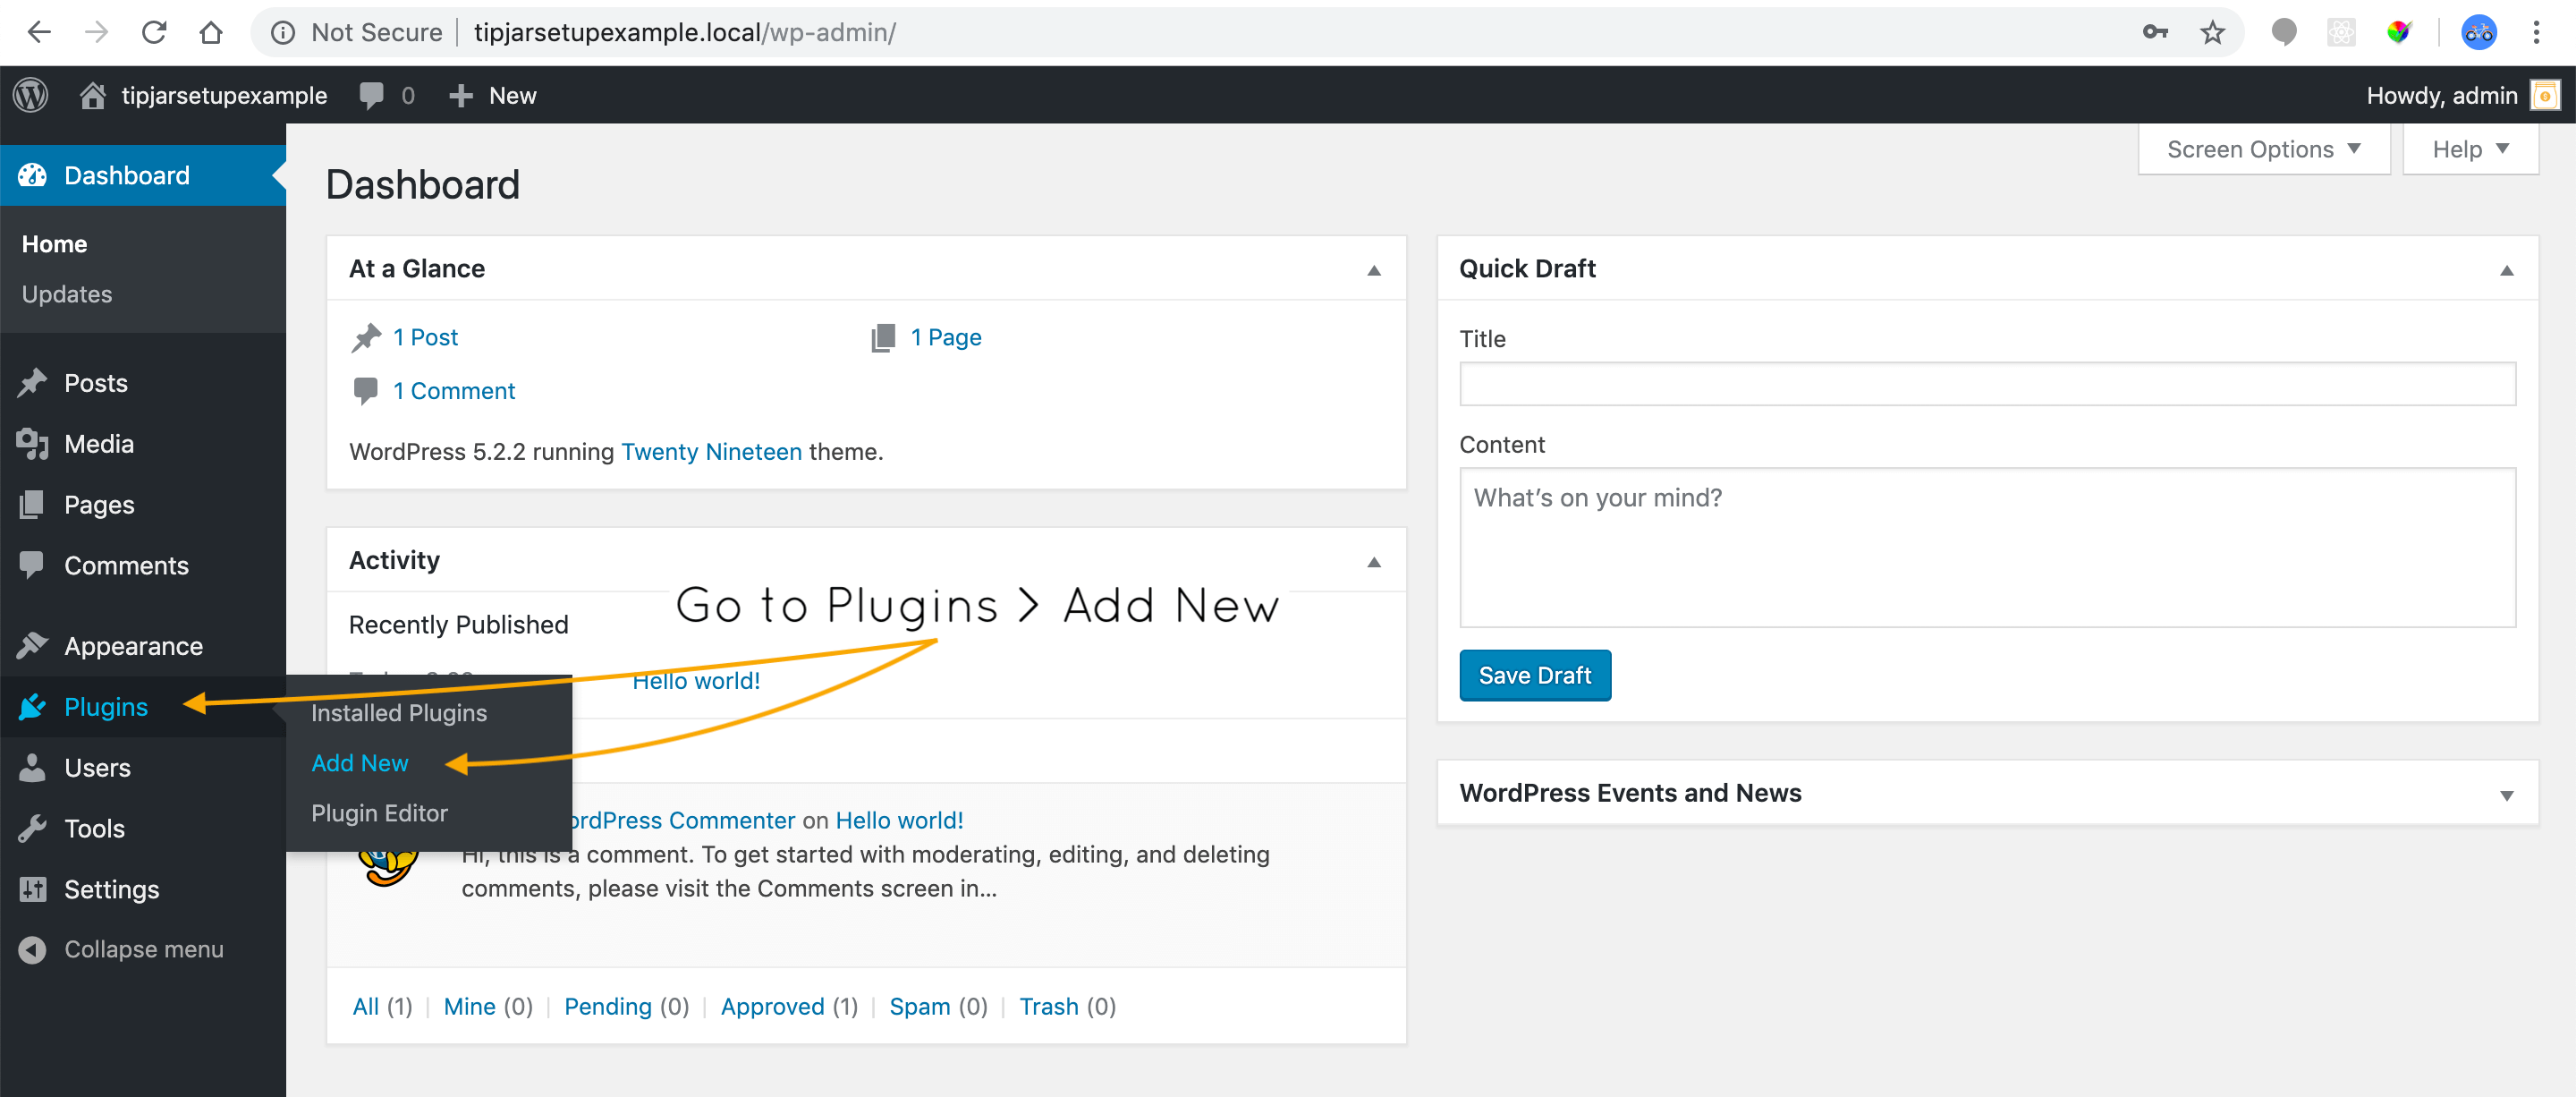
To install Tip Jar WP into your WordPress website, log into your WordPress dashboard and go to “Plugins” > “Add New”:
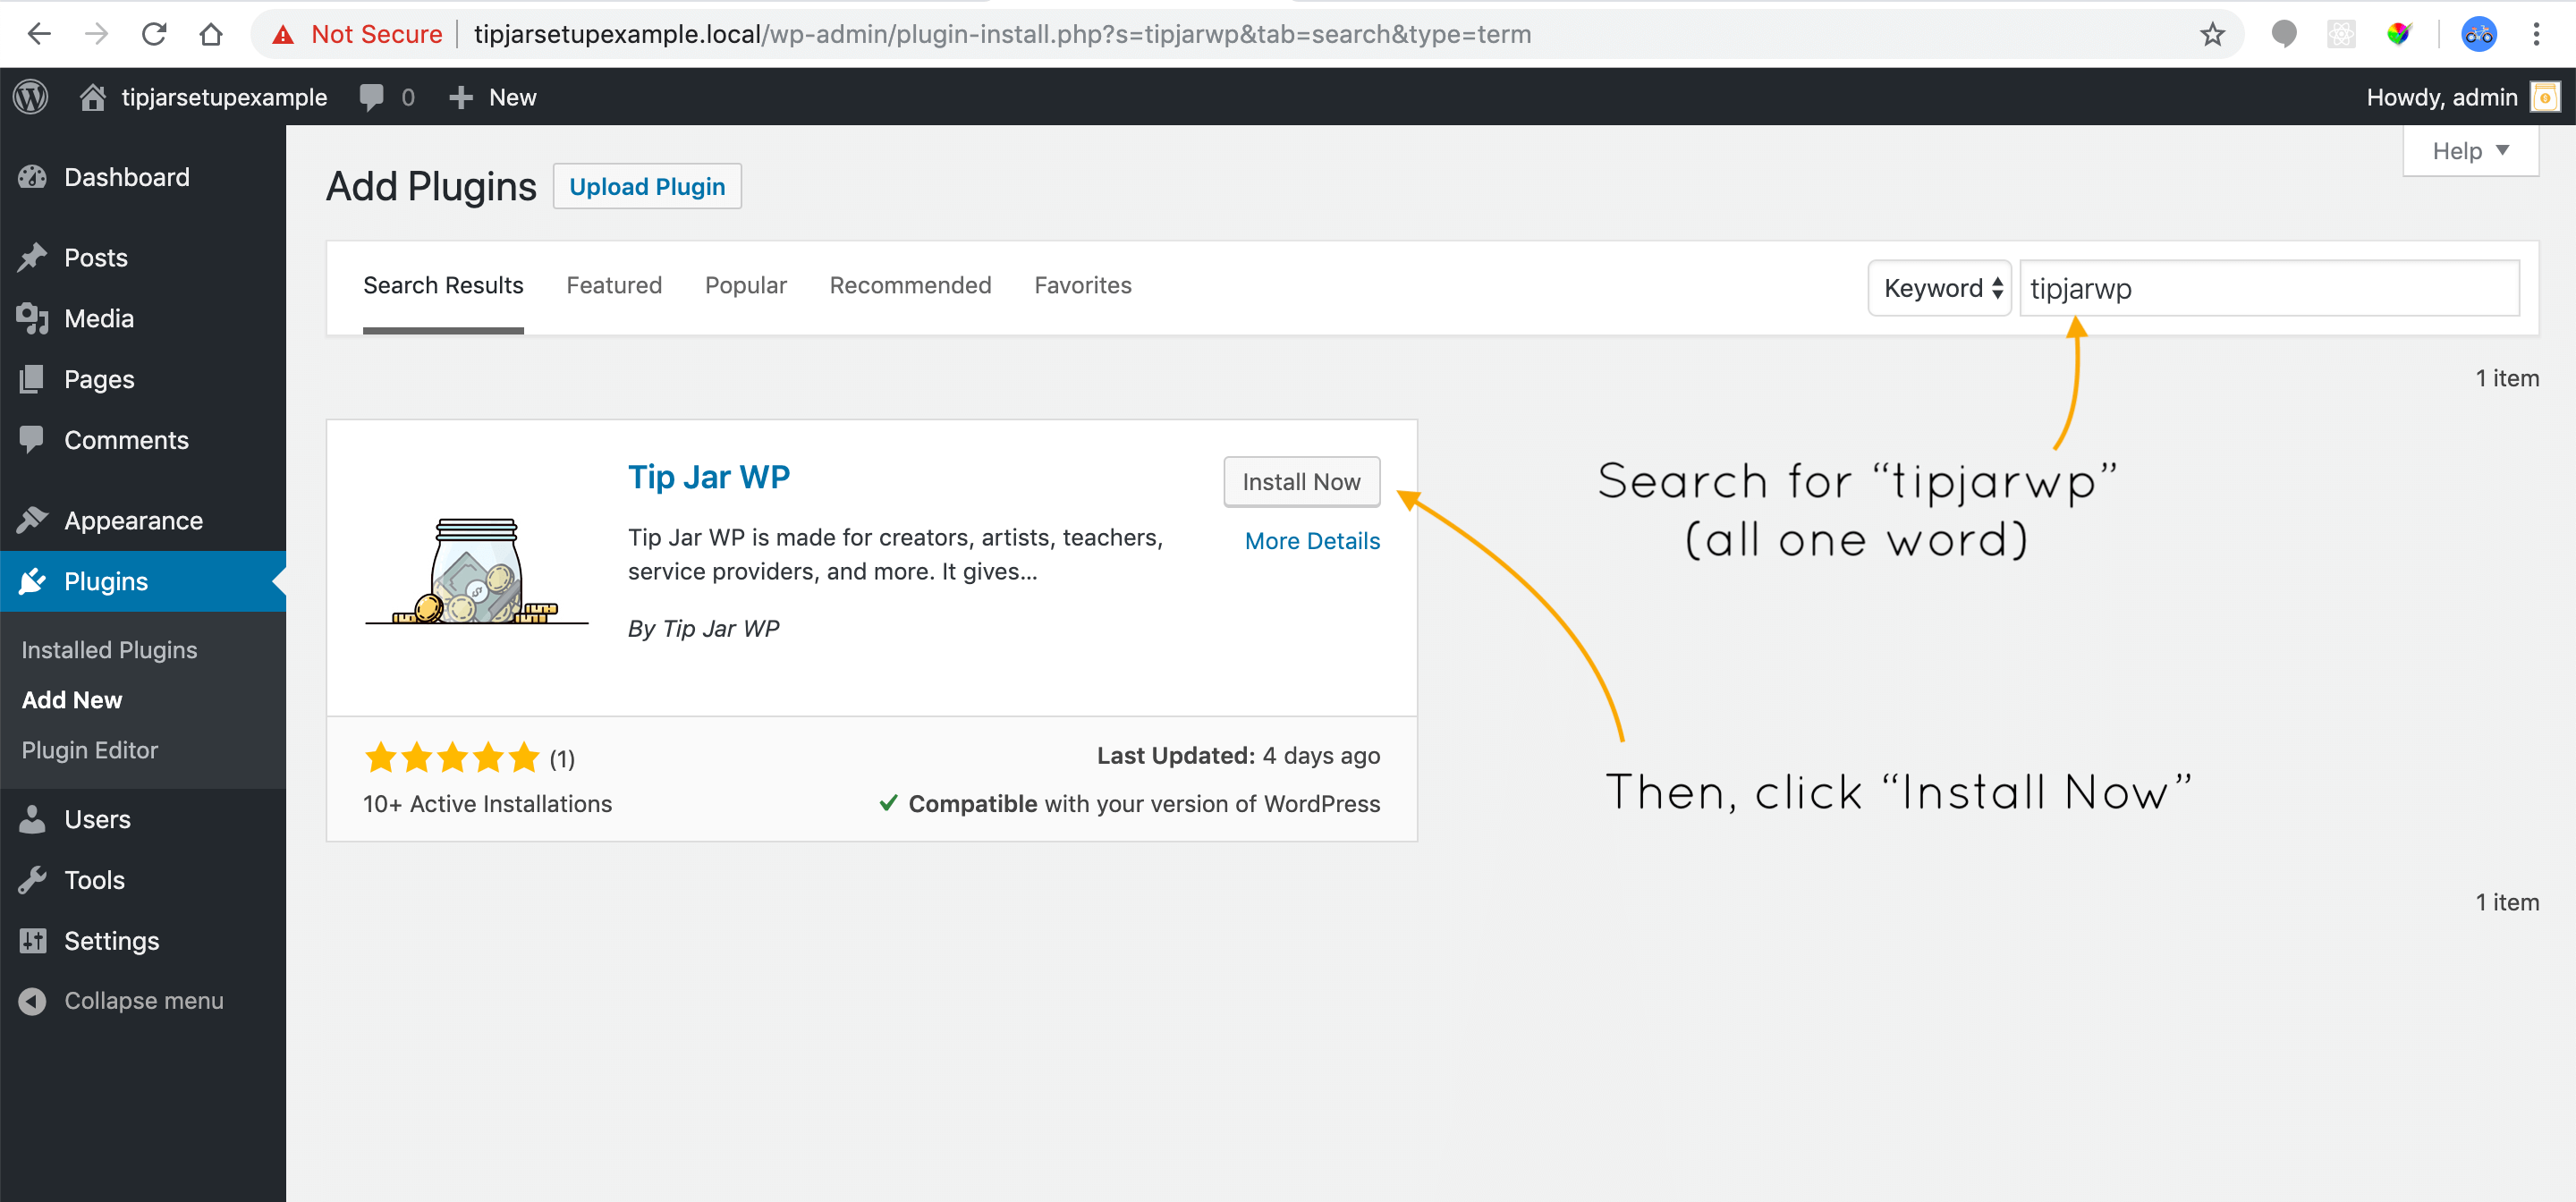
In the search bar (top right) search for “tipjarwp”. When the plugin shows up, click “Install Now”.
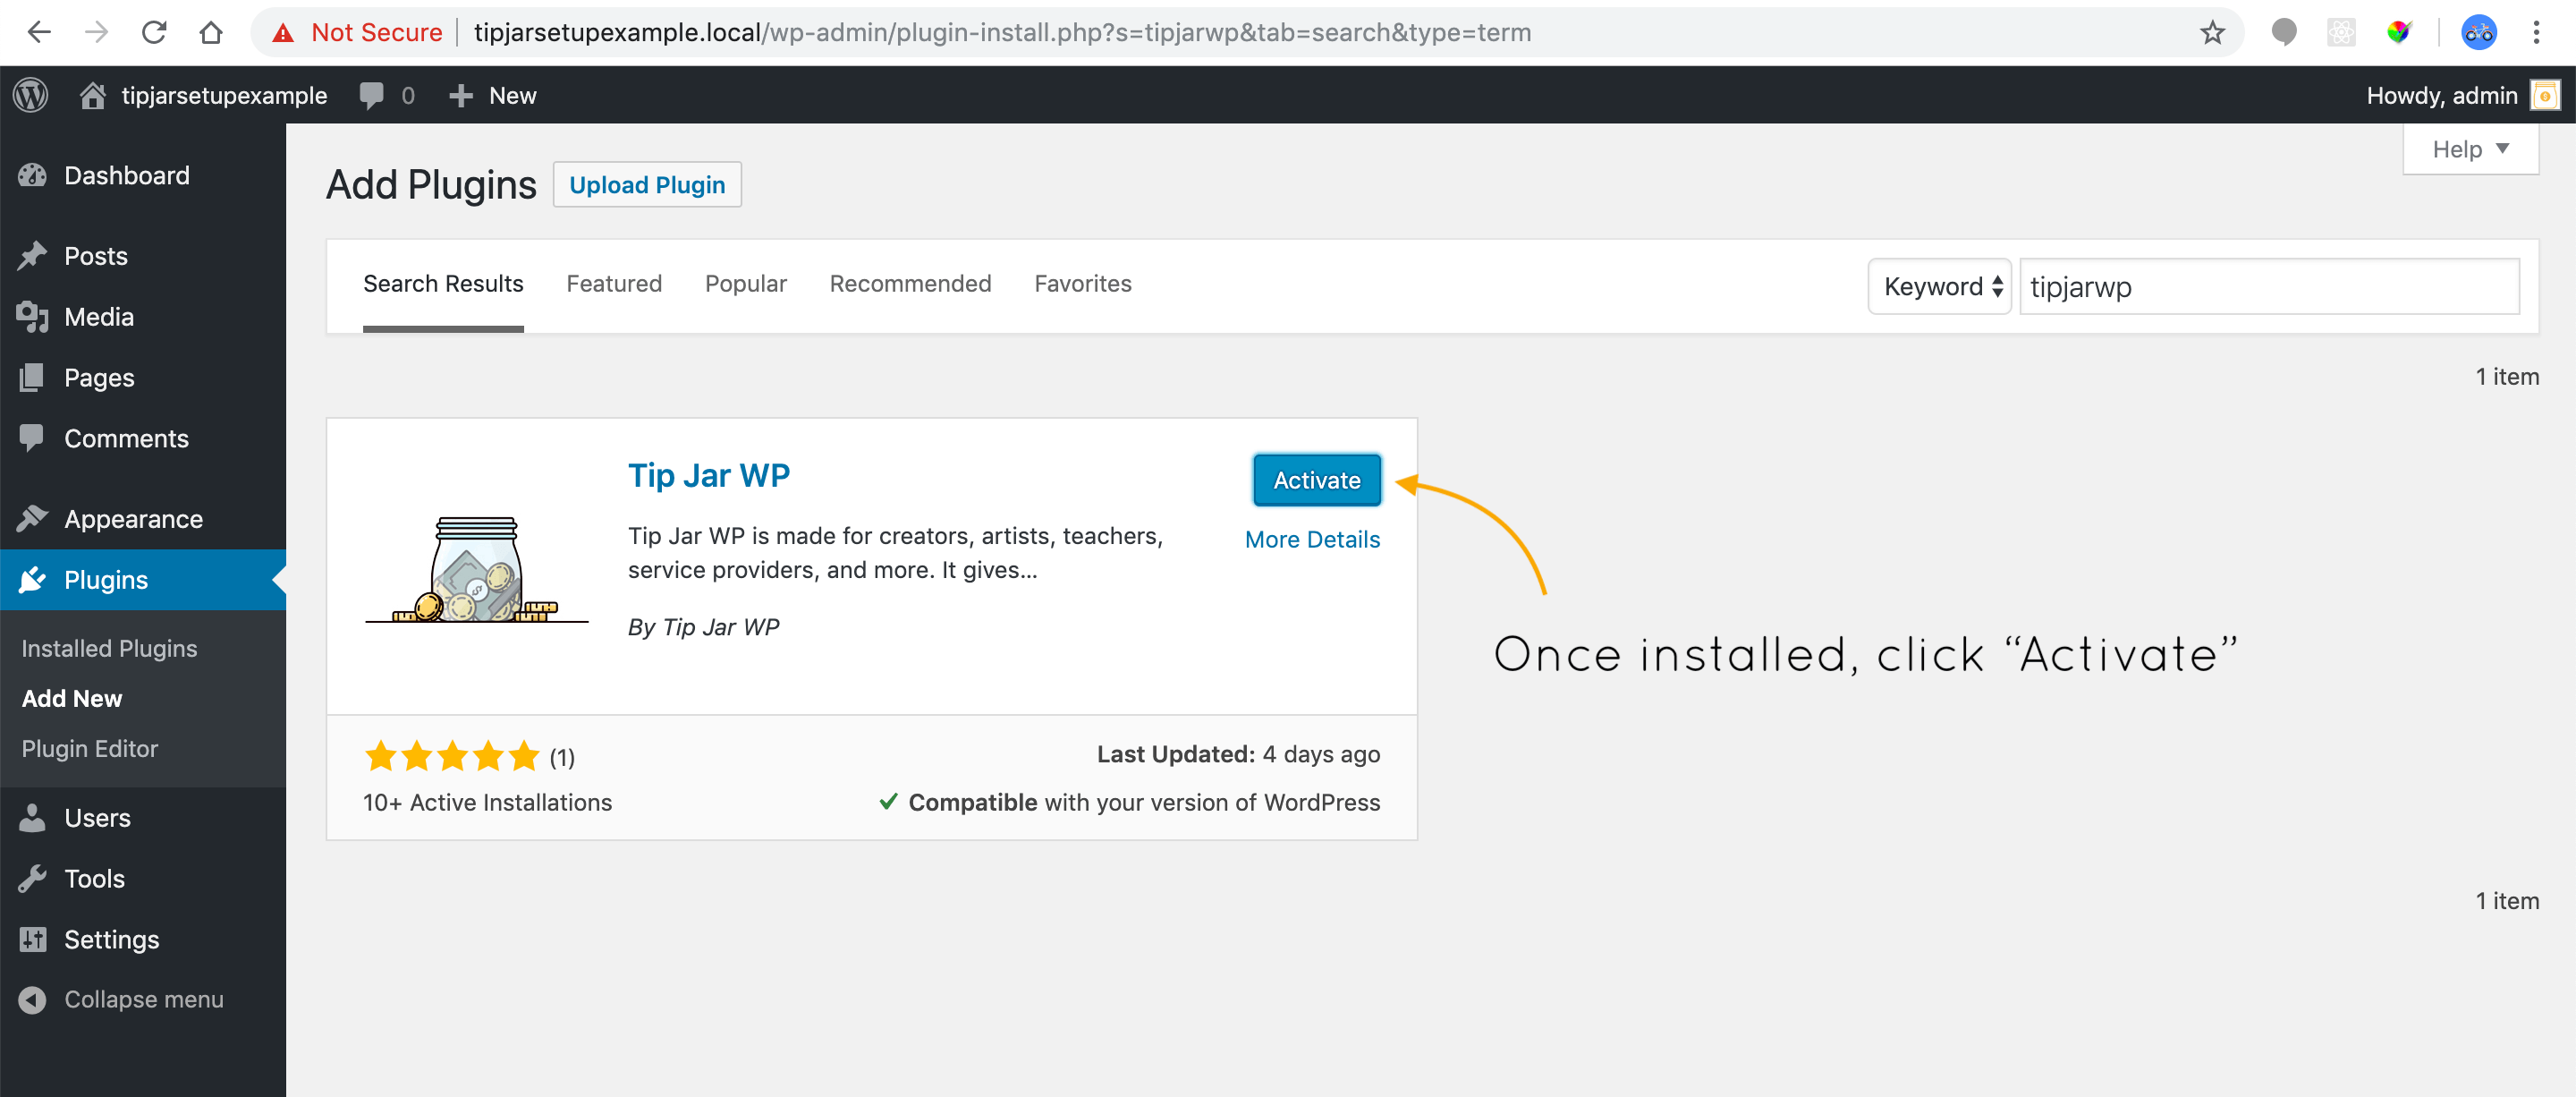
Once your installation completes, the “Install Now” button will turn into an “Activate” button. Click on it.
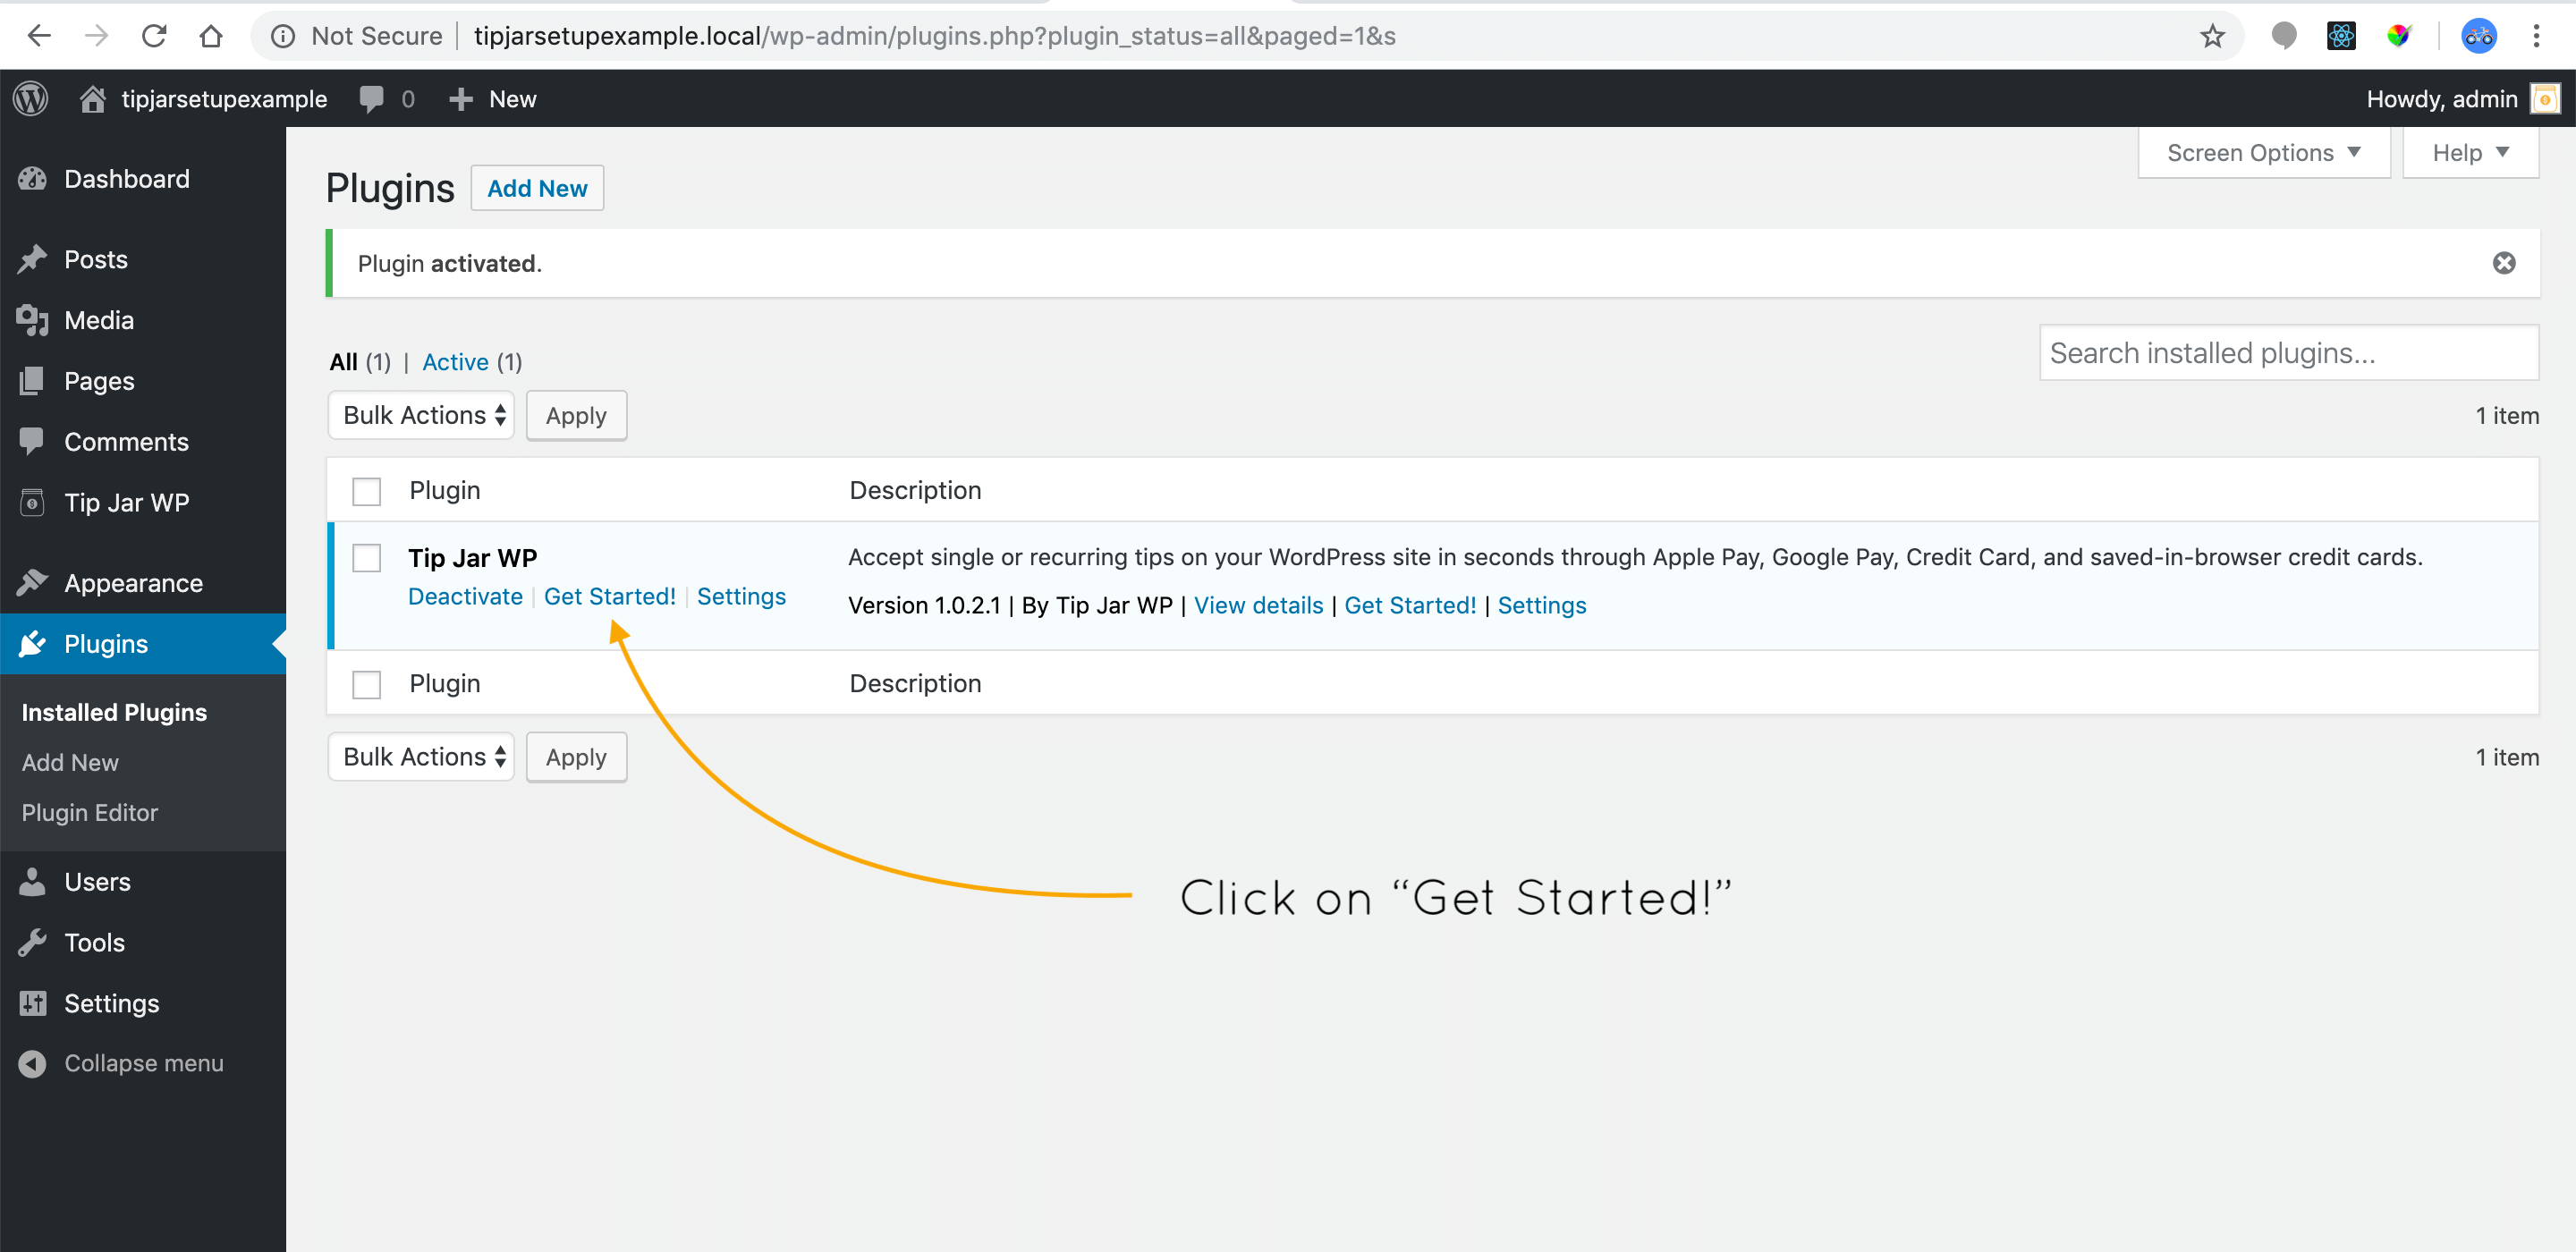
After the plugin is activated, you will be redirected to a list of all the plugins you have installed. Find “Tip Jar WP” in the list, and then click the “Get Started!” link:
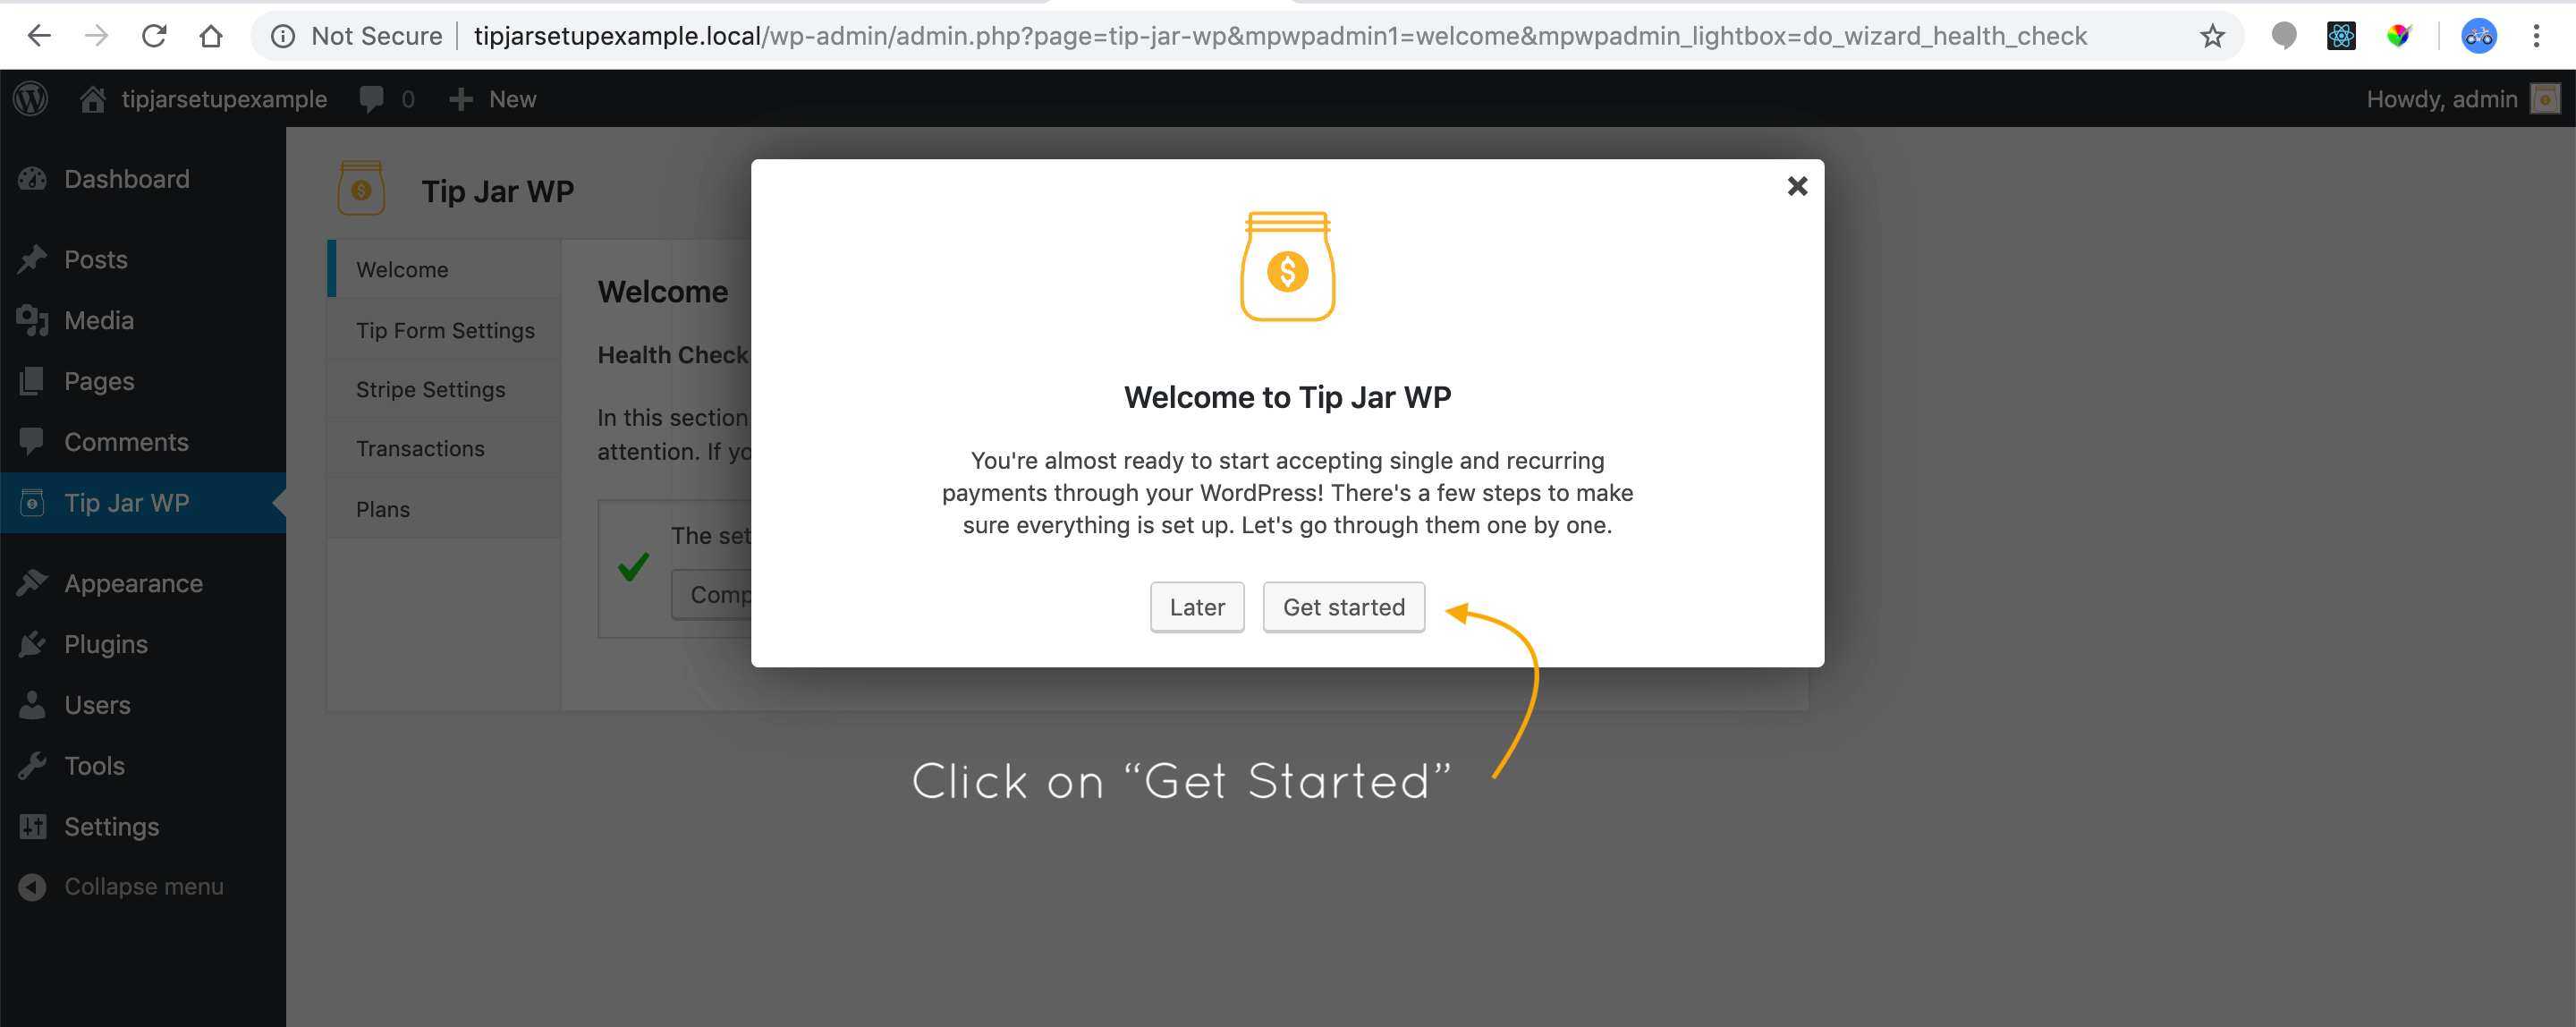
You will now be redirected to the onboarding wizard for Tip Jar WP, which walks through all of the steps to get everything important set up properly.
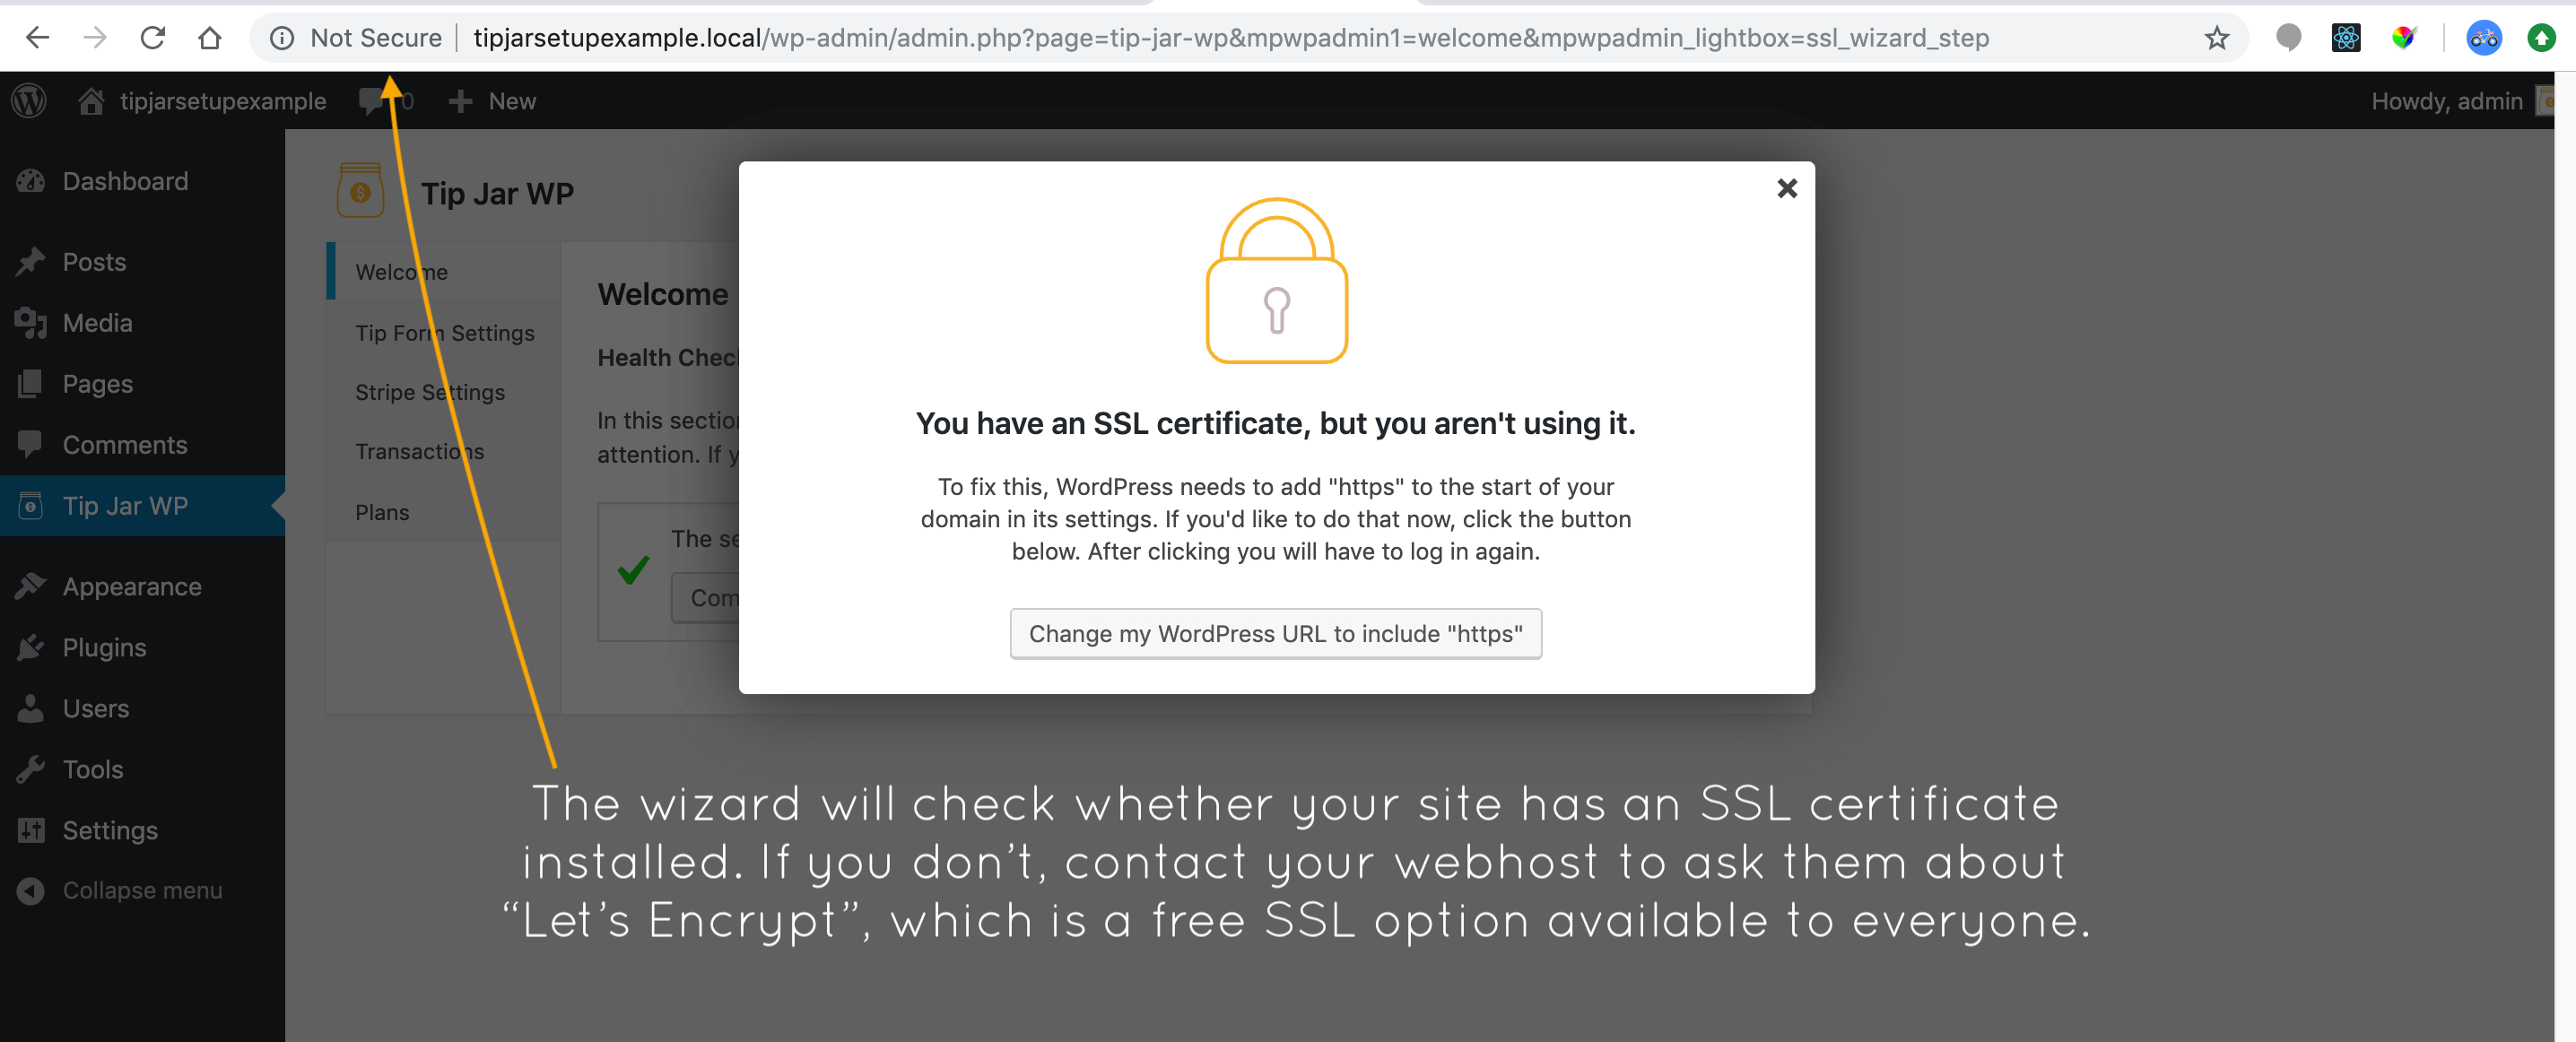
2. Making sure your site is secure to process payments
The first check the wizard will do is to confirm that your site is using an SSL certificate. Running over “https” using an SSL certificate encrypts your site’s data, and protects both you and your site’s customers. It is a requirement for using Tip Jar WP and Stripe. Most good webhosts will provide an SSL certificate to you at no extra cost. When you contact them, be sure to mention “Let’s Encrypt”, which is a free SSL service available to everyone.
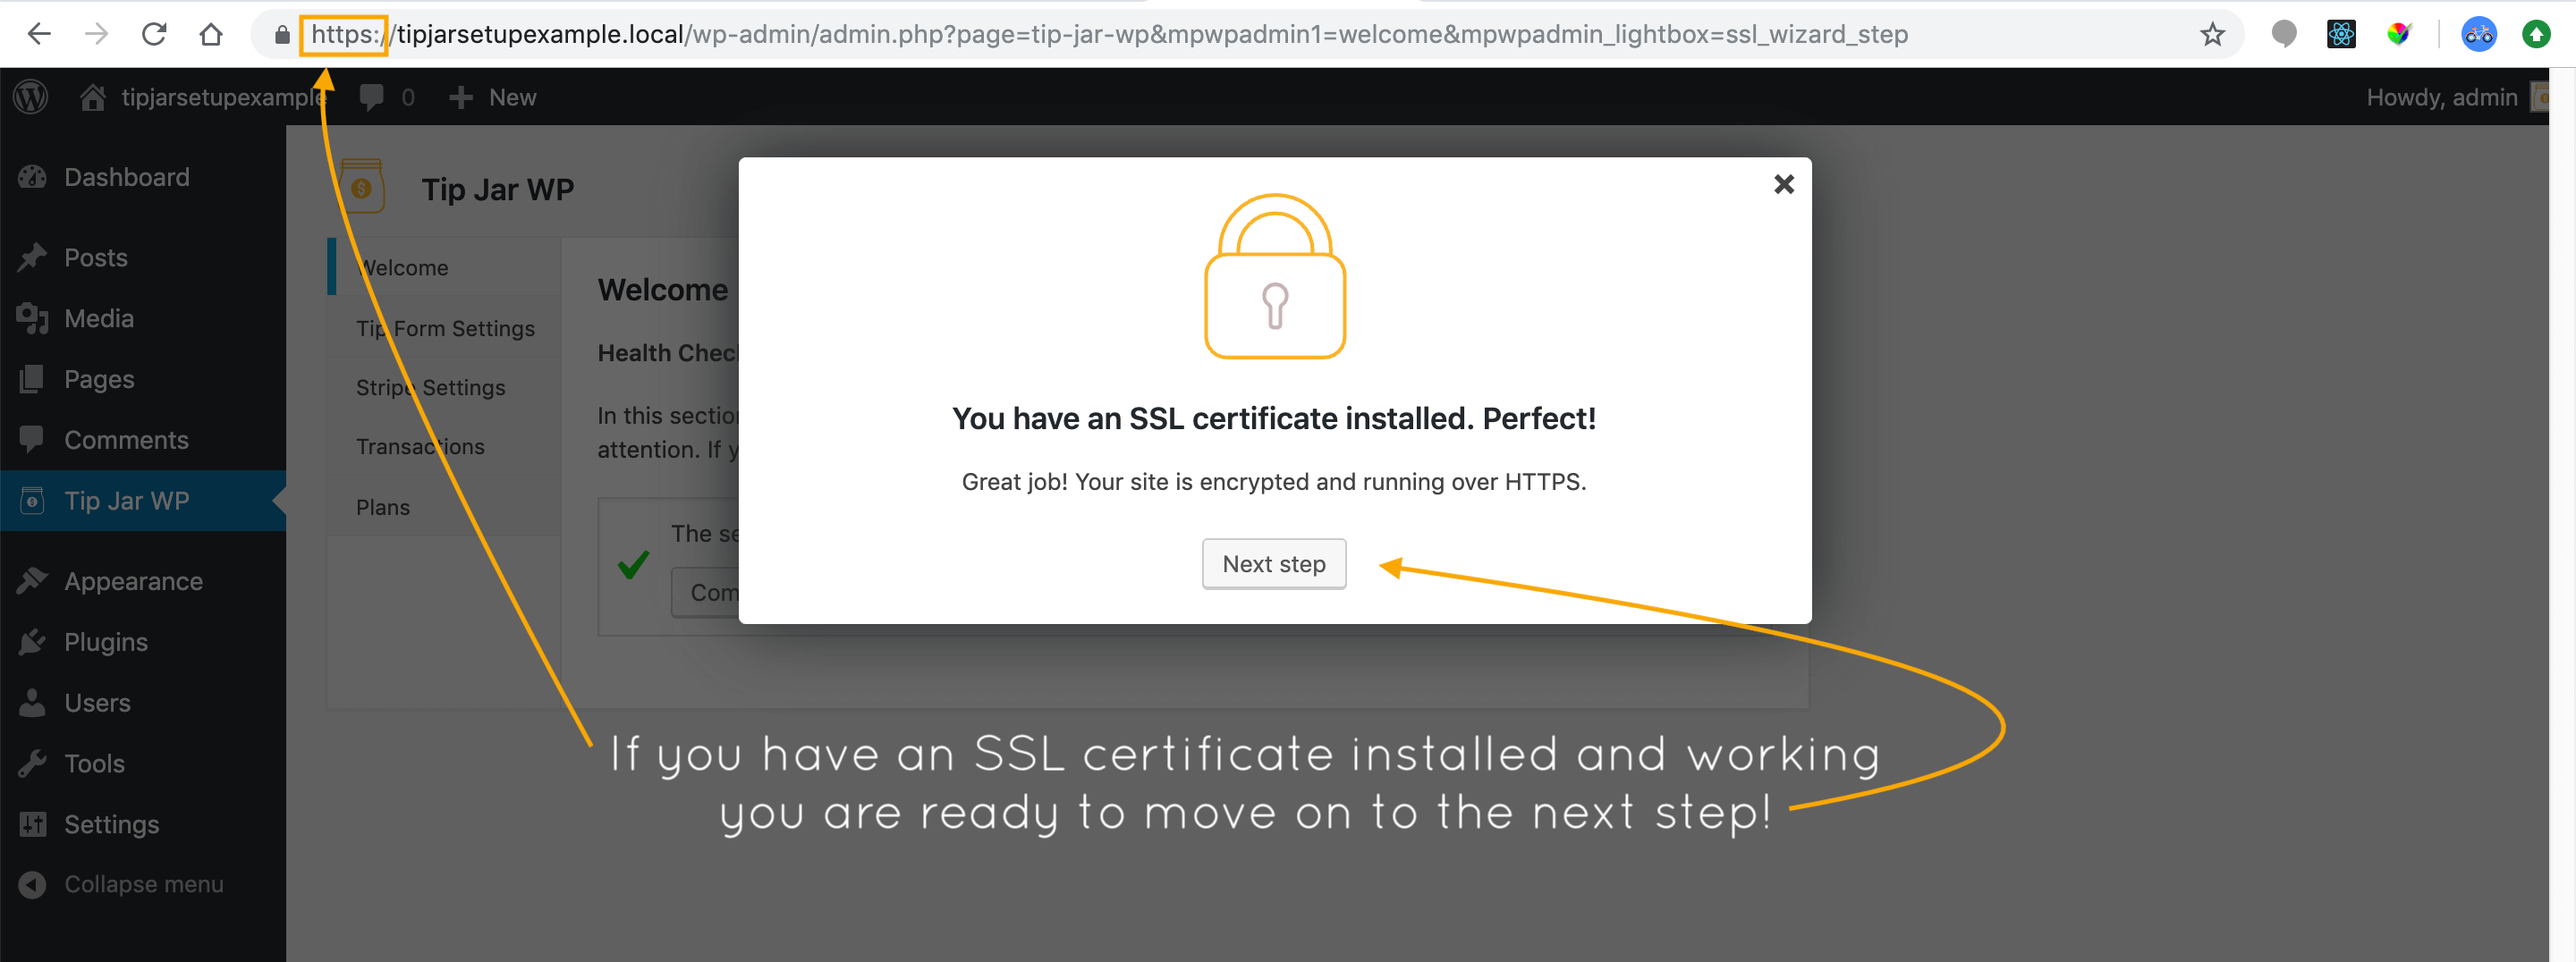
If/when you have an SSL certificate installed and working, you will be able to move to the next step!
3. Connecting Stripe
Now you will be prompted to connect (or create) your Stripe Account. Click the blue button, and Stripe’s website will load.
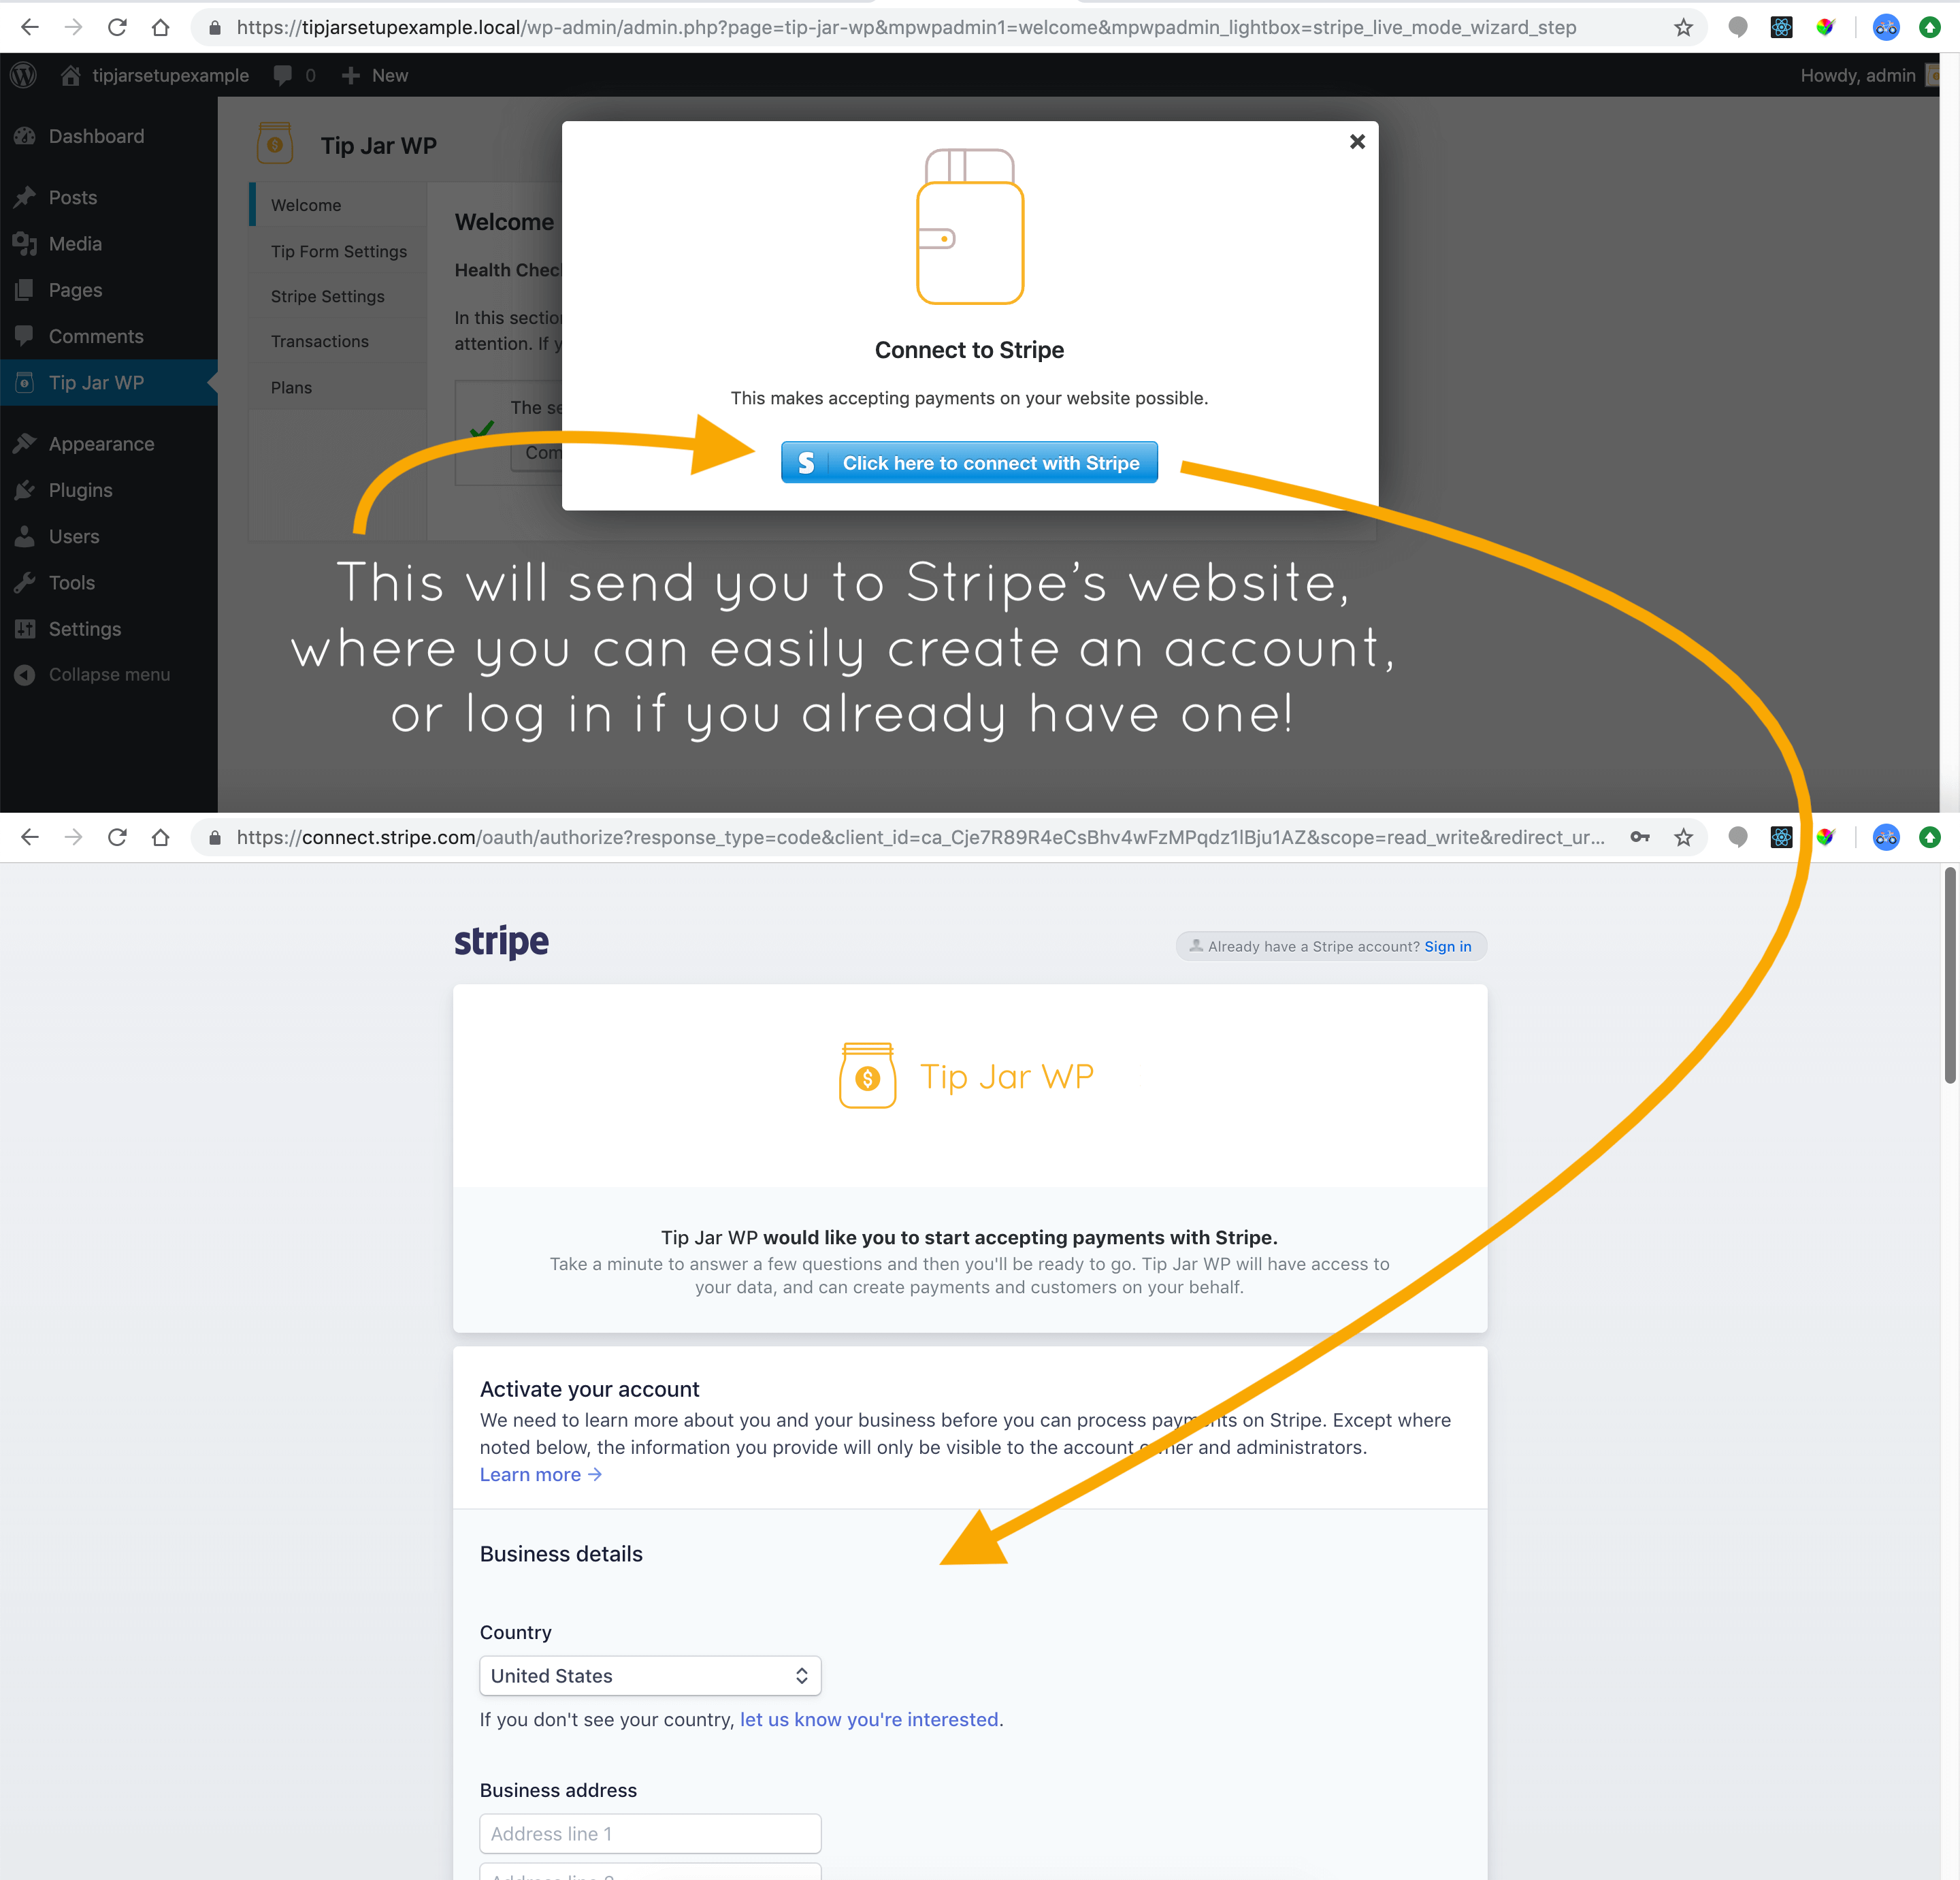
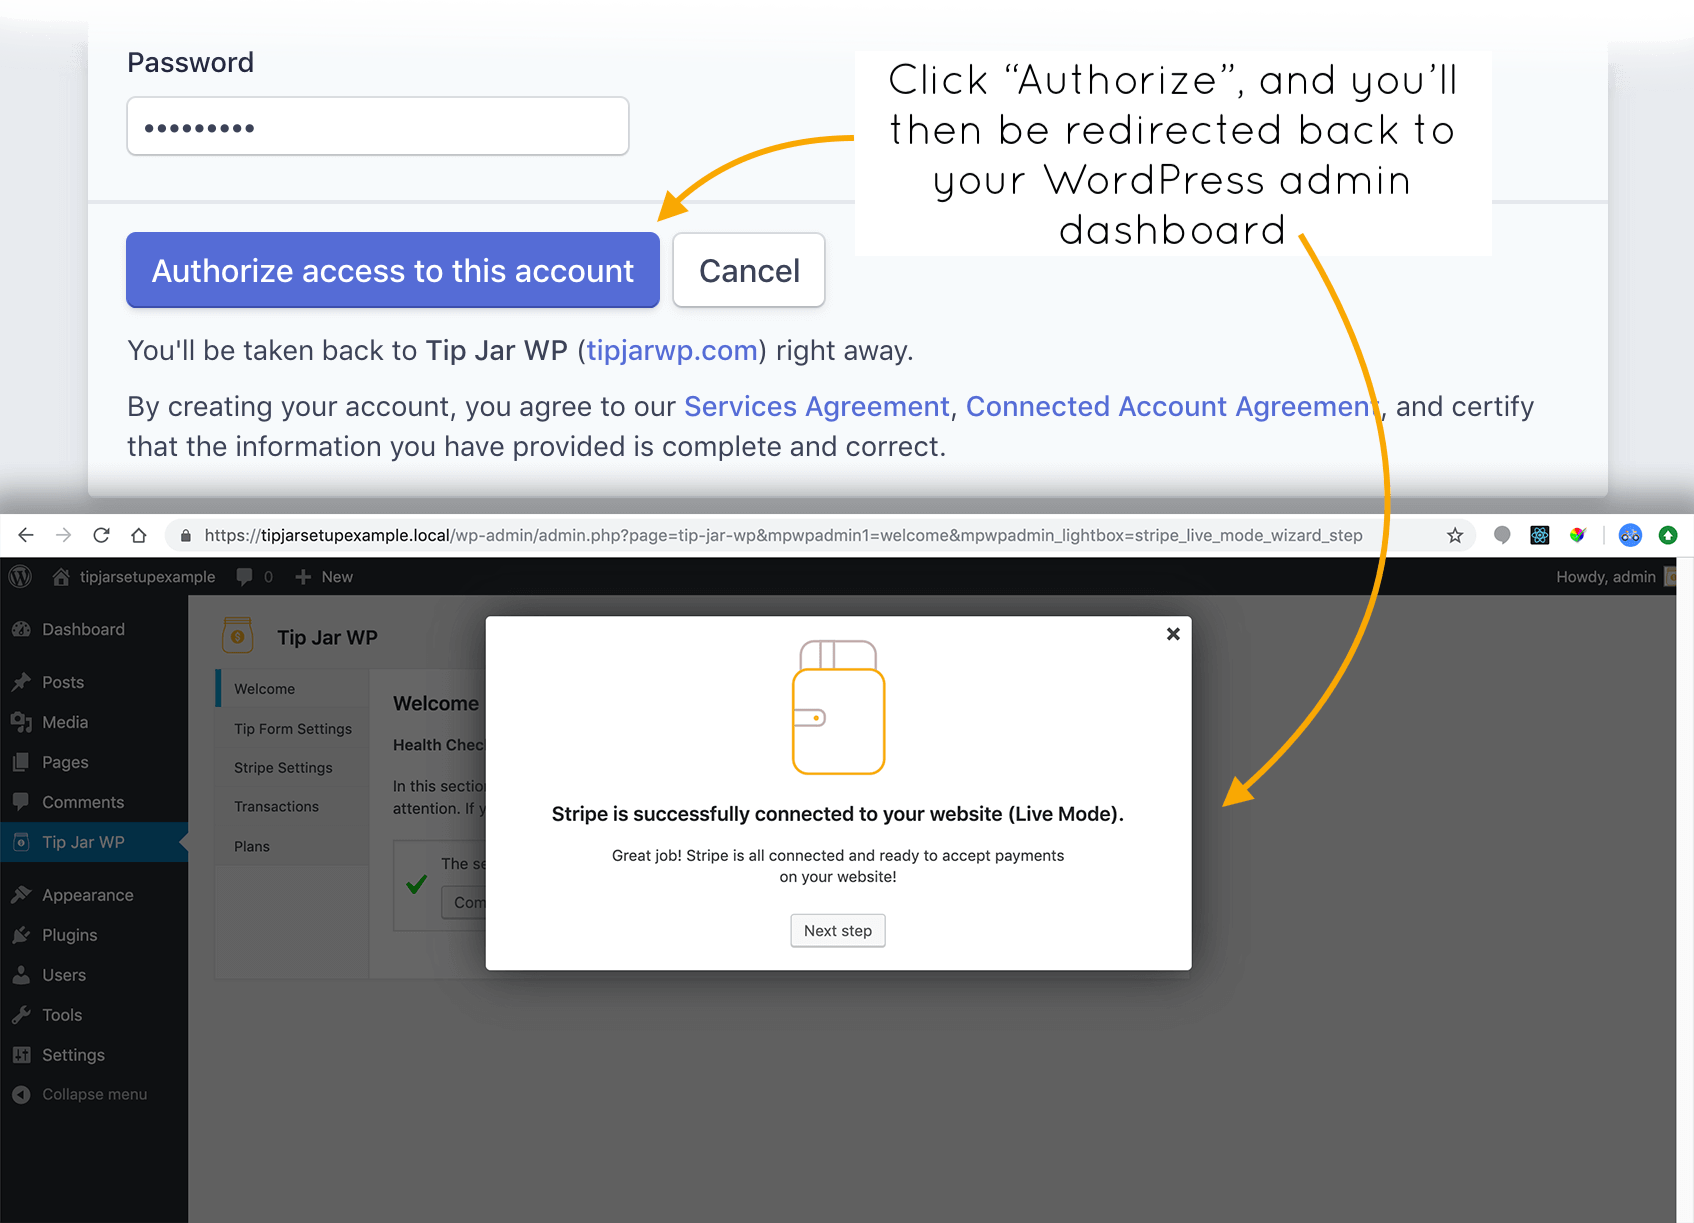
Once your account details have been entered (or you’ve logged in), at the bottom you’ll see a button to “Authorize”. Click on it, and you’ll be directed back to your WordPress admin dashboard.
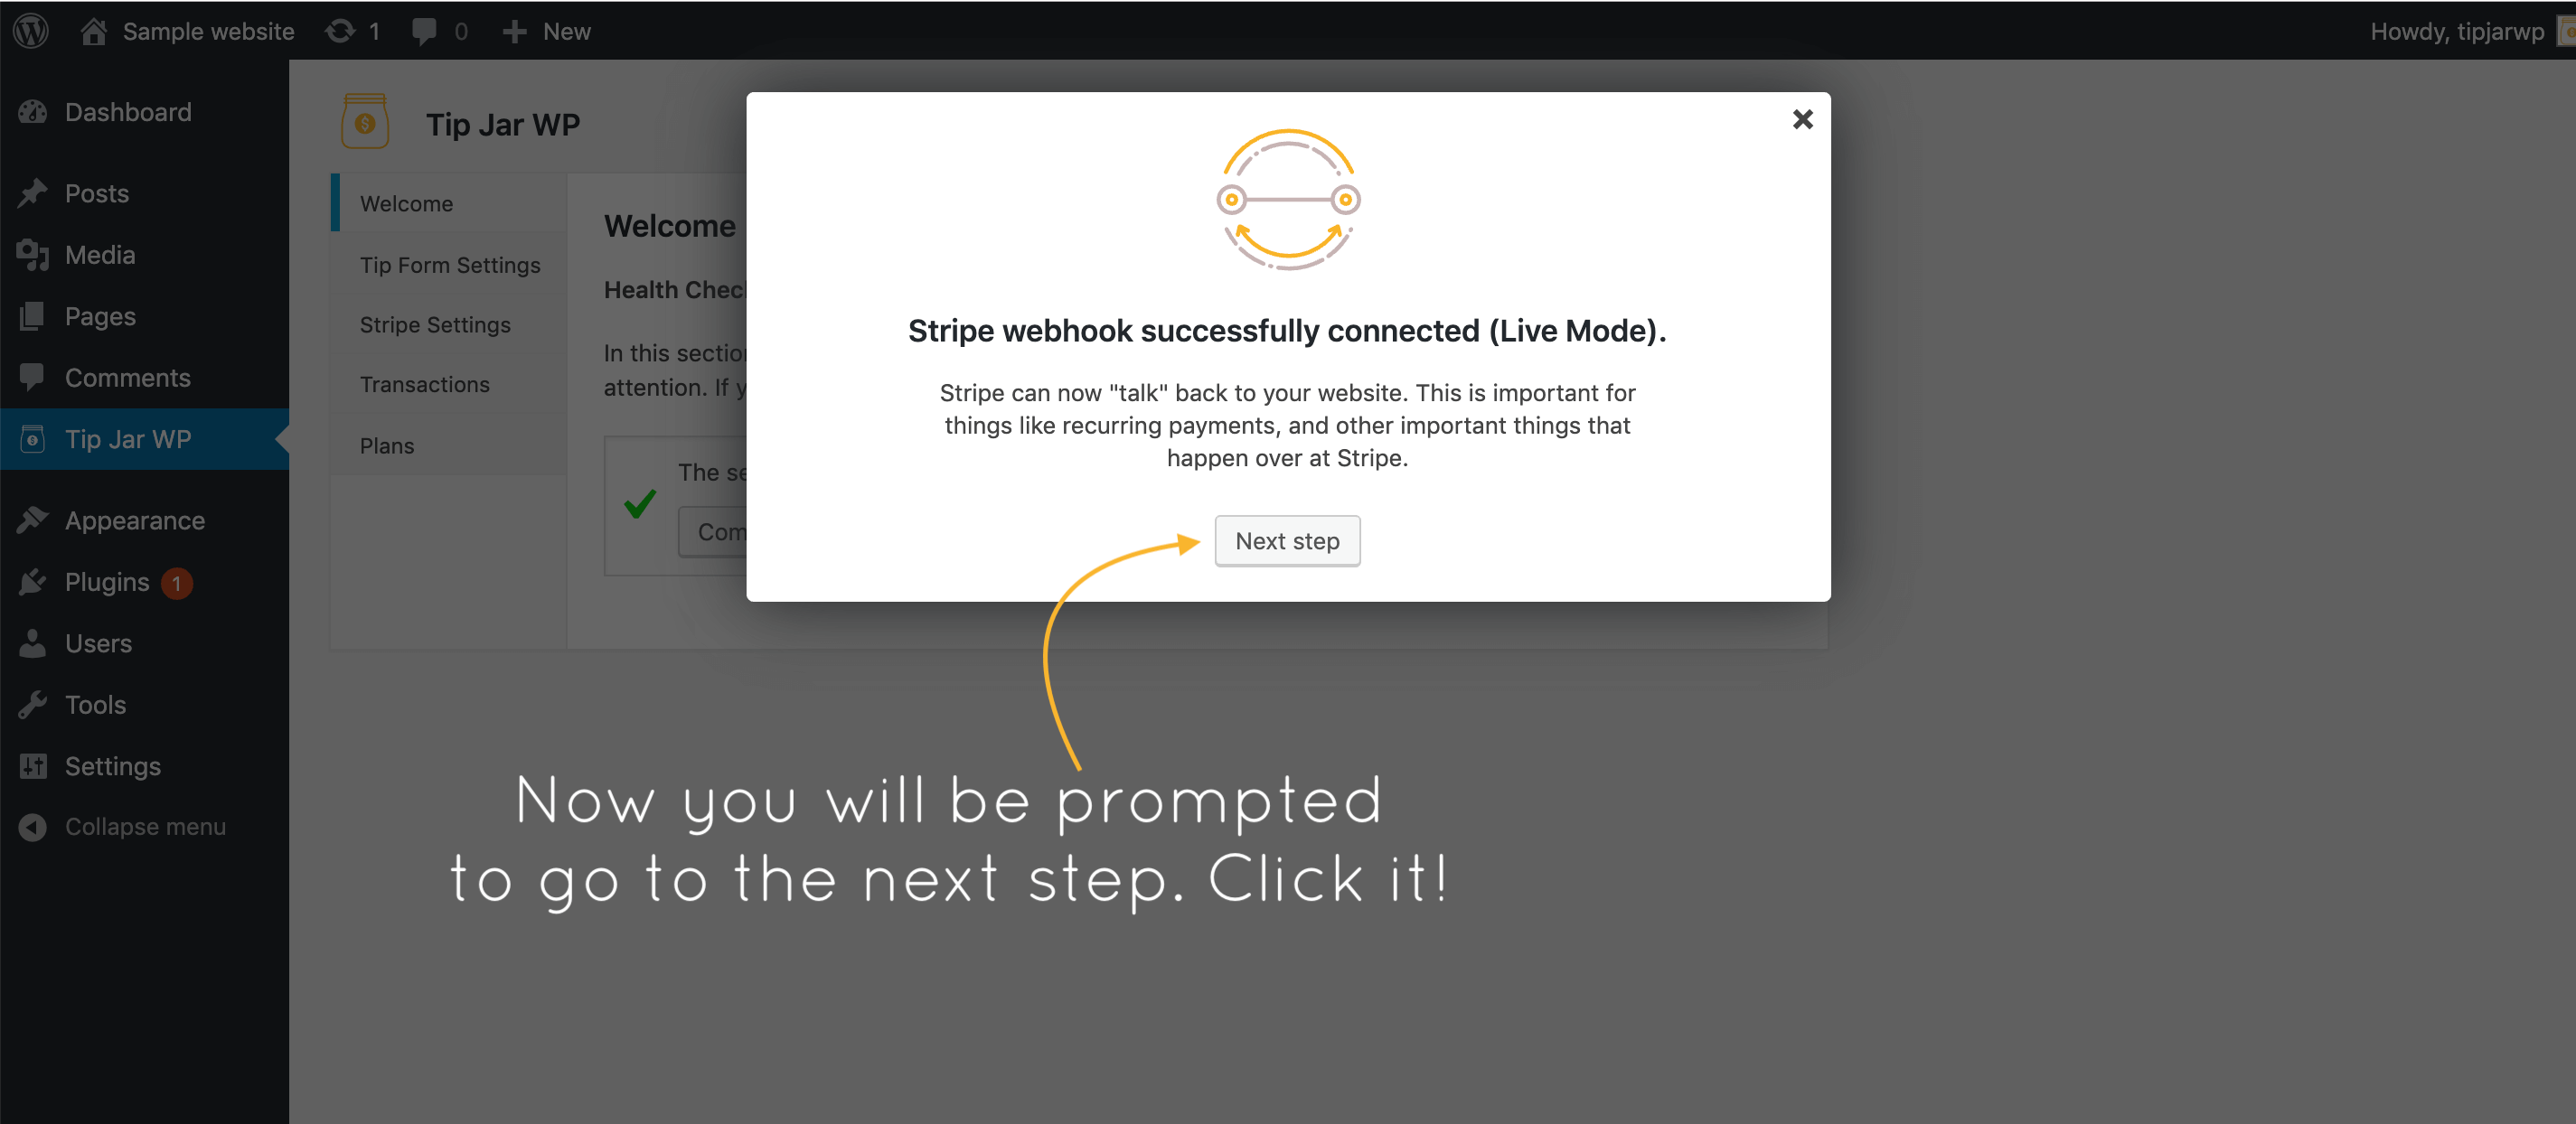
4. Setting up Stripe Webhooks
Now you need to set up Stripe Webhooks. Follow the wizard on the screen to complete these steps:
A) Copy the webhook URL.
B) Click the button.
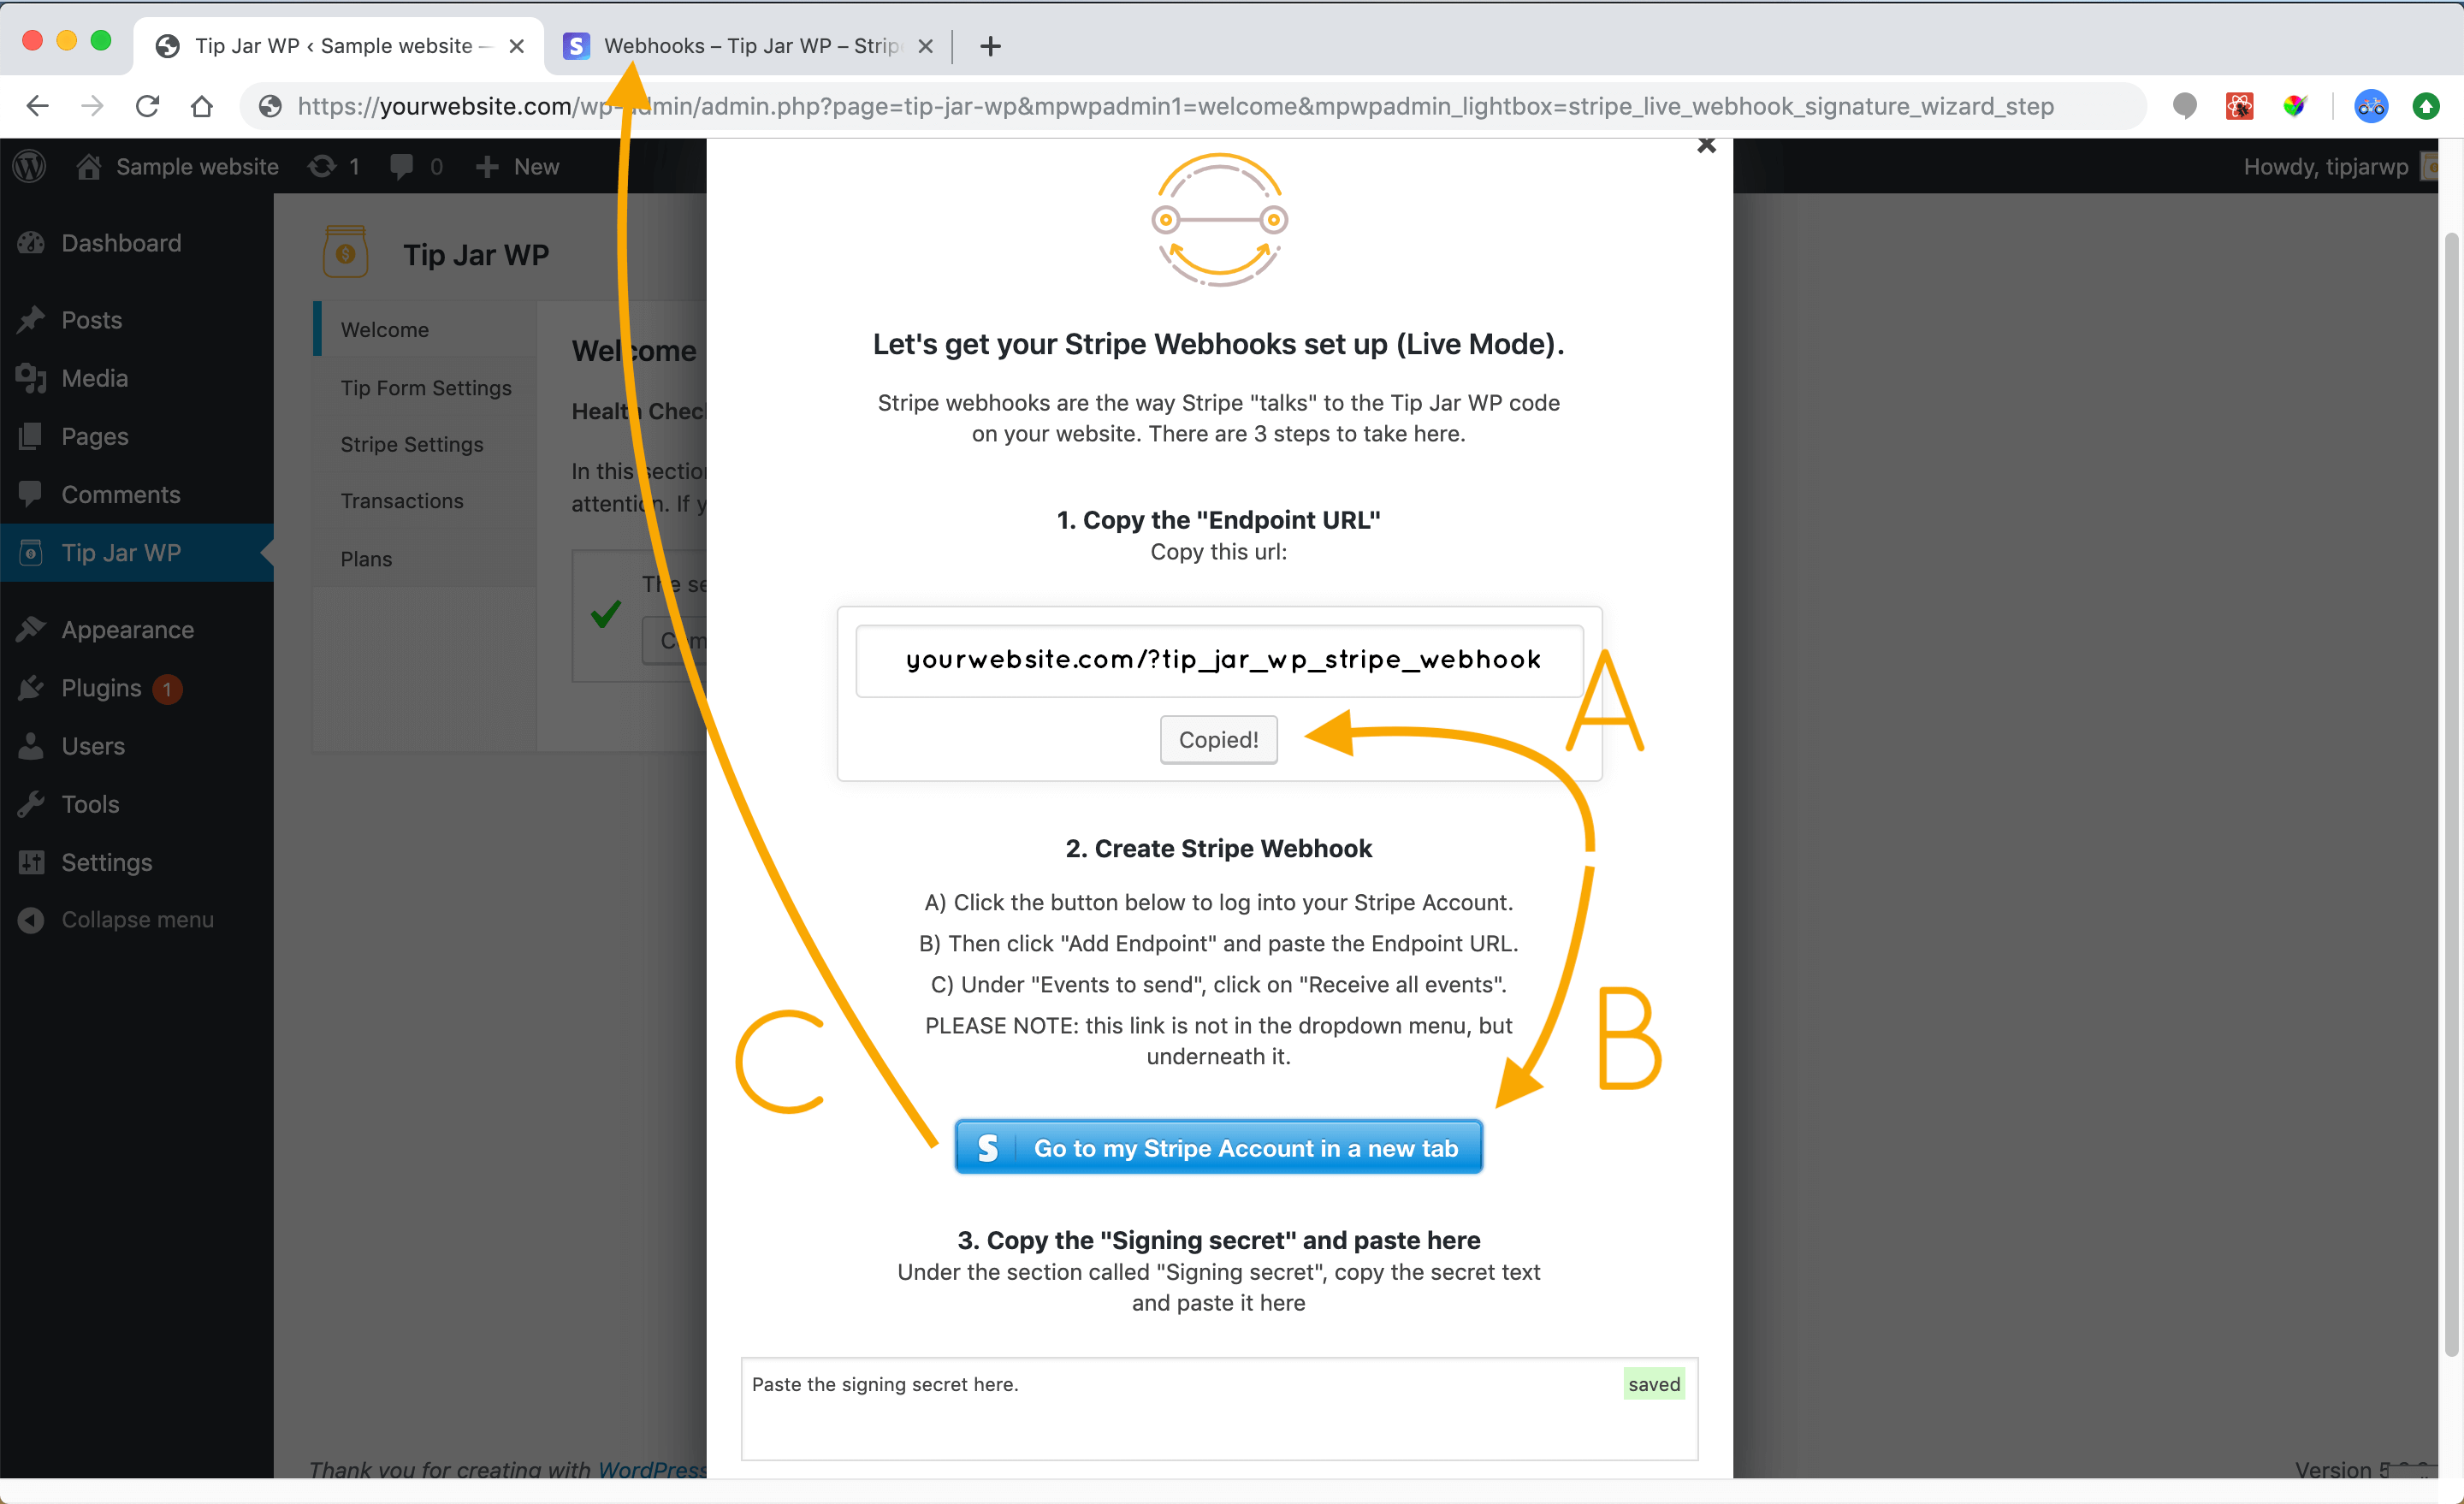
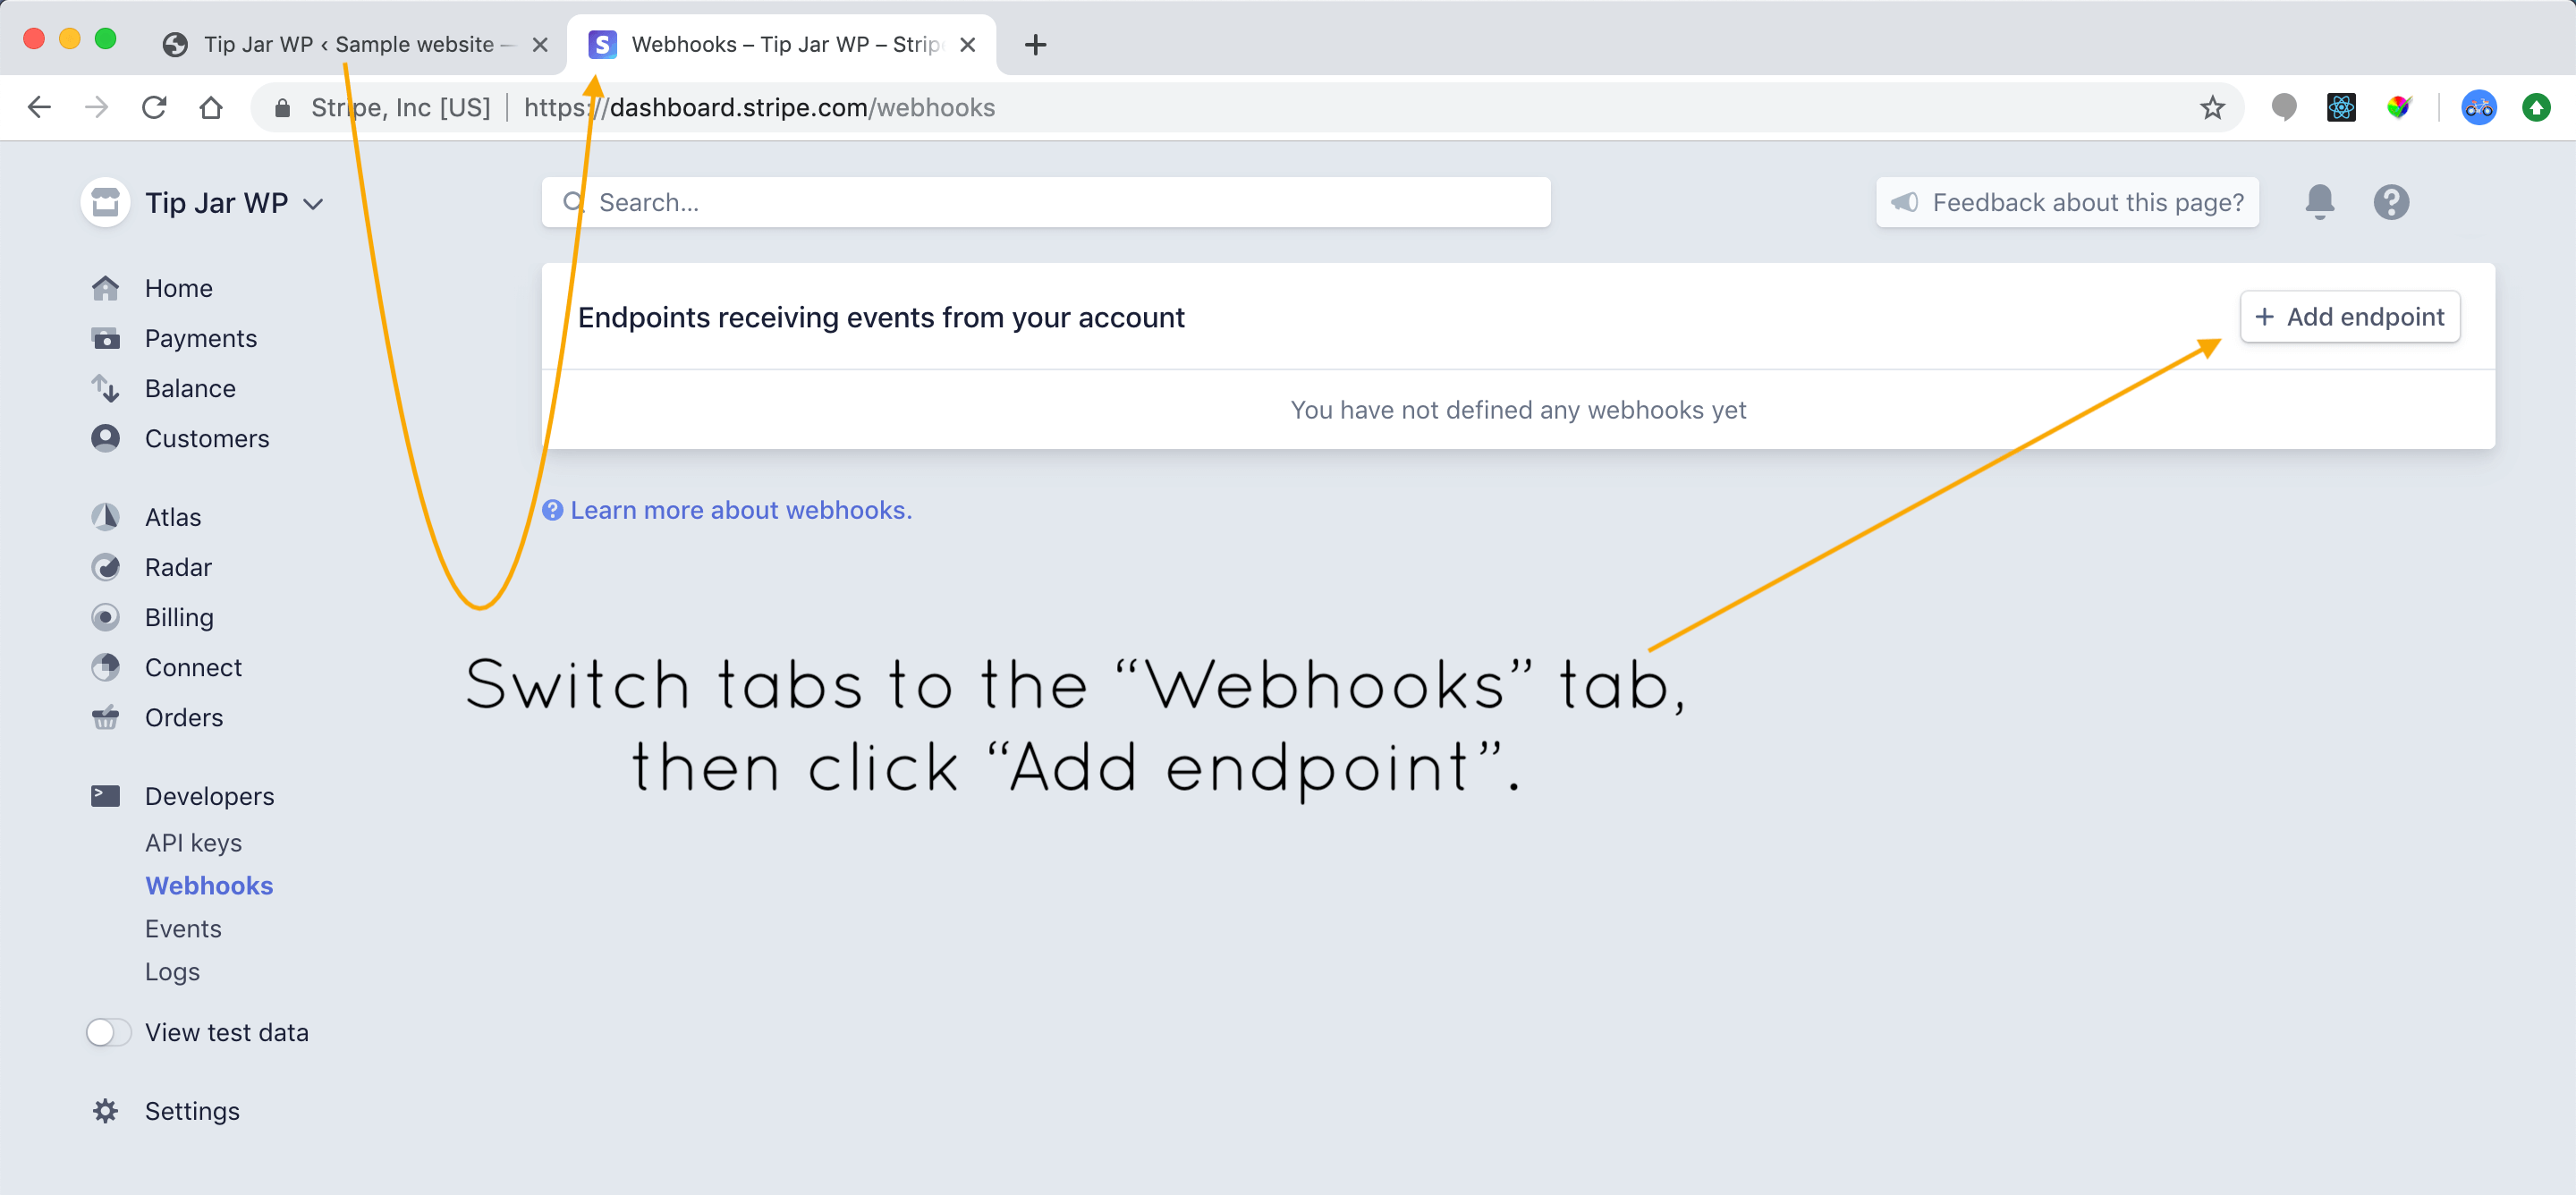
C) This will open Stripe in a new tab. Click on that tab.
Once you’ve switched tabs, click on “Add endpoint”.
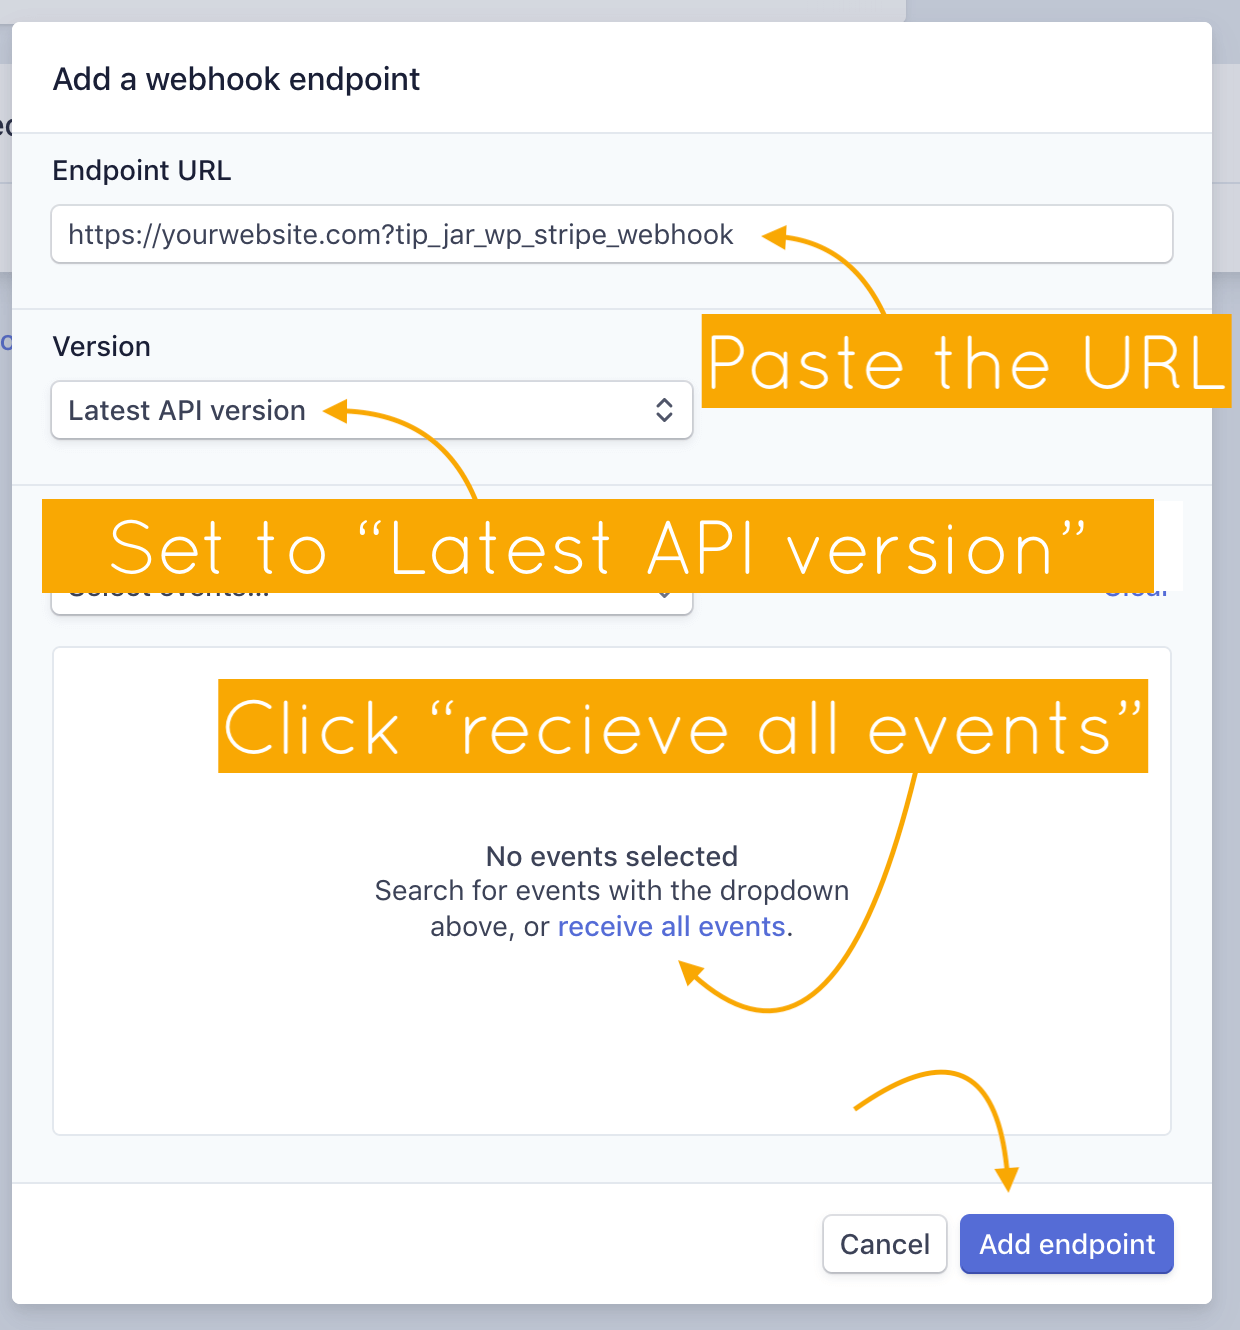
In the pop-up, paste the URL you copied, set the API to “Latest Version”, then click “Receive all events”. That link is below the dropdown menu for events, which can be a bit confusing. So just take note of that.
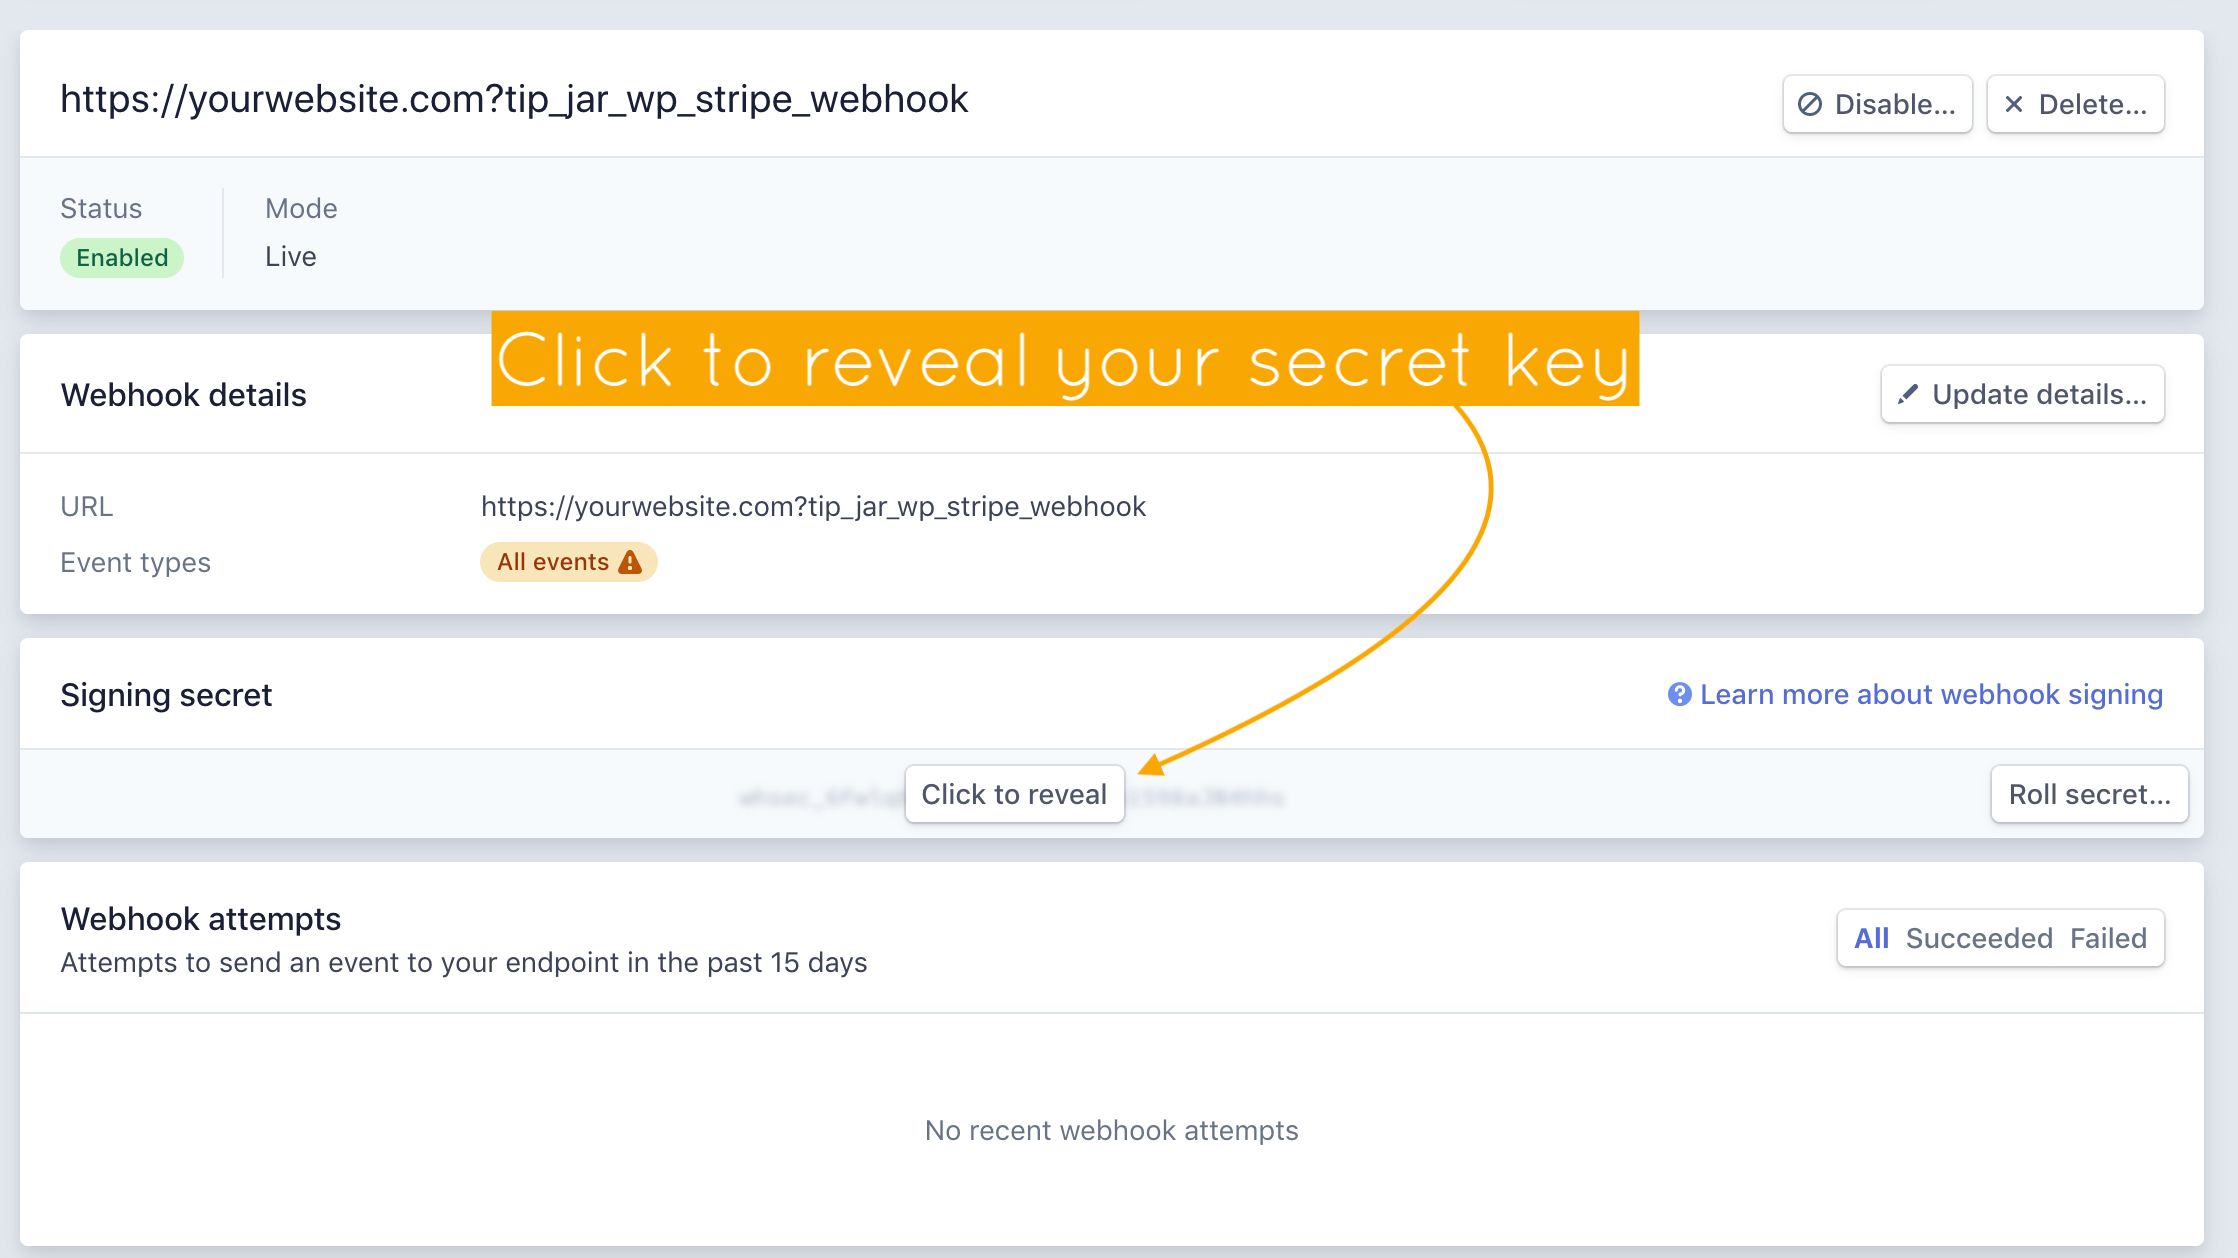
Now that you have created the endpoint, click on “Click to reveal” in the “Signing Secret” section of the page.
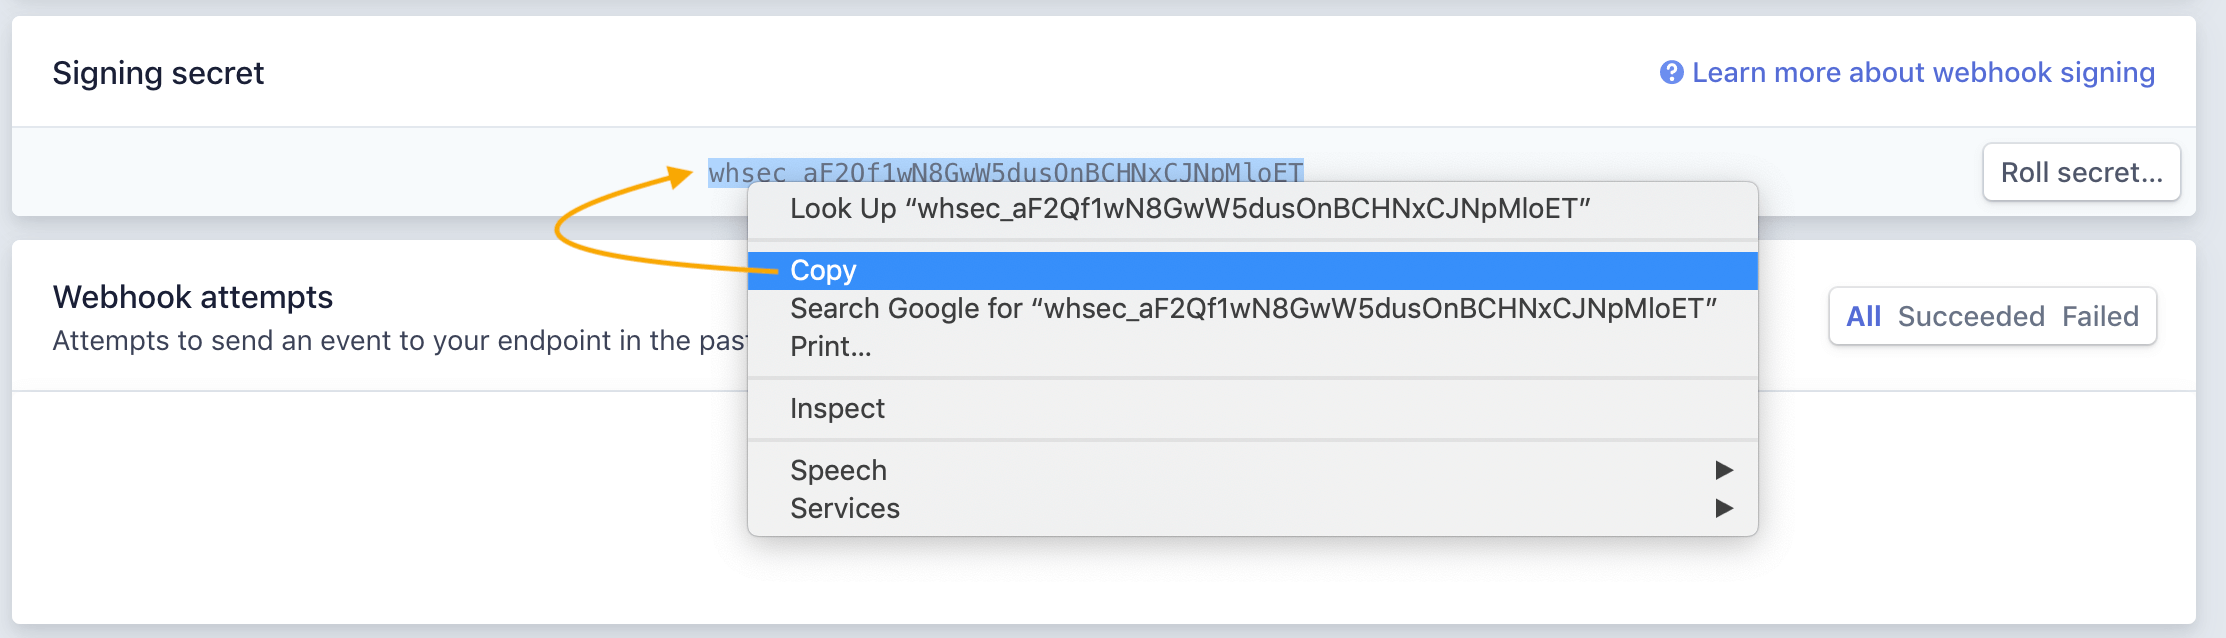
Now, copy the secret key by selecting it, right clicking, and selecting “copy”.
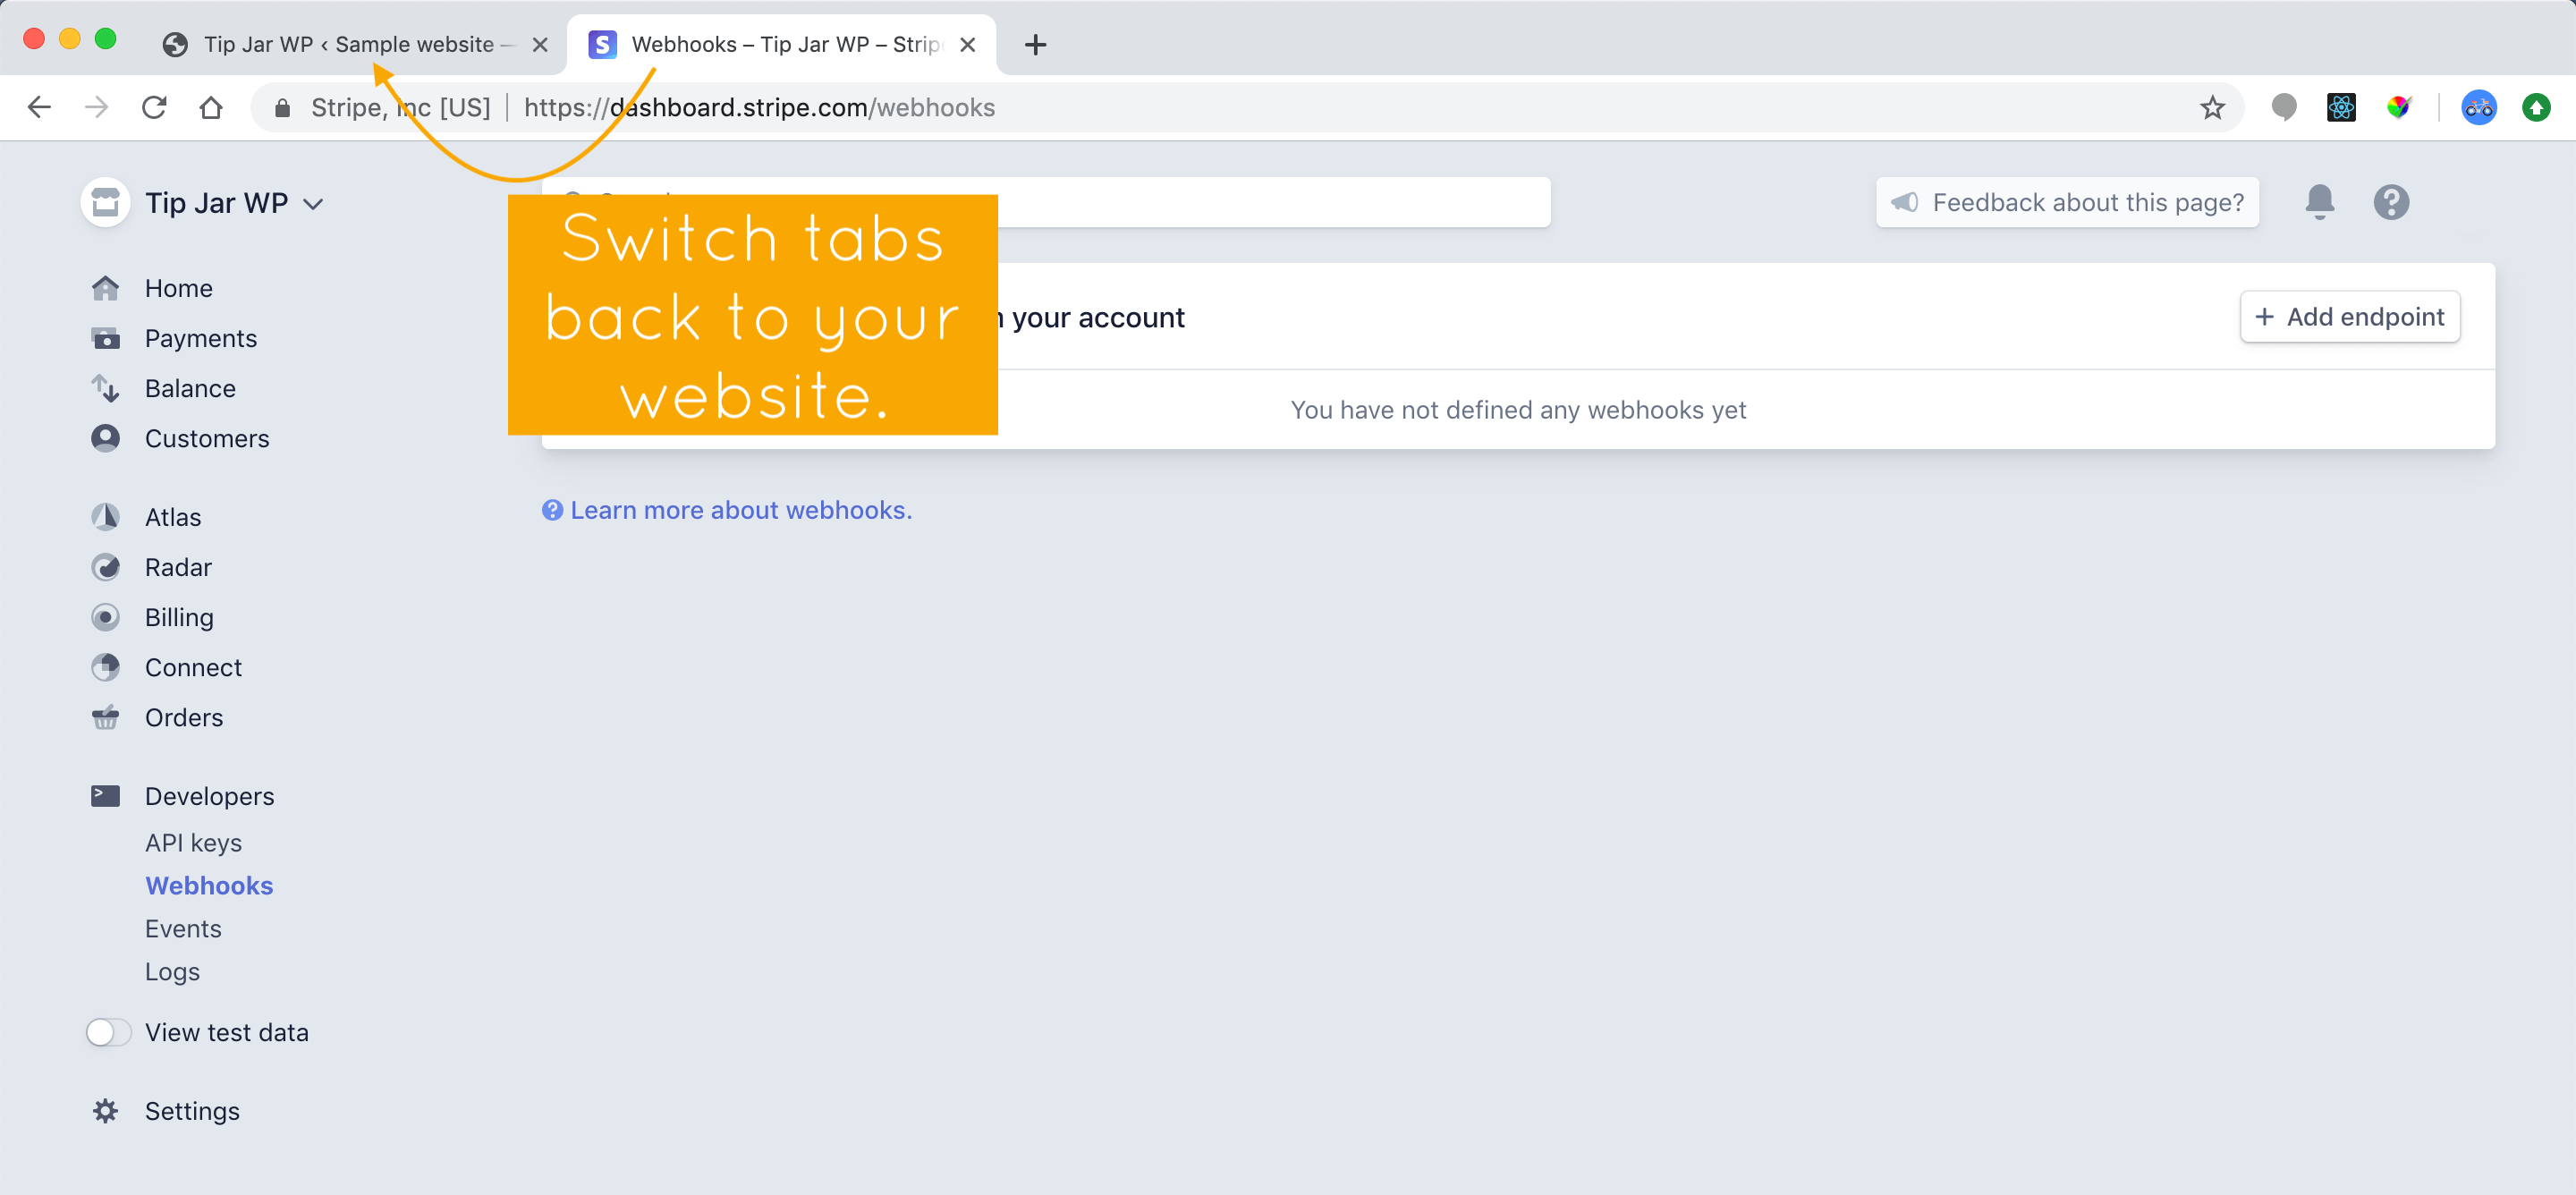
Switch browser tabs, back to your website.
Paste your secret signing key at the very bottom.
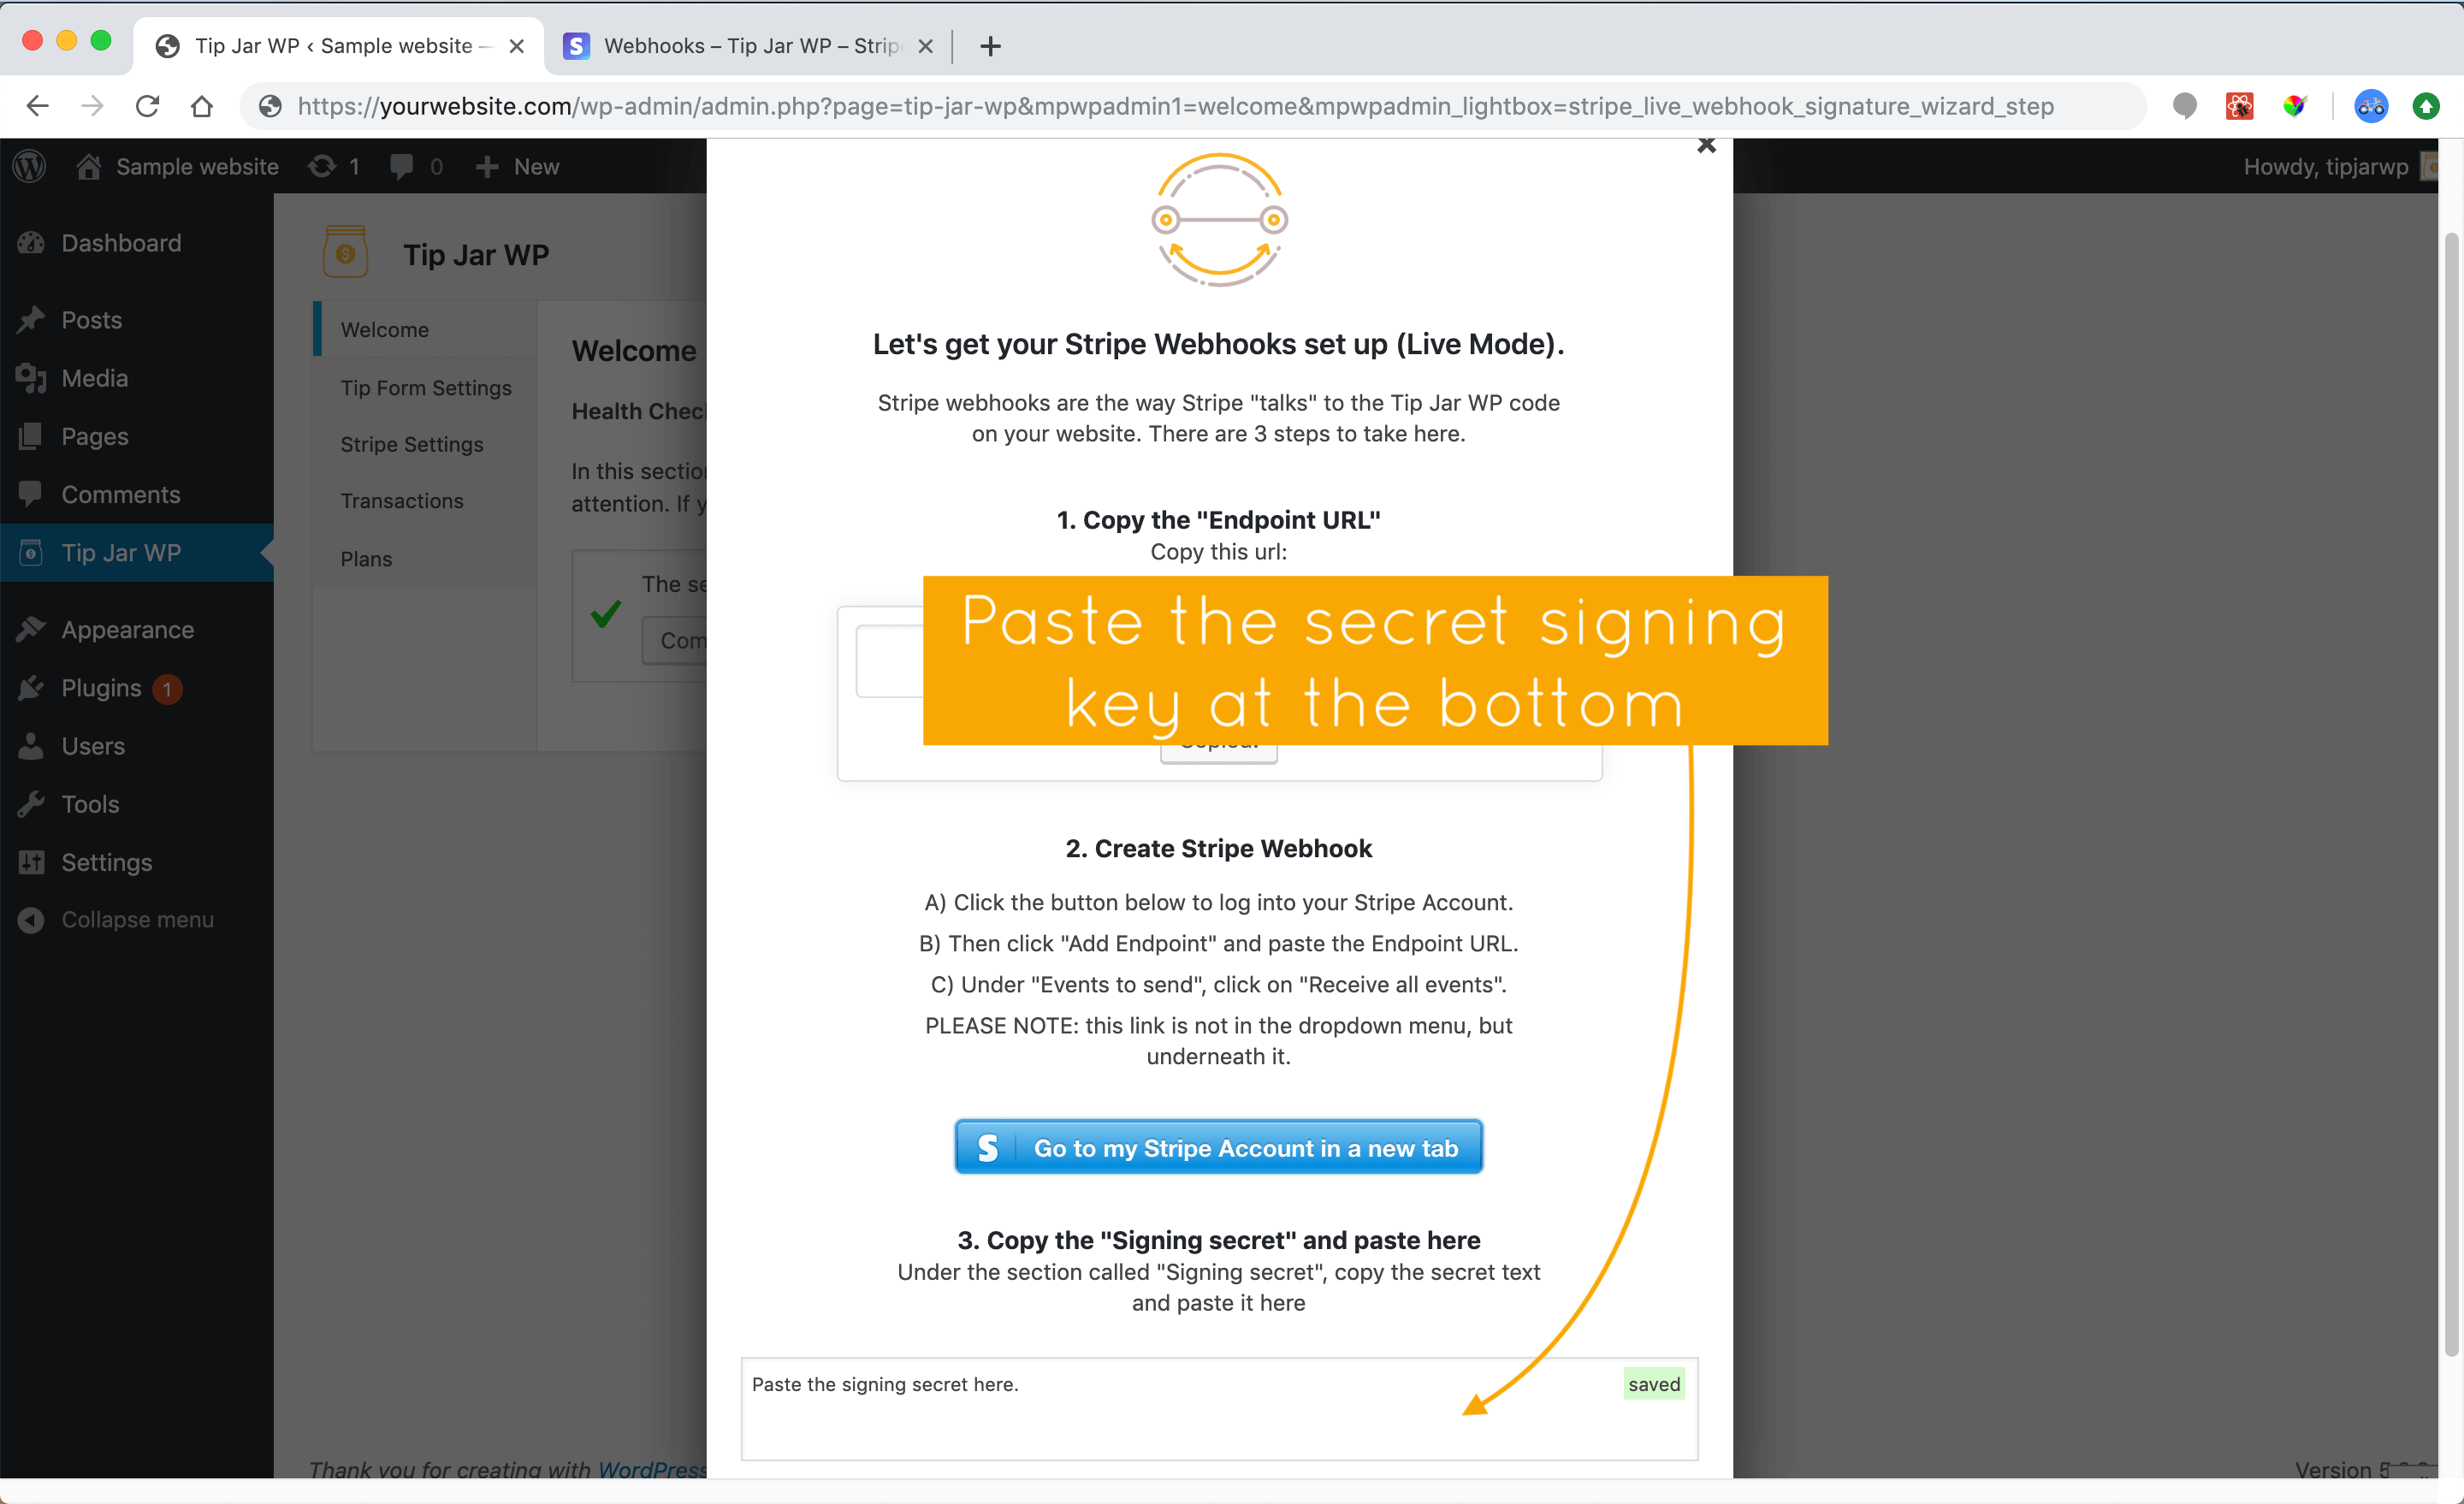
Once you have pasted the key, you will see a success message, and then you can click “Next step”.
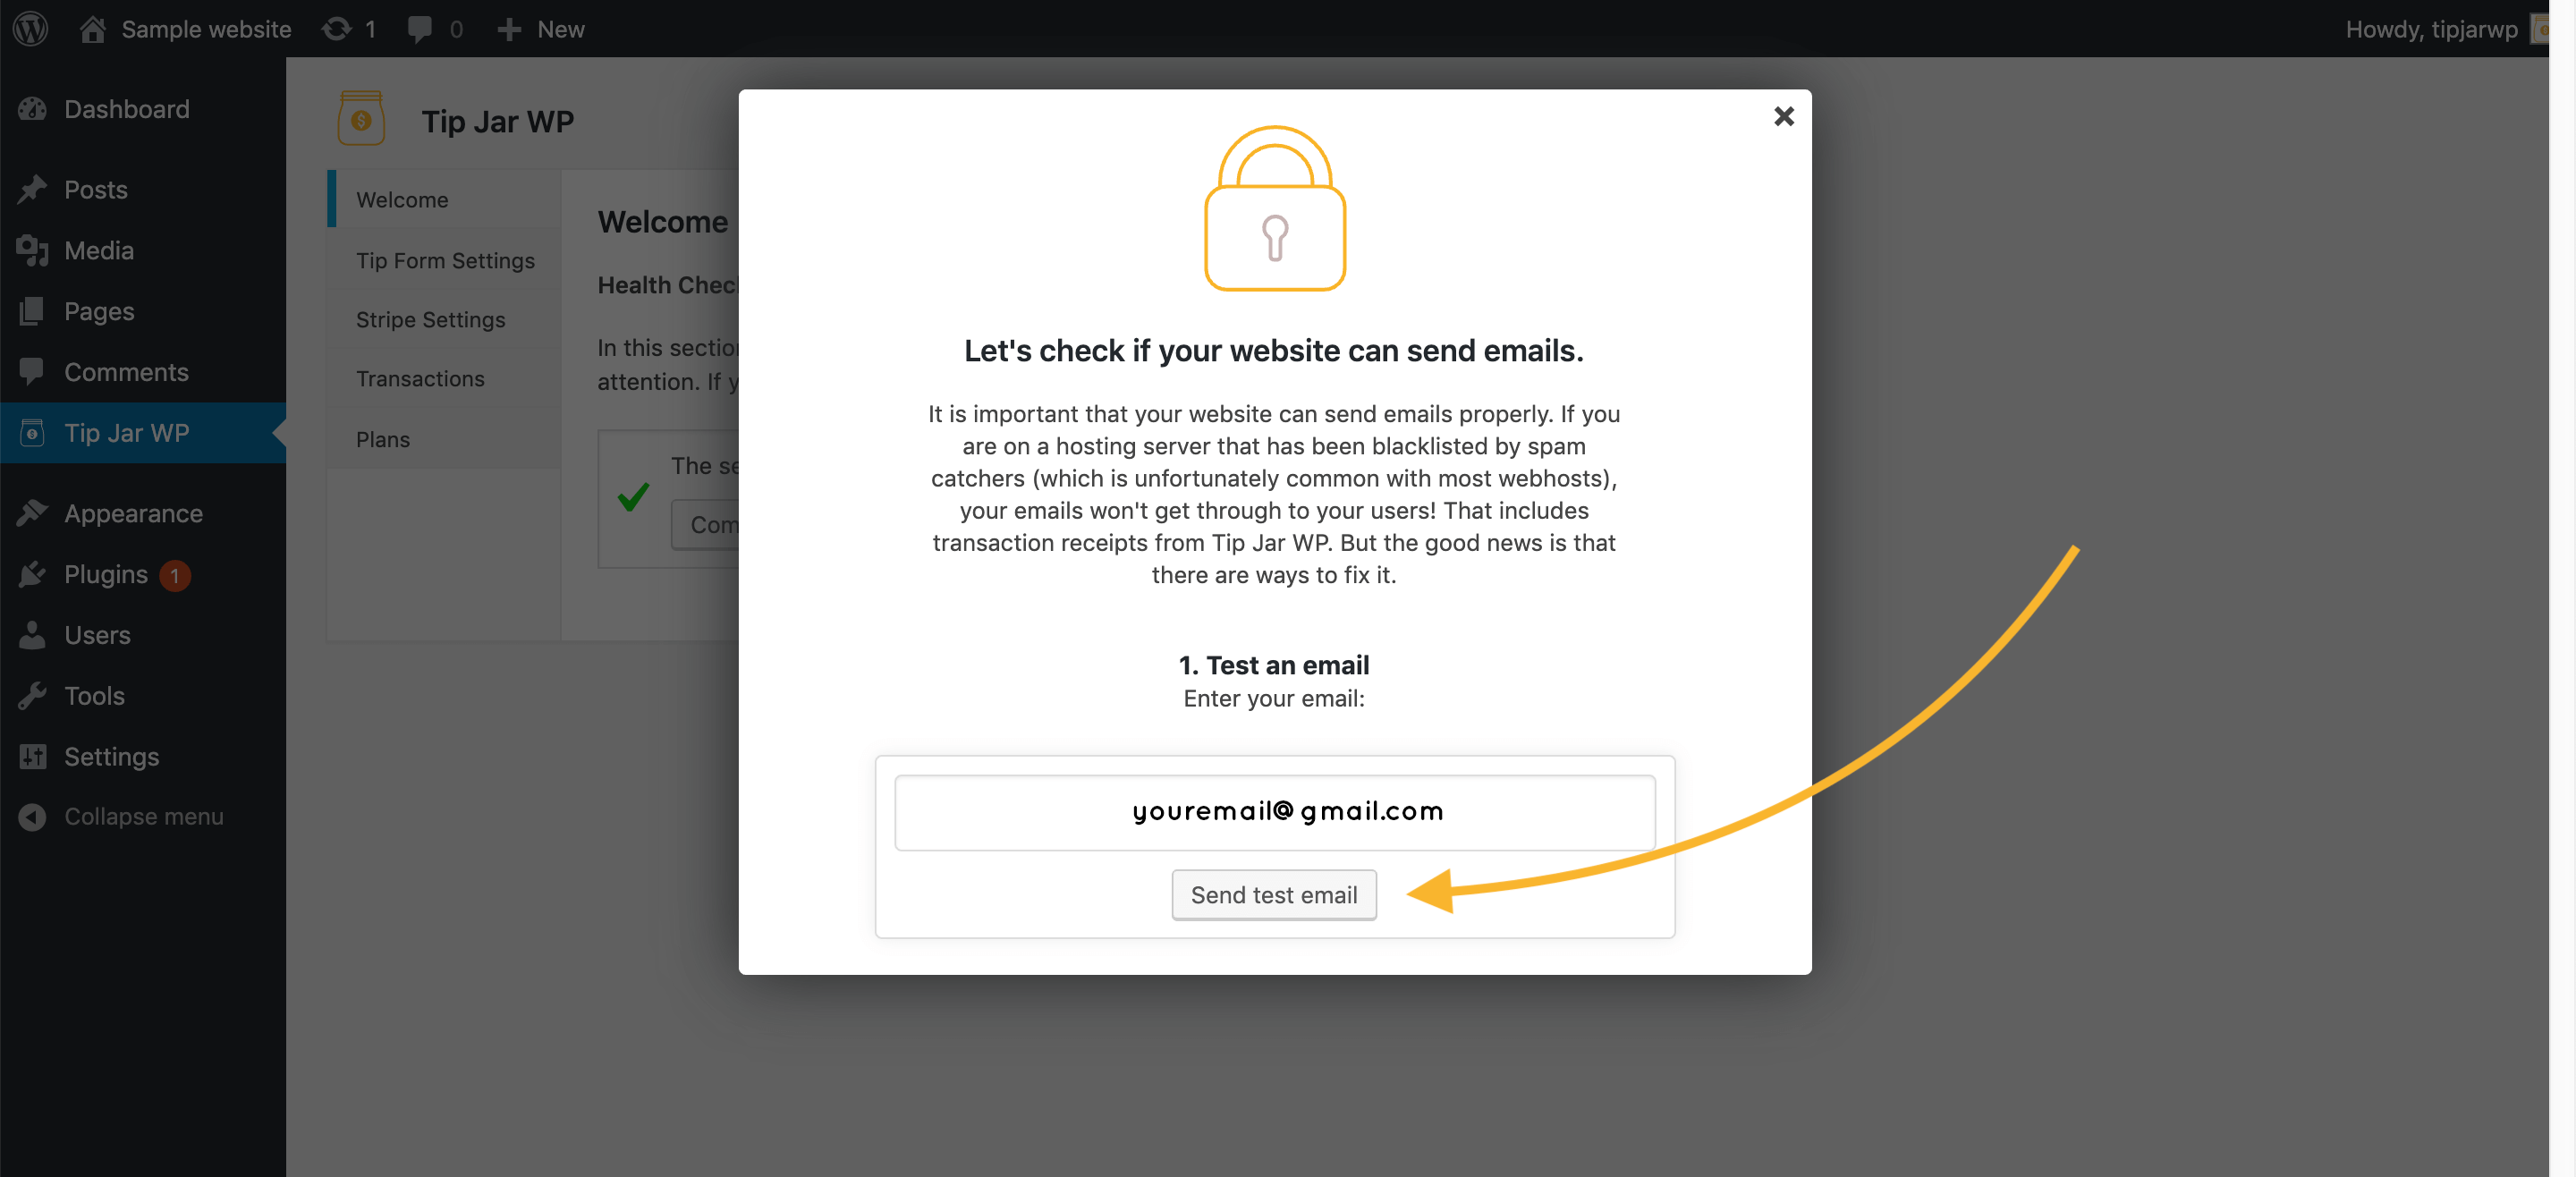
5. Making sure your WordPress emails are working
Now the wizard is going to help you make sure your WordPress is sending emails, and that those emails actually arrive in people’s inboxes (as opposed to their spam). Emails are important for things like transaction receipt emails.
Click the “Send test email” button, and a test email will be sent to you.
Head over to your email inbox in a new tab and click the link in the email. That will confirm the emails are working for your website.
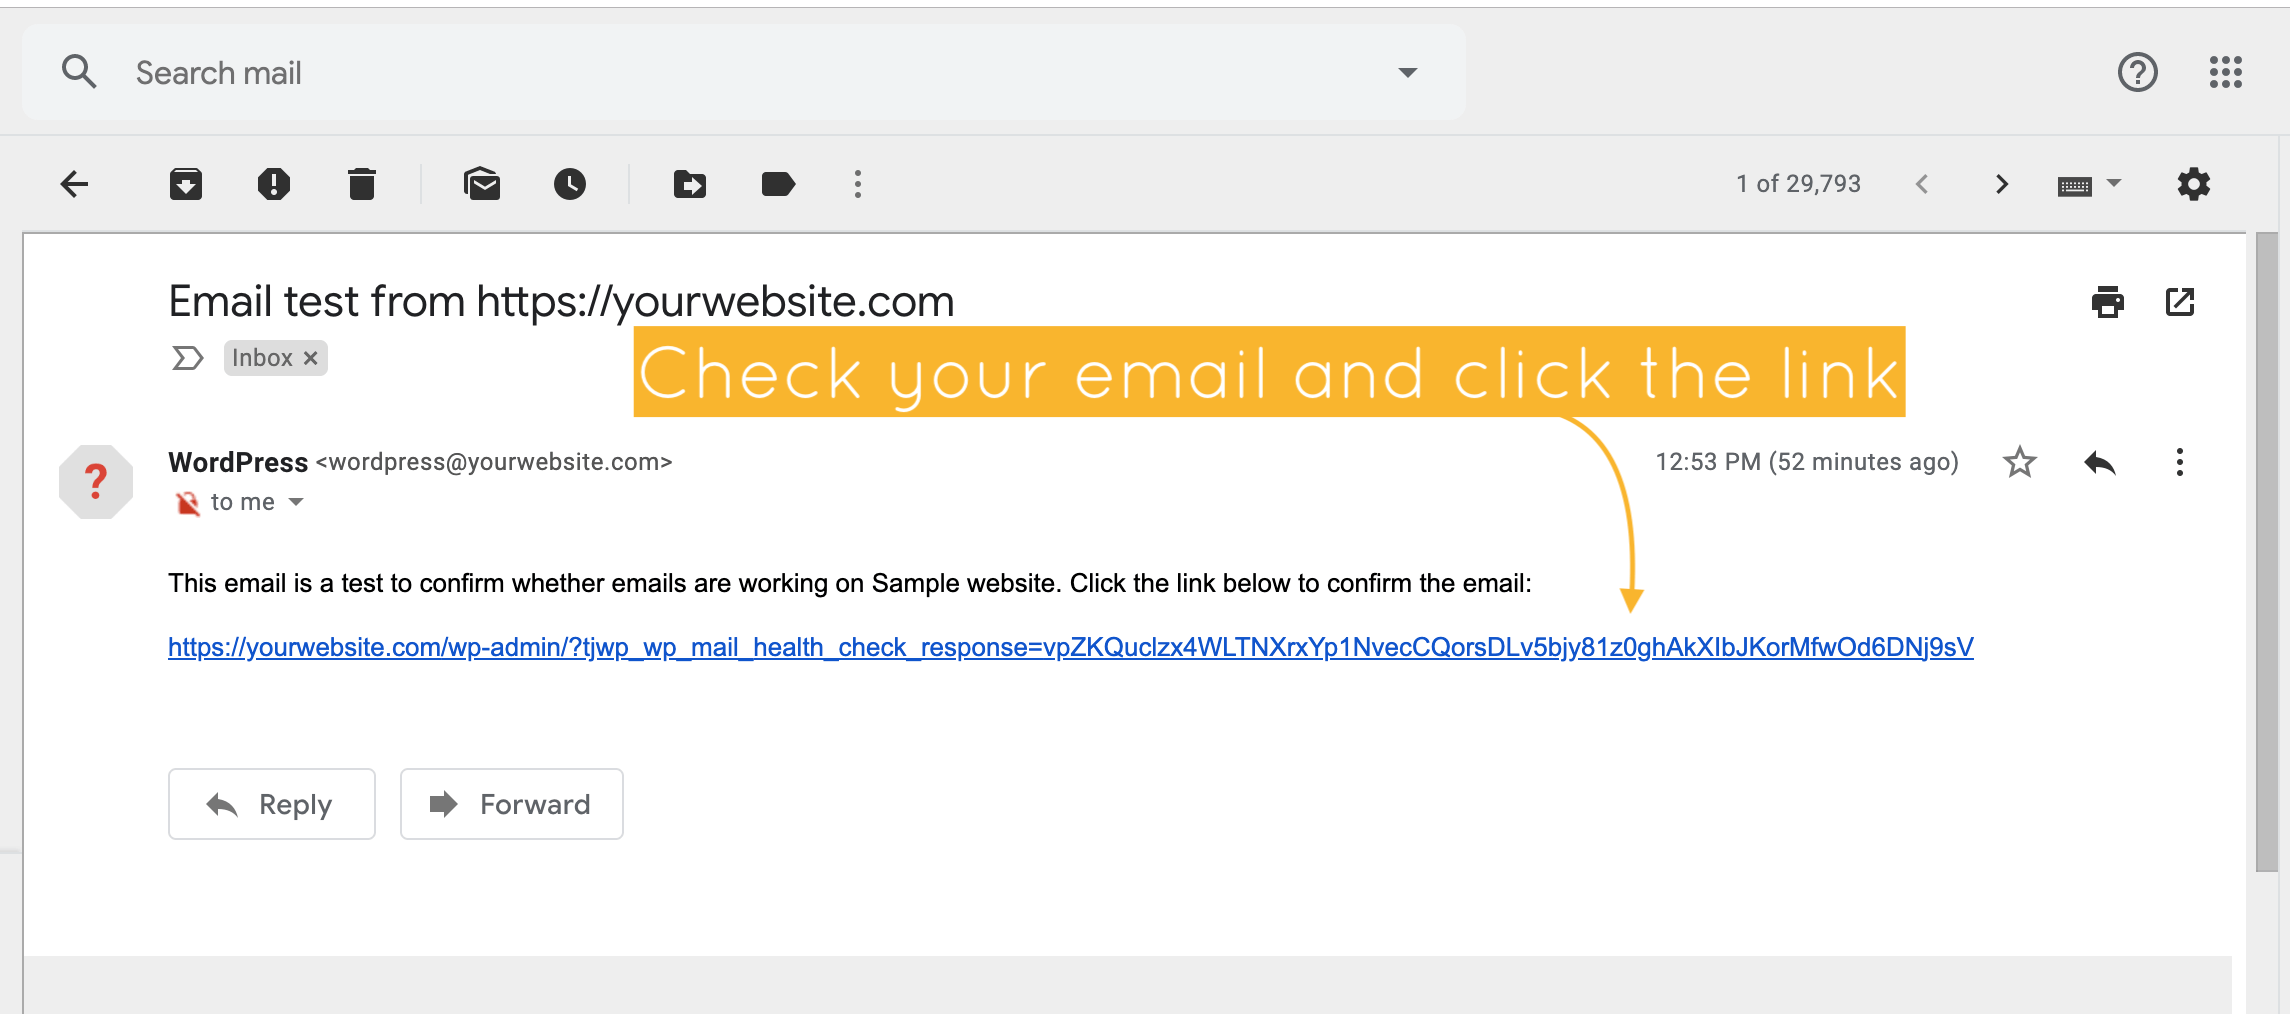
If you got the email and clicked the link, you can skip the next section because your emails are working!
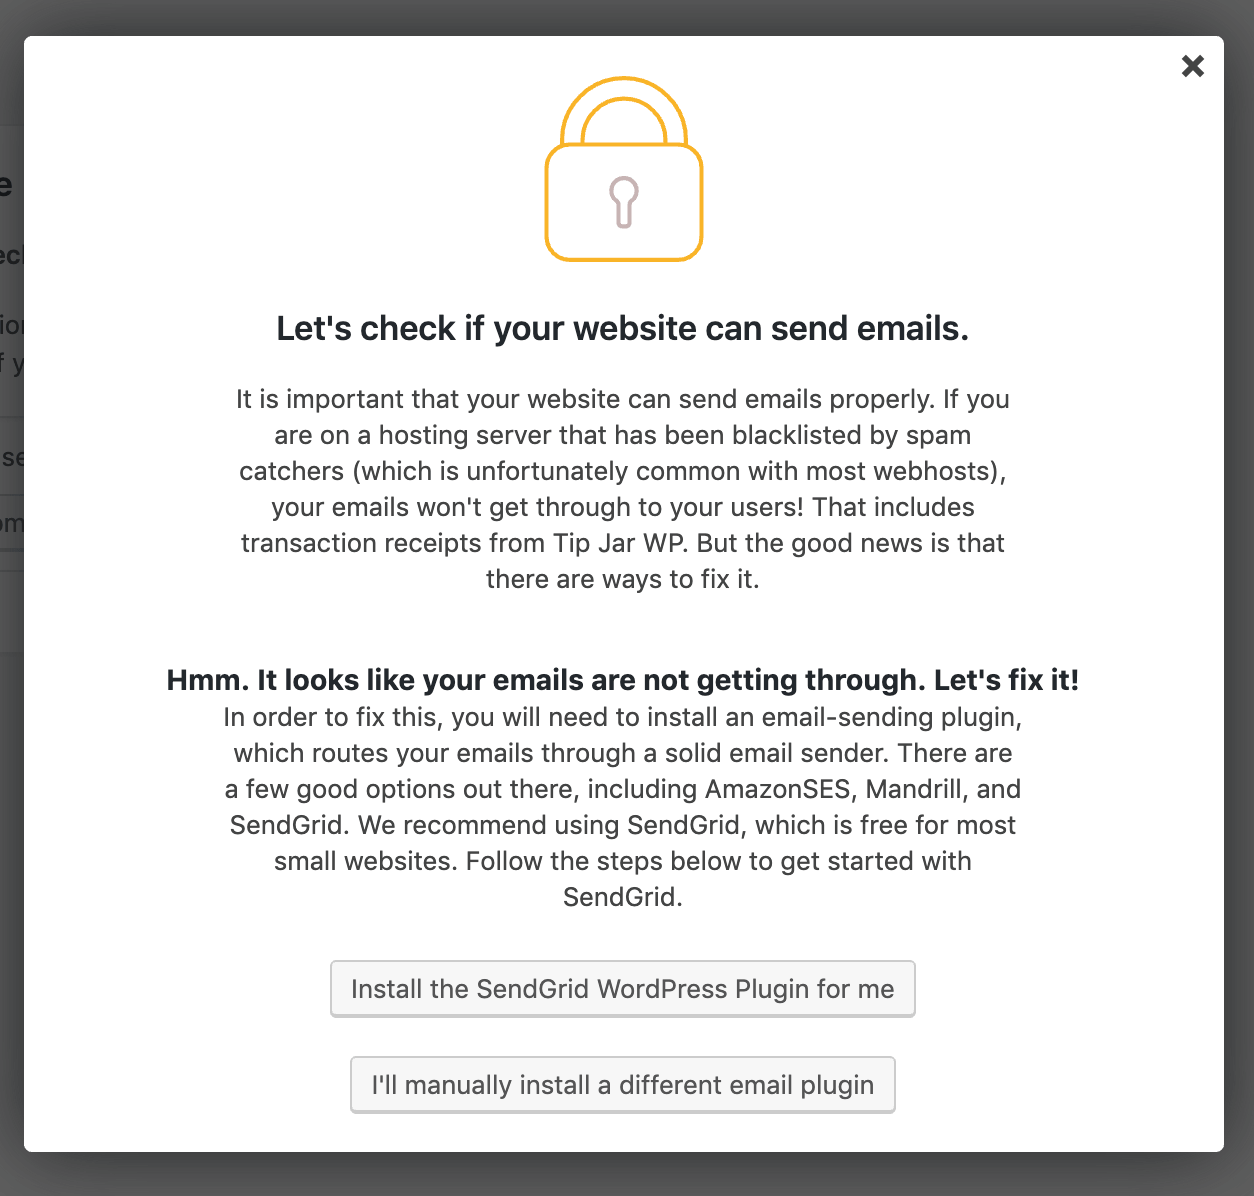
Now, if you didn’t get the email within 3-5 minutes, that’s a sign of a problem. It means your WordPress emails are not getting through! If that happens to you, click the “Didn’t get the email” button, and you’ll be prompted to install an email sending plugin.

At this point, you will be given 2 options:
1: Automatically install the “SendGrid” plugin for WordPress.
2: Install your own email sending plugin. A few of the popular options for this are Mandrill, SendGrid, AmazonSES, and others. Each of these plugins will have their own configuration settings, so its likely best/easiest to stick with SendGrid unless you know what you are doing.
If you choose option 1 (Install the SendGrid WordPress Plugin for me), the SendGrid WordPress plugin will automatically be installed in the background.
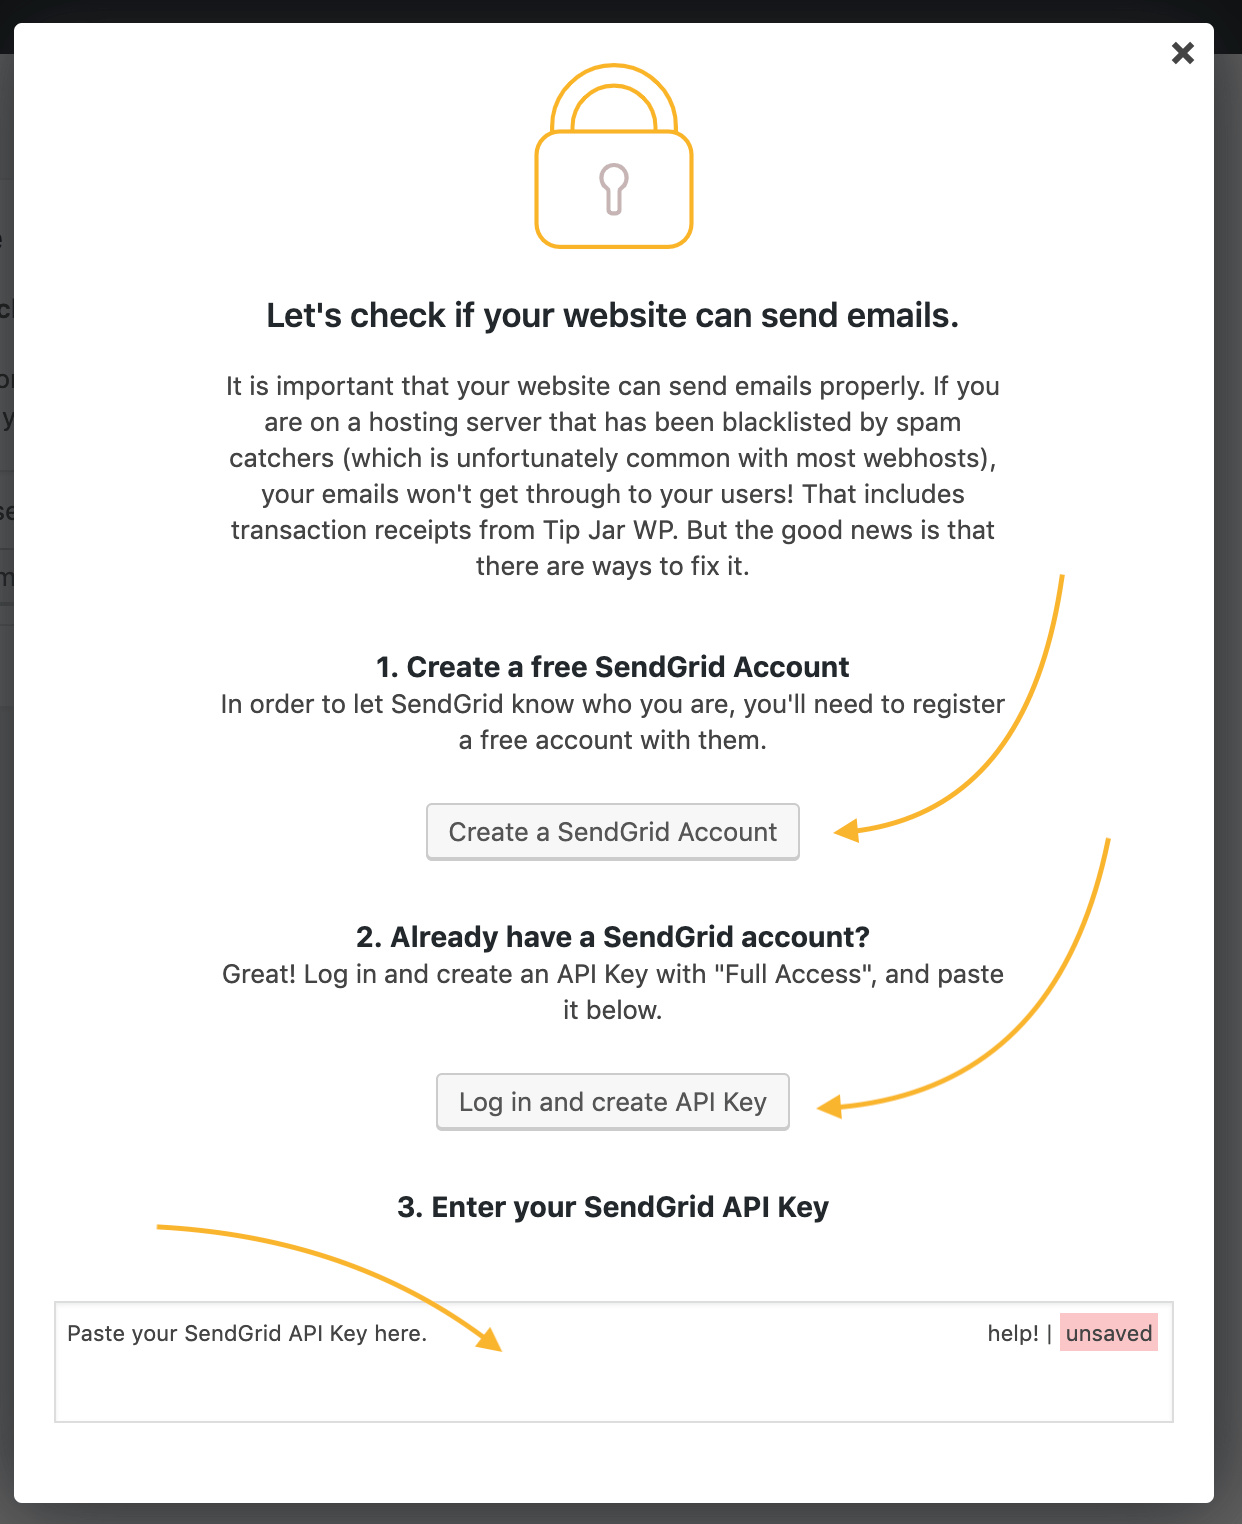
You can then click the button to create your SendGrid account, where you’ll generate an API key. Once you have the API key generated, you can then copy/paste that API key into the 3rd box at the bottom:
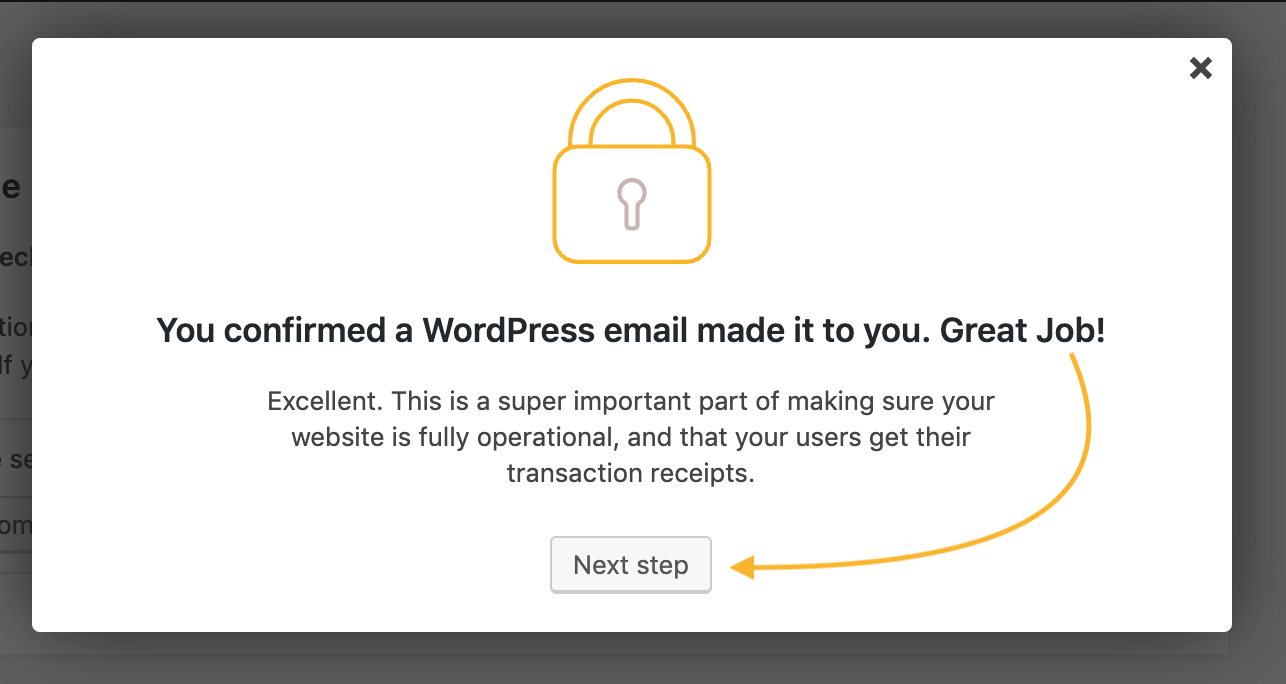
From here, you’ll be sent another test email. This time it should arrive. When you get it, click on the link in your email to confirm, and you’ll be brought back to the wizard to complete the next step!
6. Setting the default settings for your Tip/Payment Form
Congrats! You’ve made it through the hardest steps. From here on out it’s the fun stuff, customizing the default settings for your tip/payment form!
Each Tip Form has a little image at the top. You can set what you would like that to be on this step, by uploading your own image. You’ll want to make the image at least 200px wide by 200px high. But play around with using your own image here, as it will help your users to know their money is going directly to you!
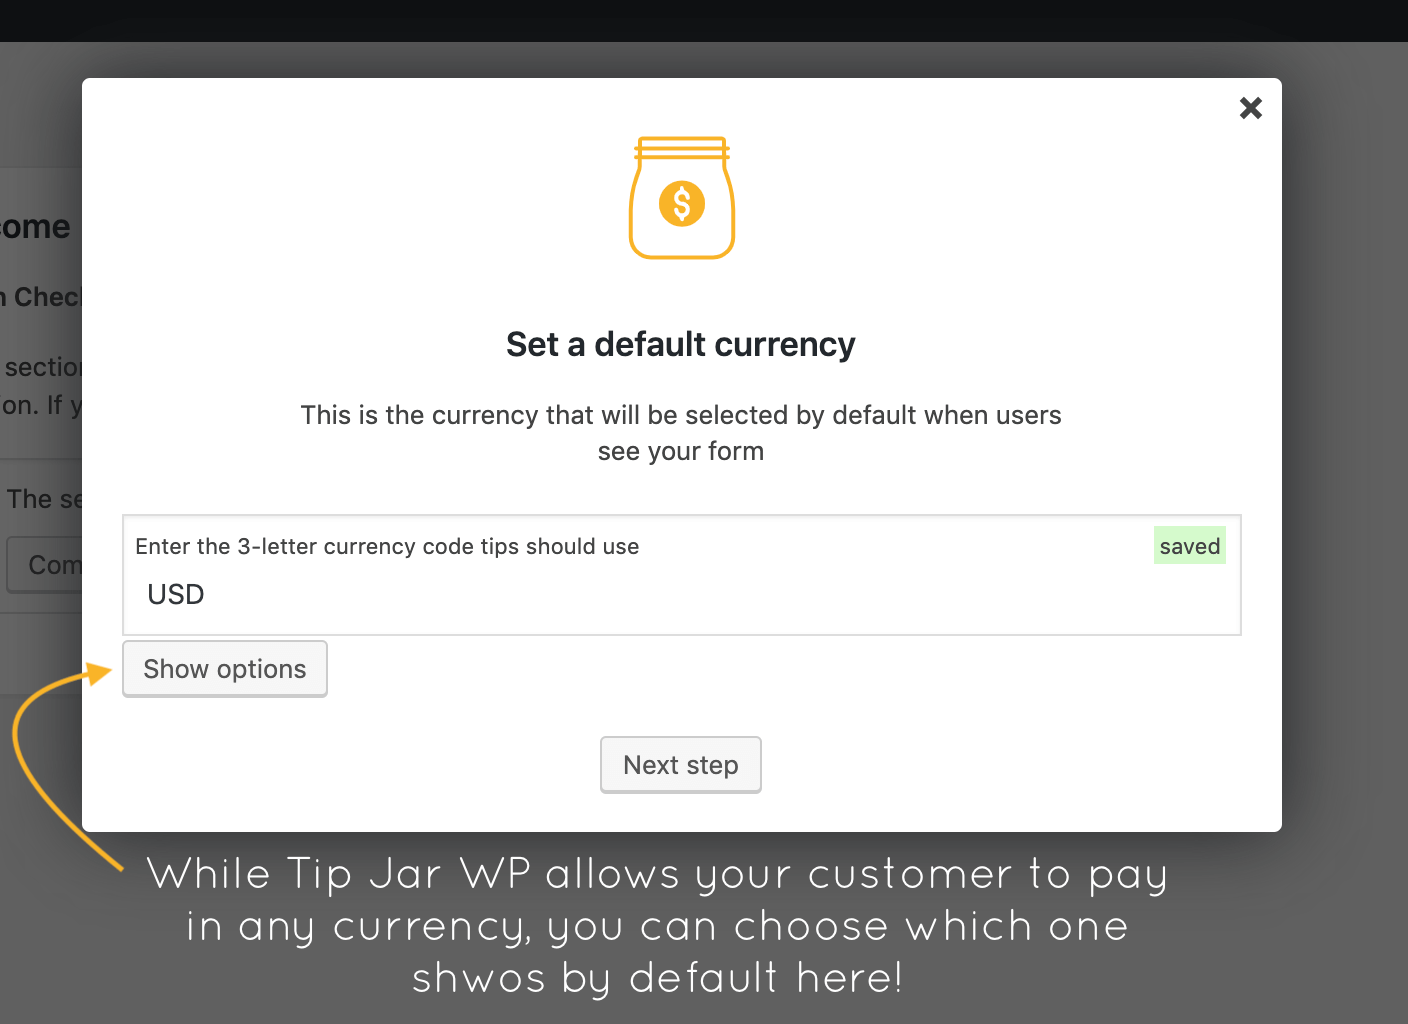
Now you can set the default currency, which will be shown to your users wherever you put your payment forms. Type in the 3 letter currency code, or choose from the list available:
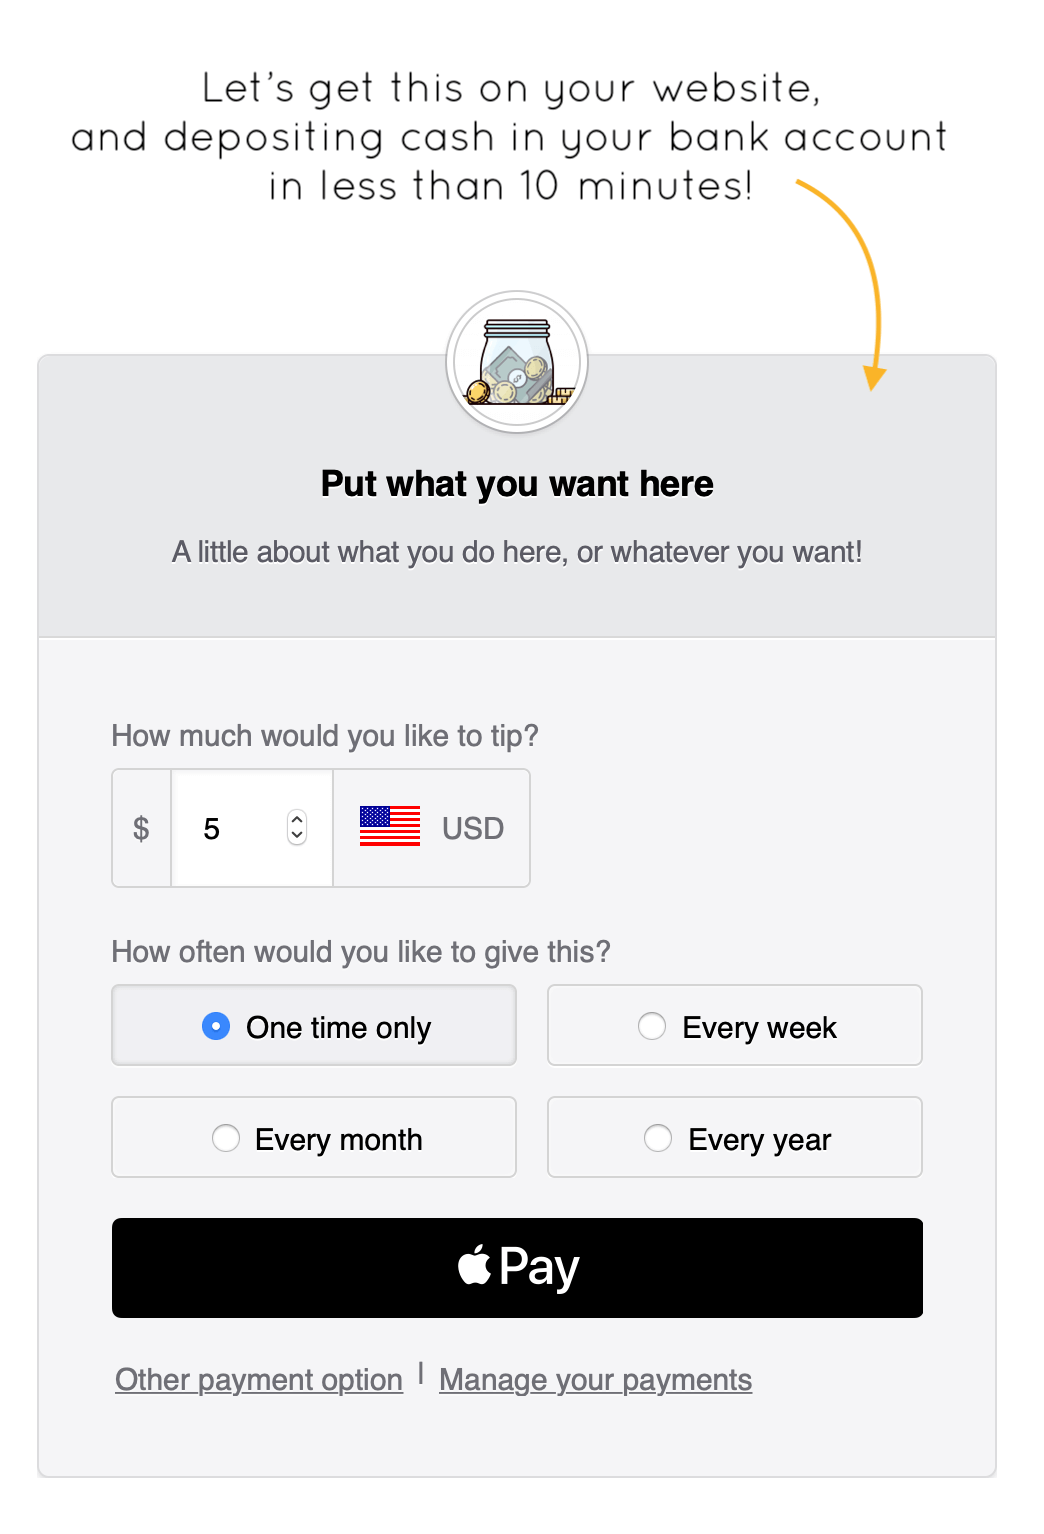
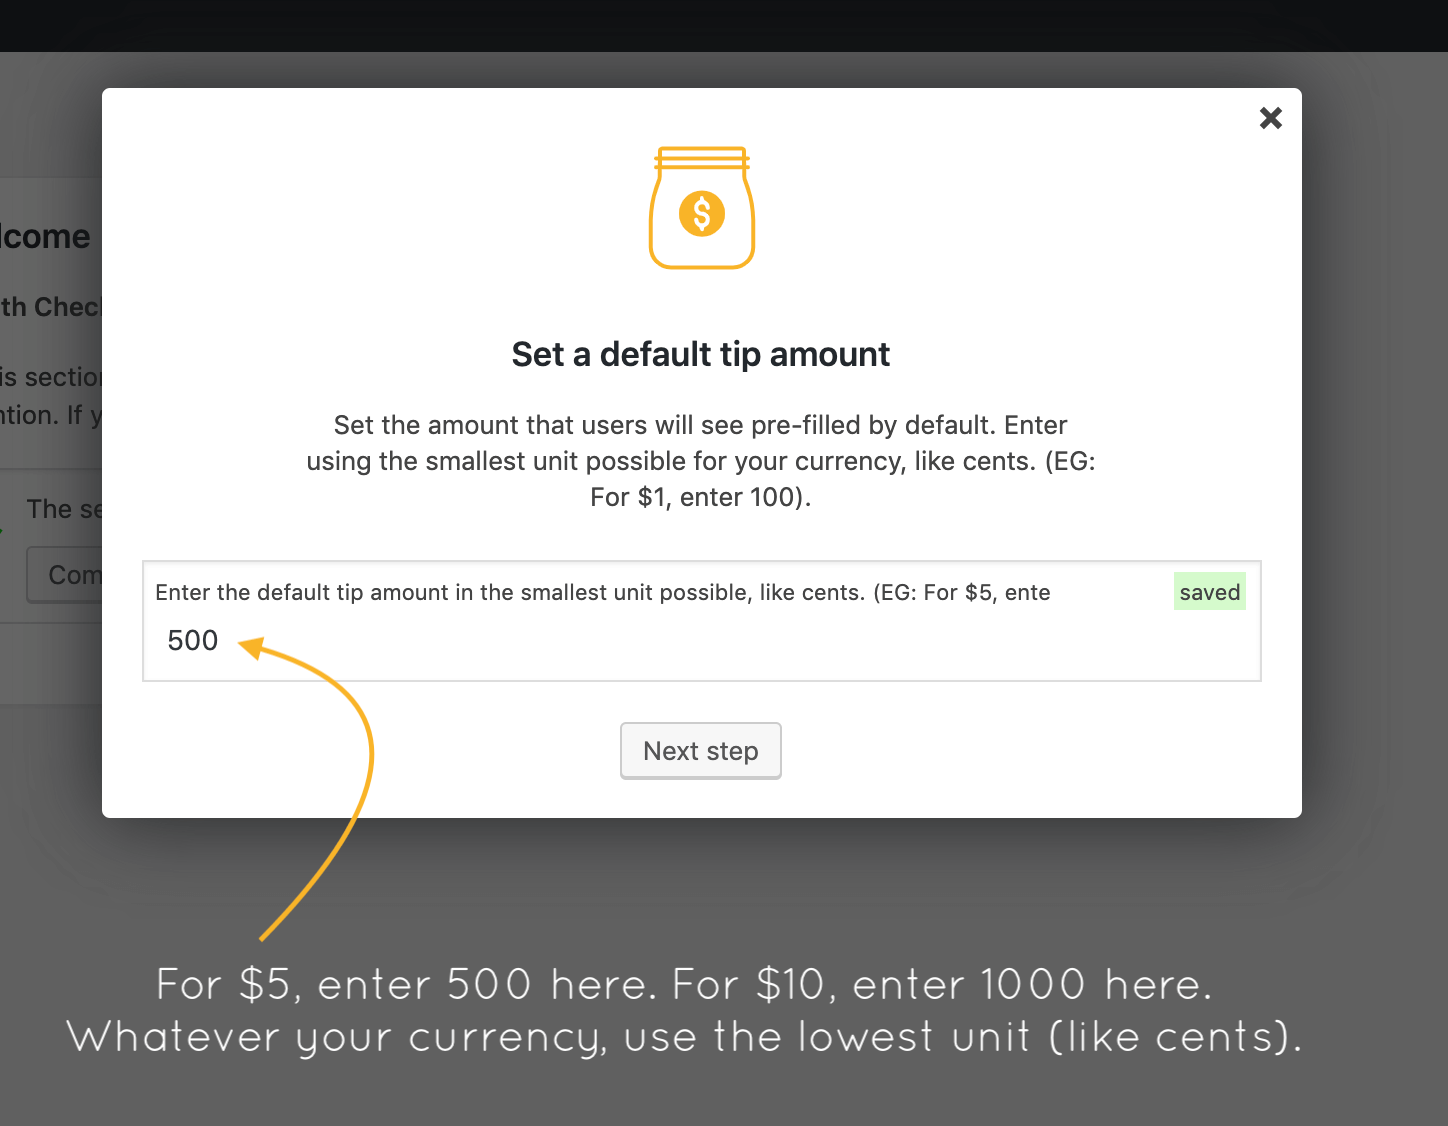
Along with the default currency, on this next step you can set the default amount. You will enter it in the lowest unit for your currency. For USD, that currency is cents. If you’re familiar with the Japanese YEN, you know that no decimal point is used at all, and there is only a single unit.
Either way, enter this amount without a decimal point and in the lowest unit for your currency. Typically this is cents. On the frontend, the user will see a properly formatted version of this amount for the currency they choose.
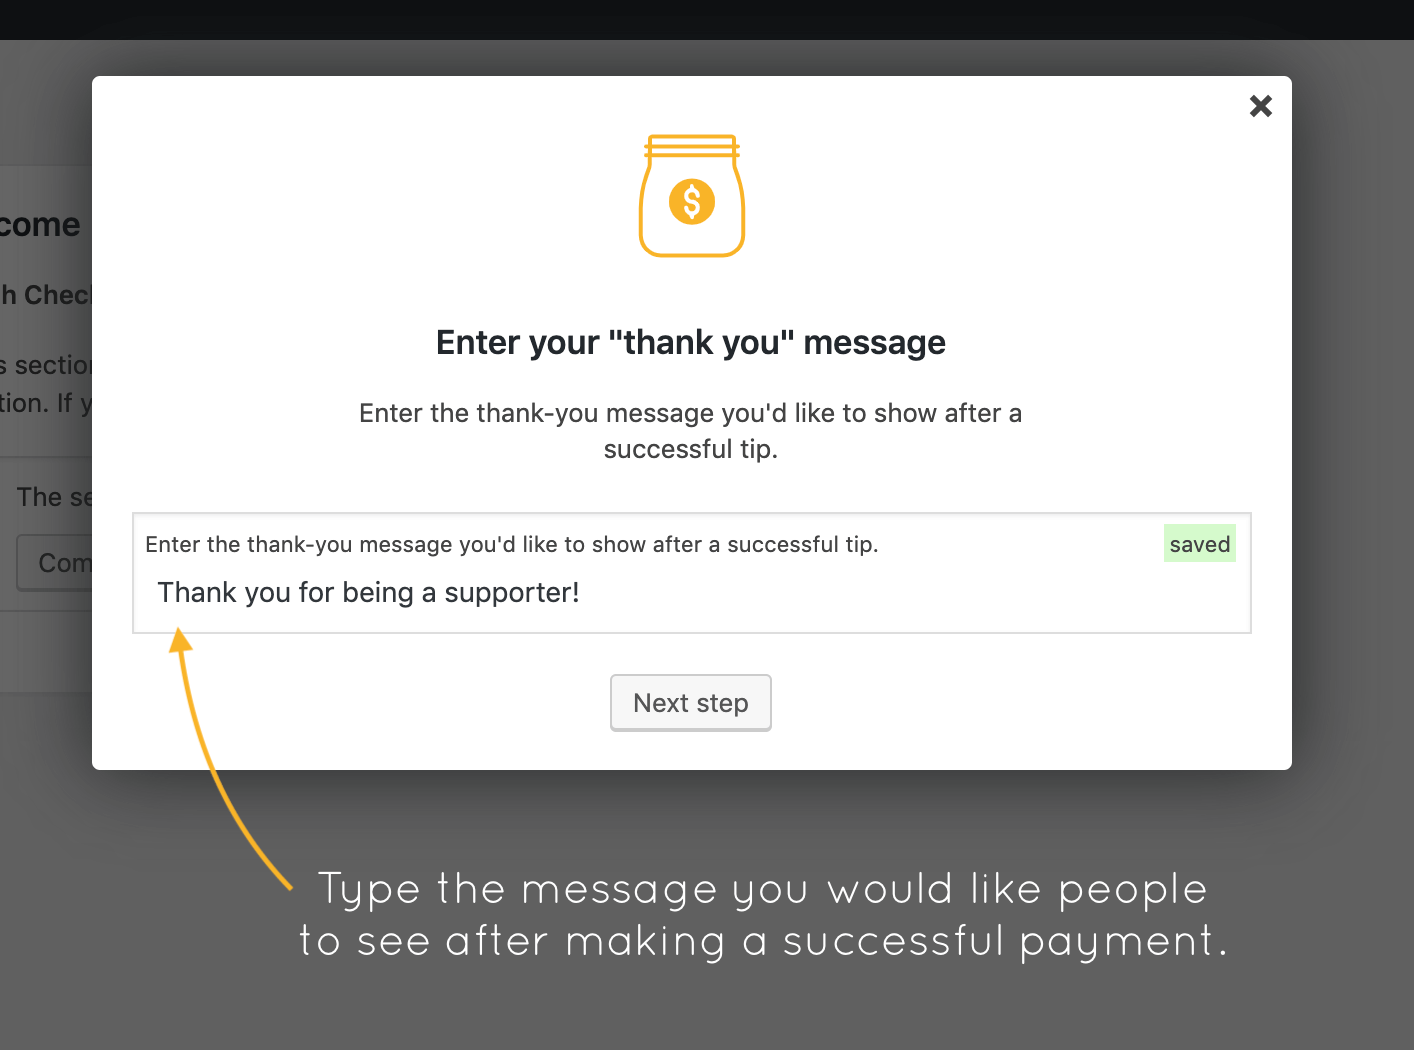
This next step allows you to set the “thank you” message you want users to see after they have successfully made a payment. Type whatever you’d like, then click “Next step”.
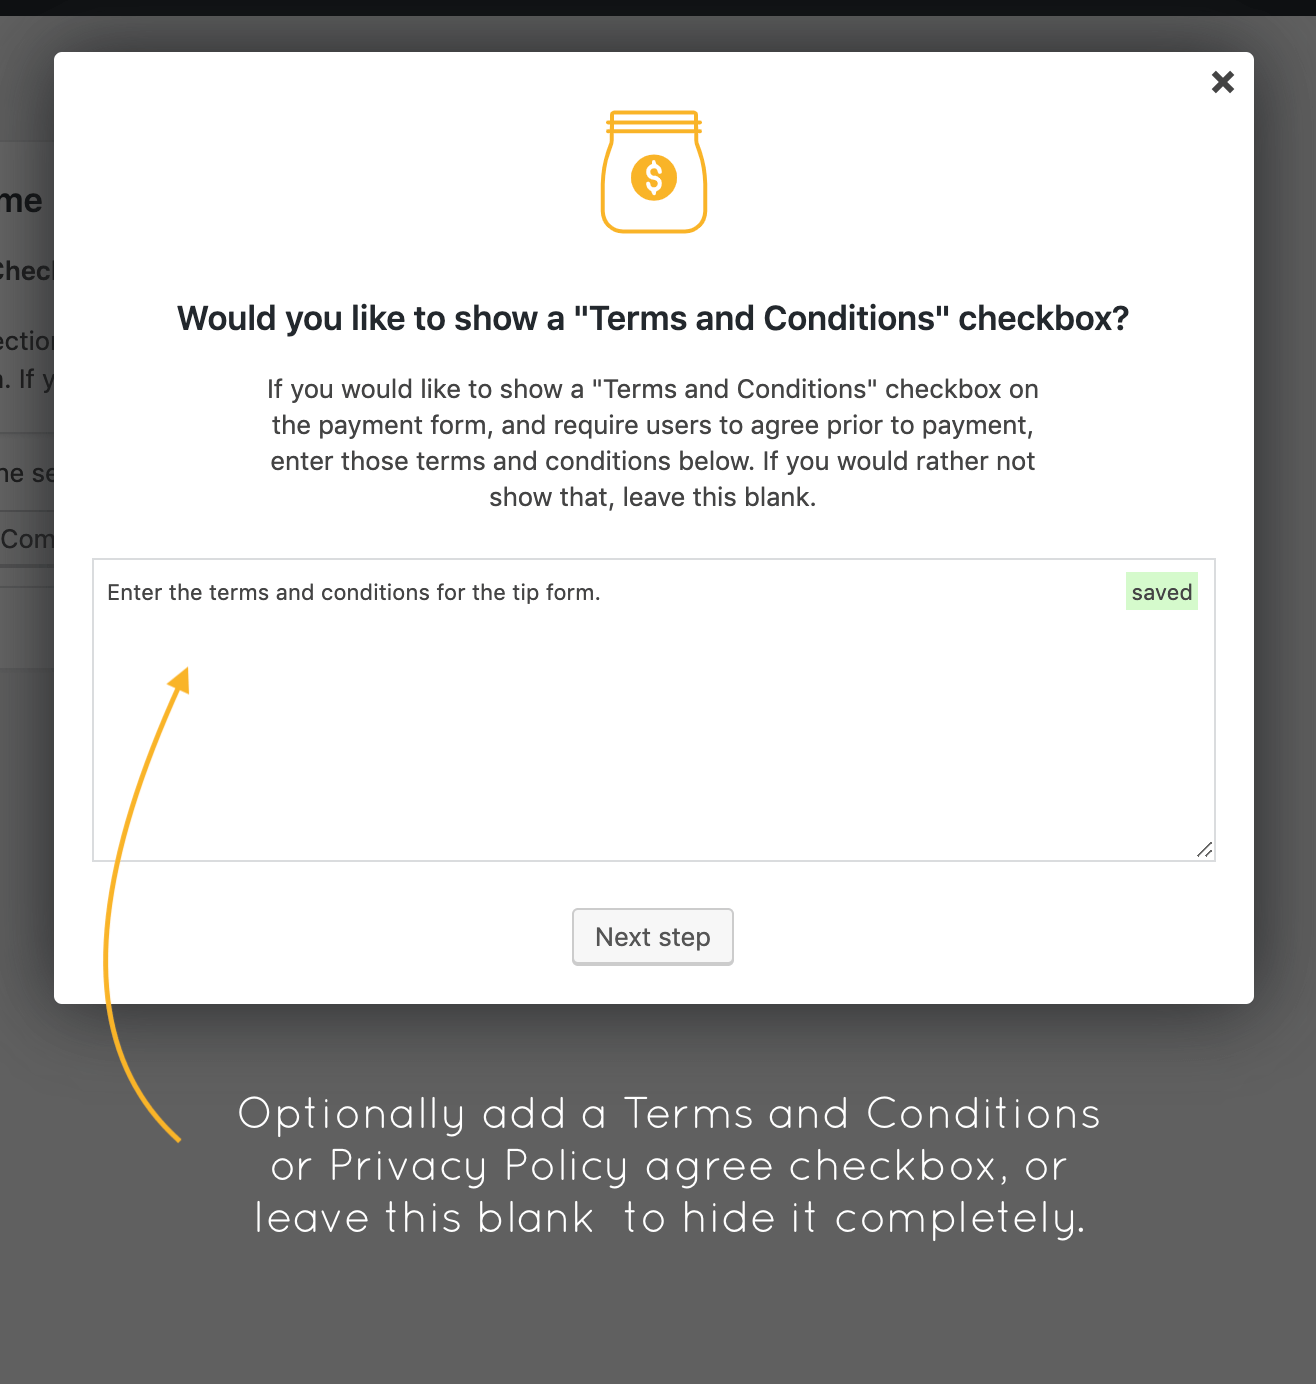
A terms and conditions and/or privacy policy checkbox may (or may not) be needed for your site, depending on what you do. Many people will choose to leave this blank, as it’s one-less-thing to get in the way of completing a payment. But if your website needs people to agree to a specific set of terms, type those terms here, and a super simple “Agree to terms” checkbox will appear, and be required, before any payment is accepted.
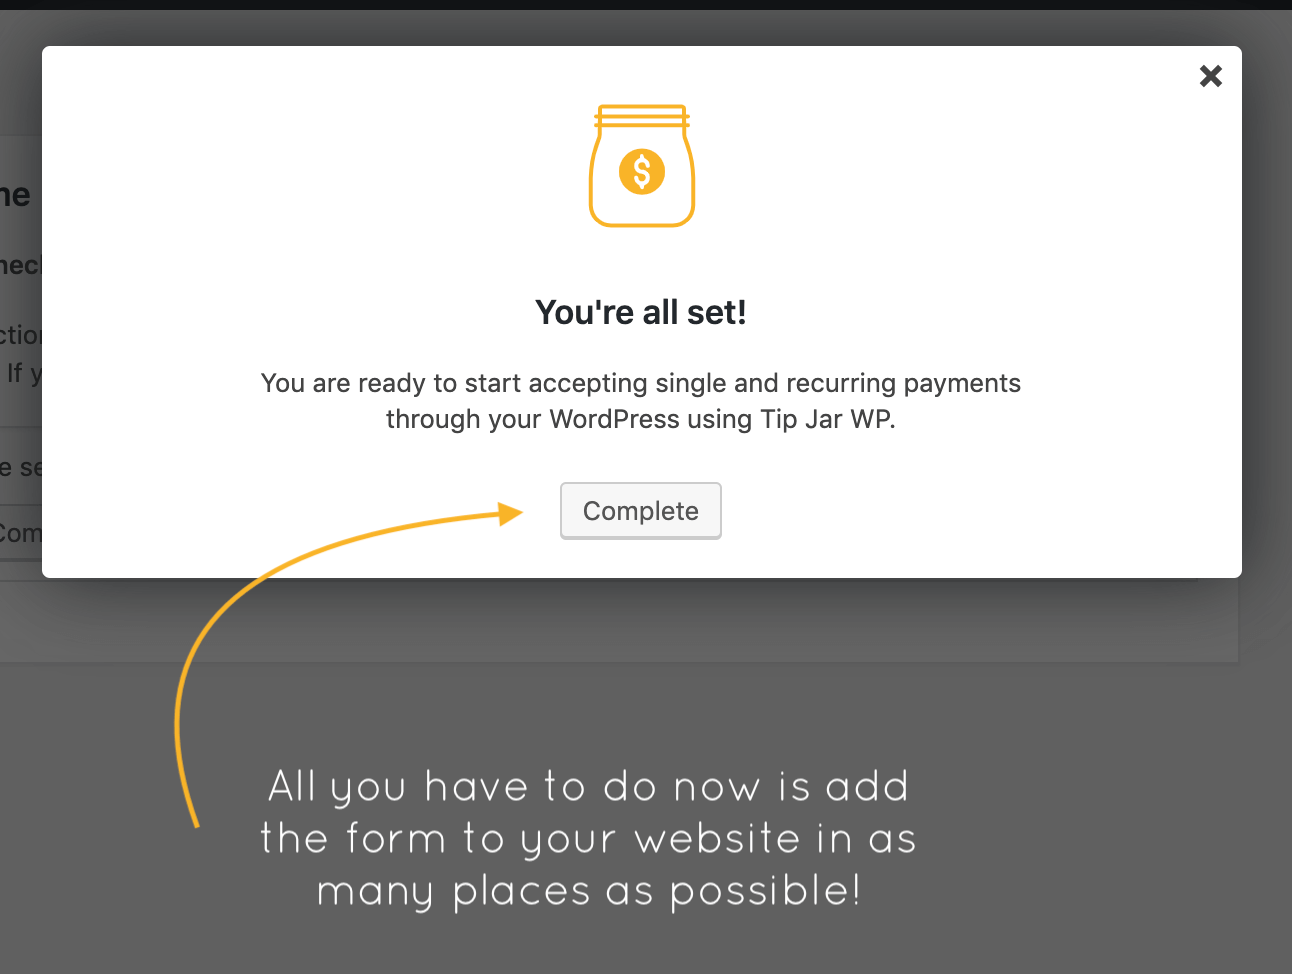
And that’s the last step in the set-up wizard!
7. Showing the payment form on your website
All that’s left to do now is add the Tip Form to your website. The easiest way is to use this shortcode on any page, post, sidebar widget:
[tipjarwp]
You can also make it open in a pop-up box using this shortcode:
[tipjarwp mode="button" link_text="Leave a tip" open_style="in_modal"]
Of course, it doesn’t have to say “Leave a tip” on the button. You can change that to anything you want like this:
[tipjarwp mode="button" link_text="ANYTHING YOU WANT HERE" open_style="in_modal"]
If you’re writing a blog post and you want to use a text link inside one of your paragraphs, use this shortcode:
[tipjarwp mode="text_link" link_text="Leave a tip" open_style="in_modal"]
If you want to get fancy, and you have some experience editing your child theme’s files, you can even hard-cod the shortcode into one of your child theme’s files (like footer.php) using this code:
<?php echo do_shortcode( '[tipjarwp mode="text_link" link_text="Leave a tip" open_style="in_modal"]' ); ?>
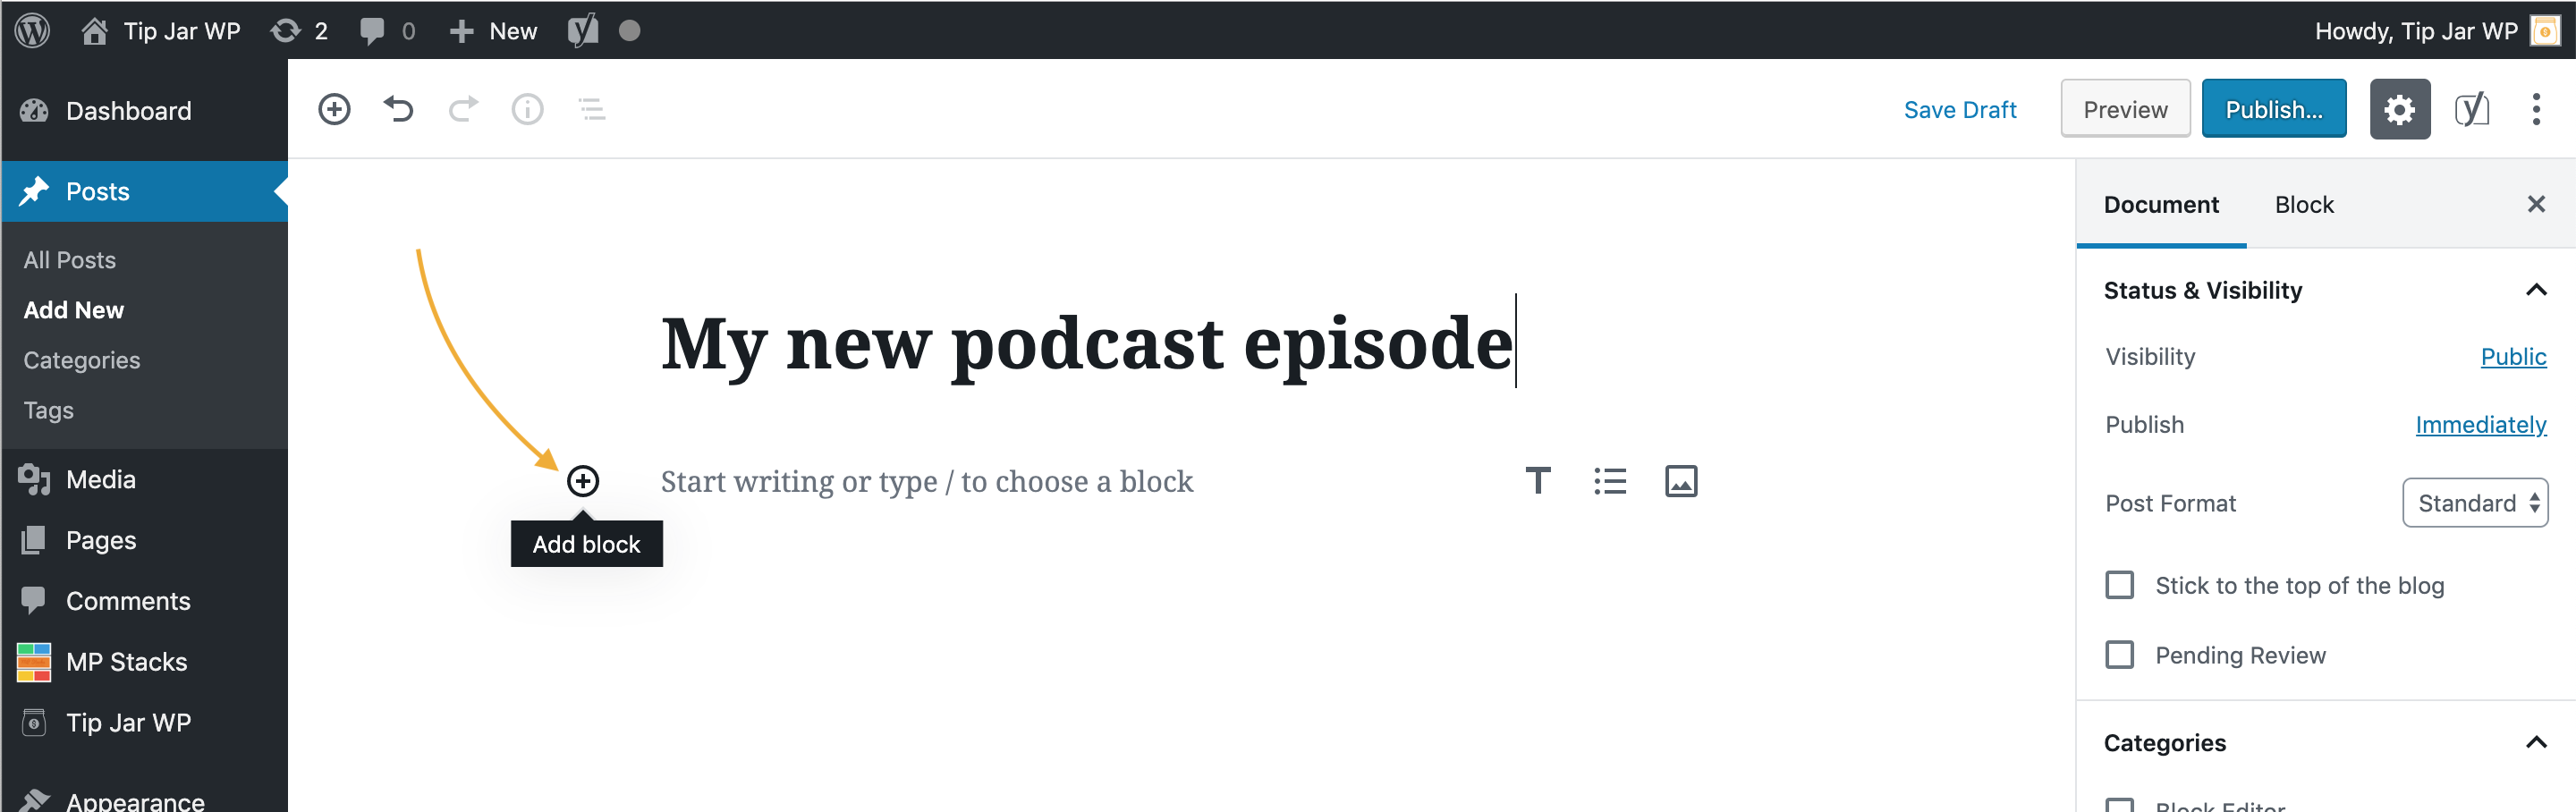
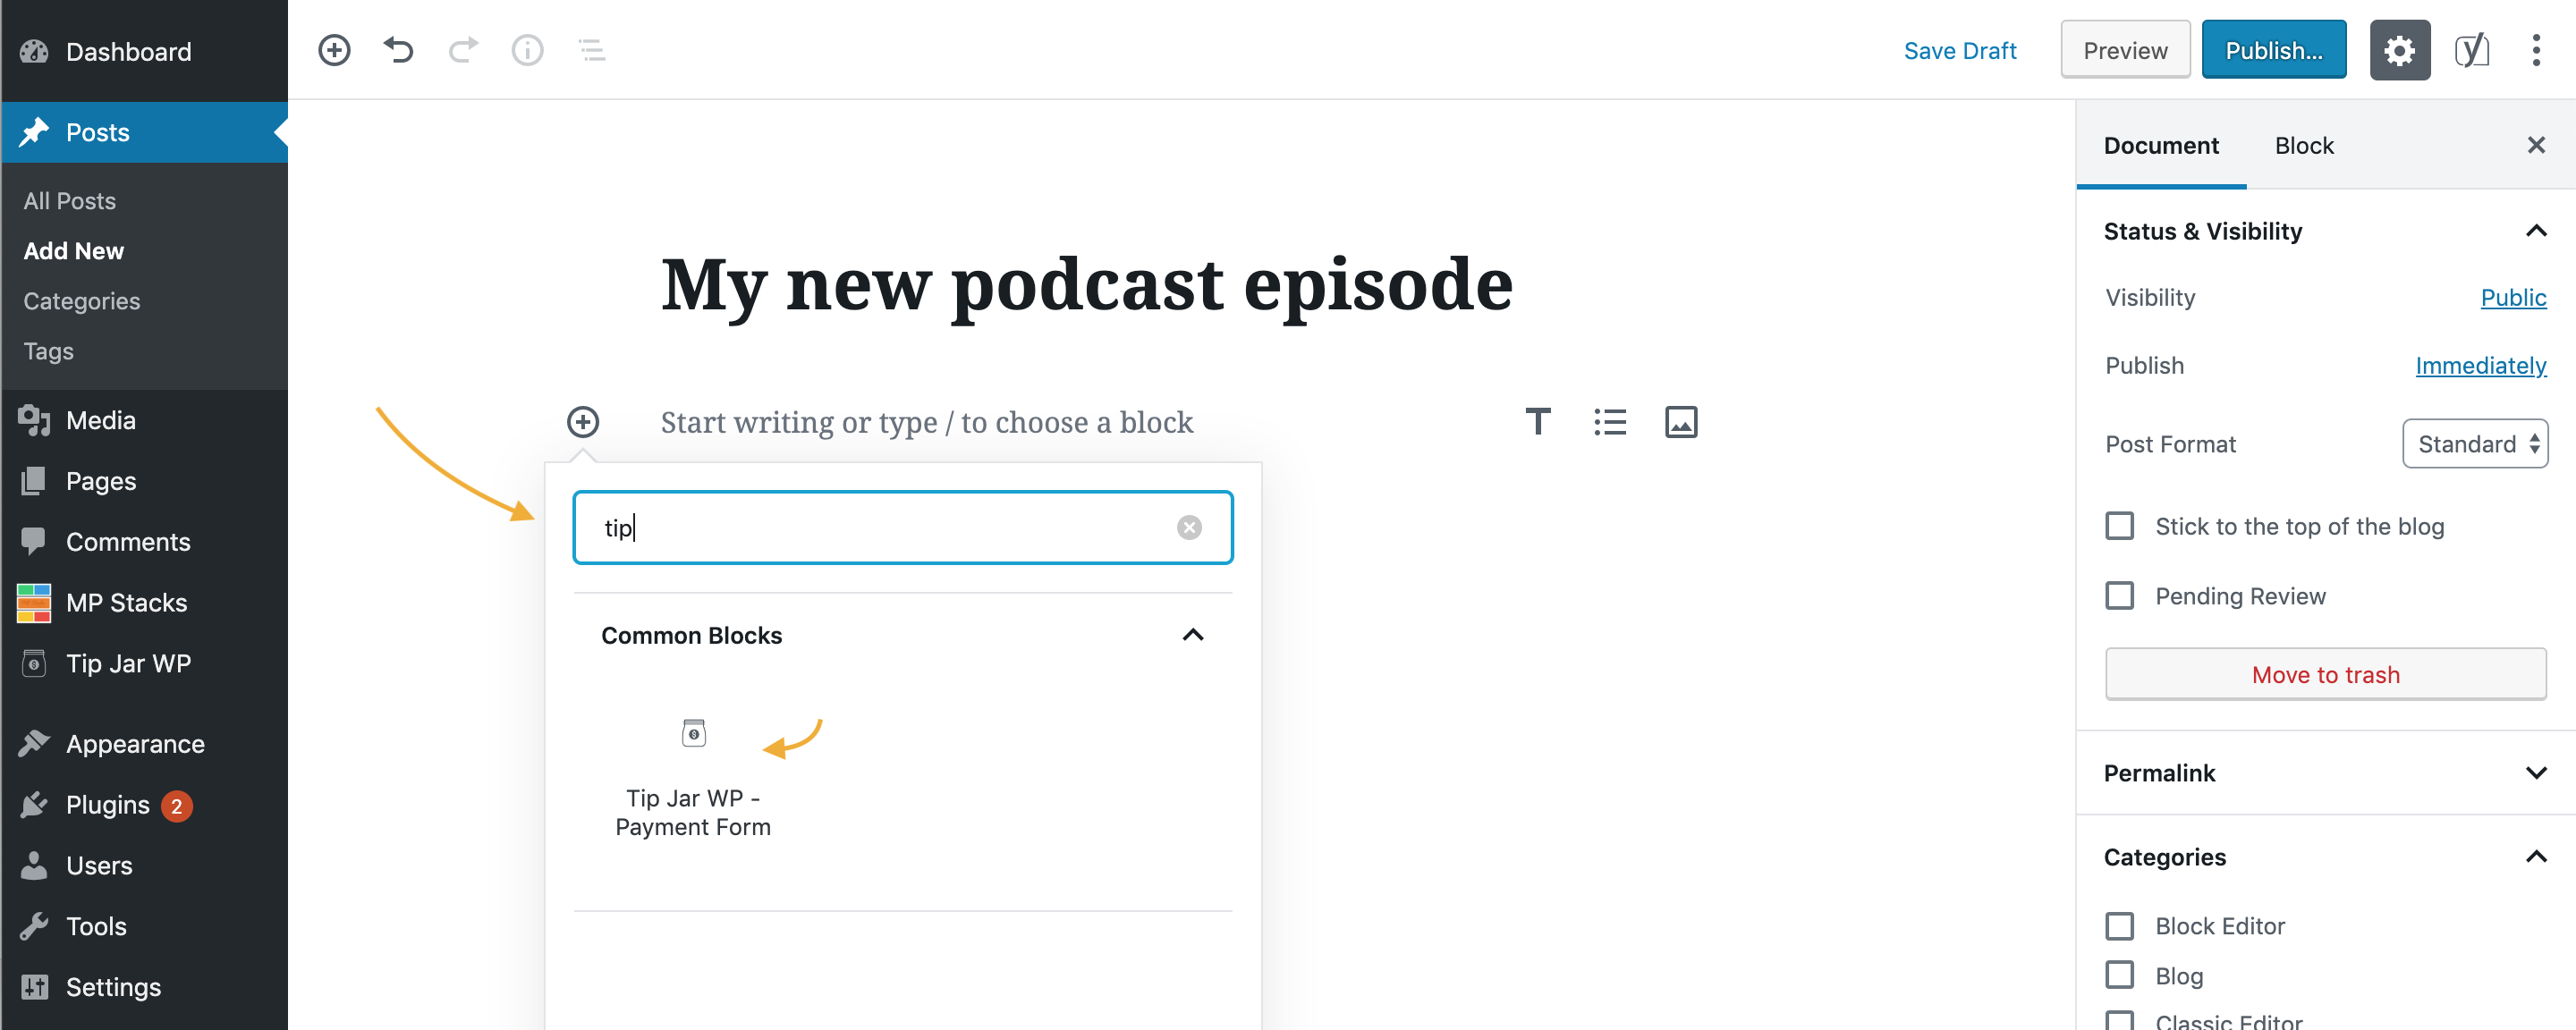
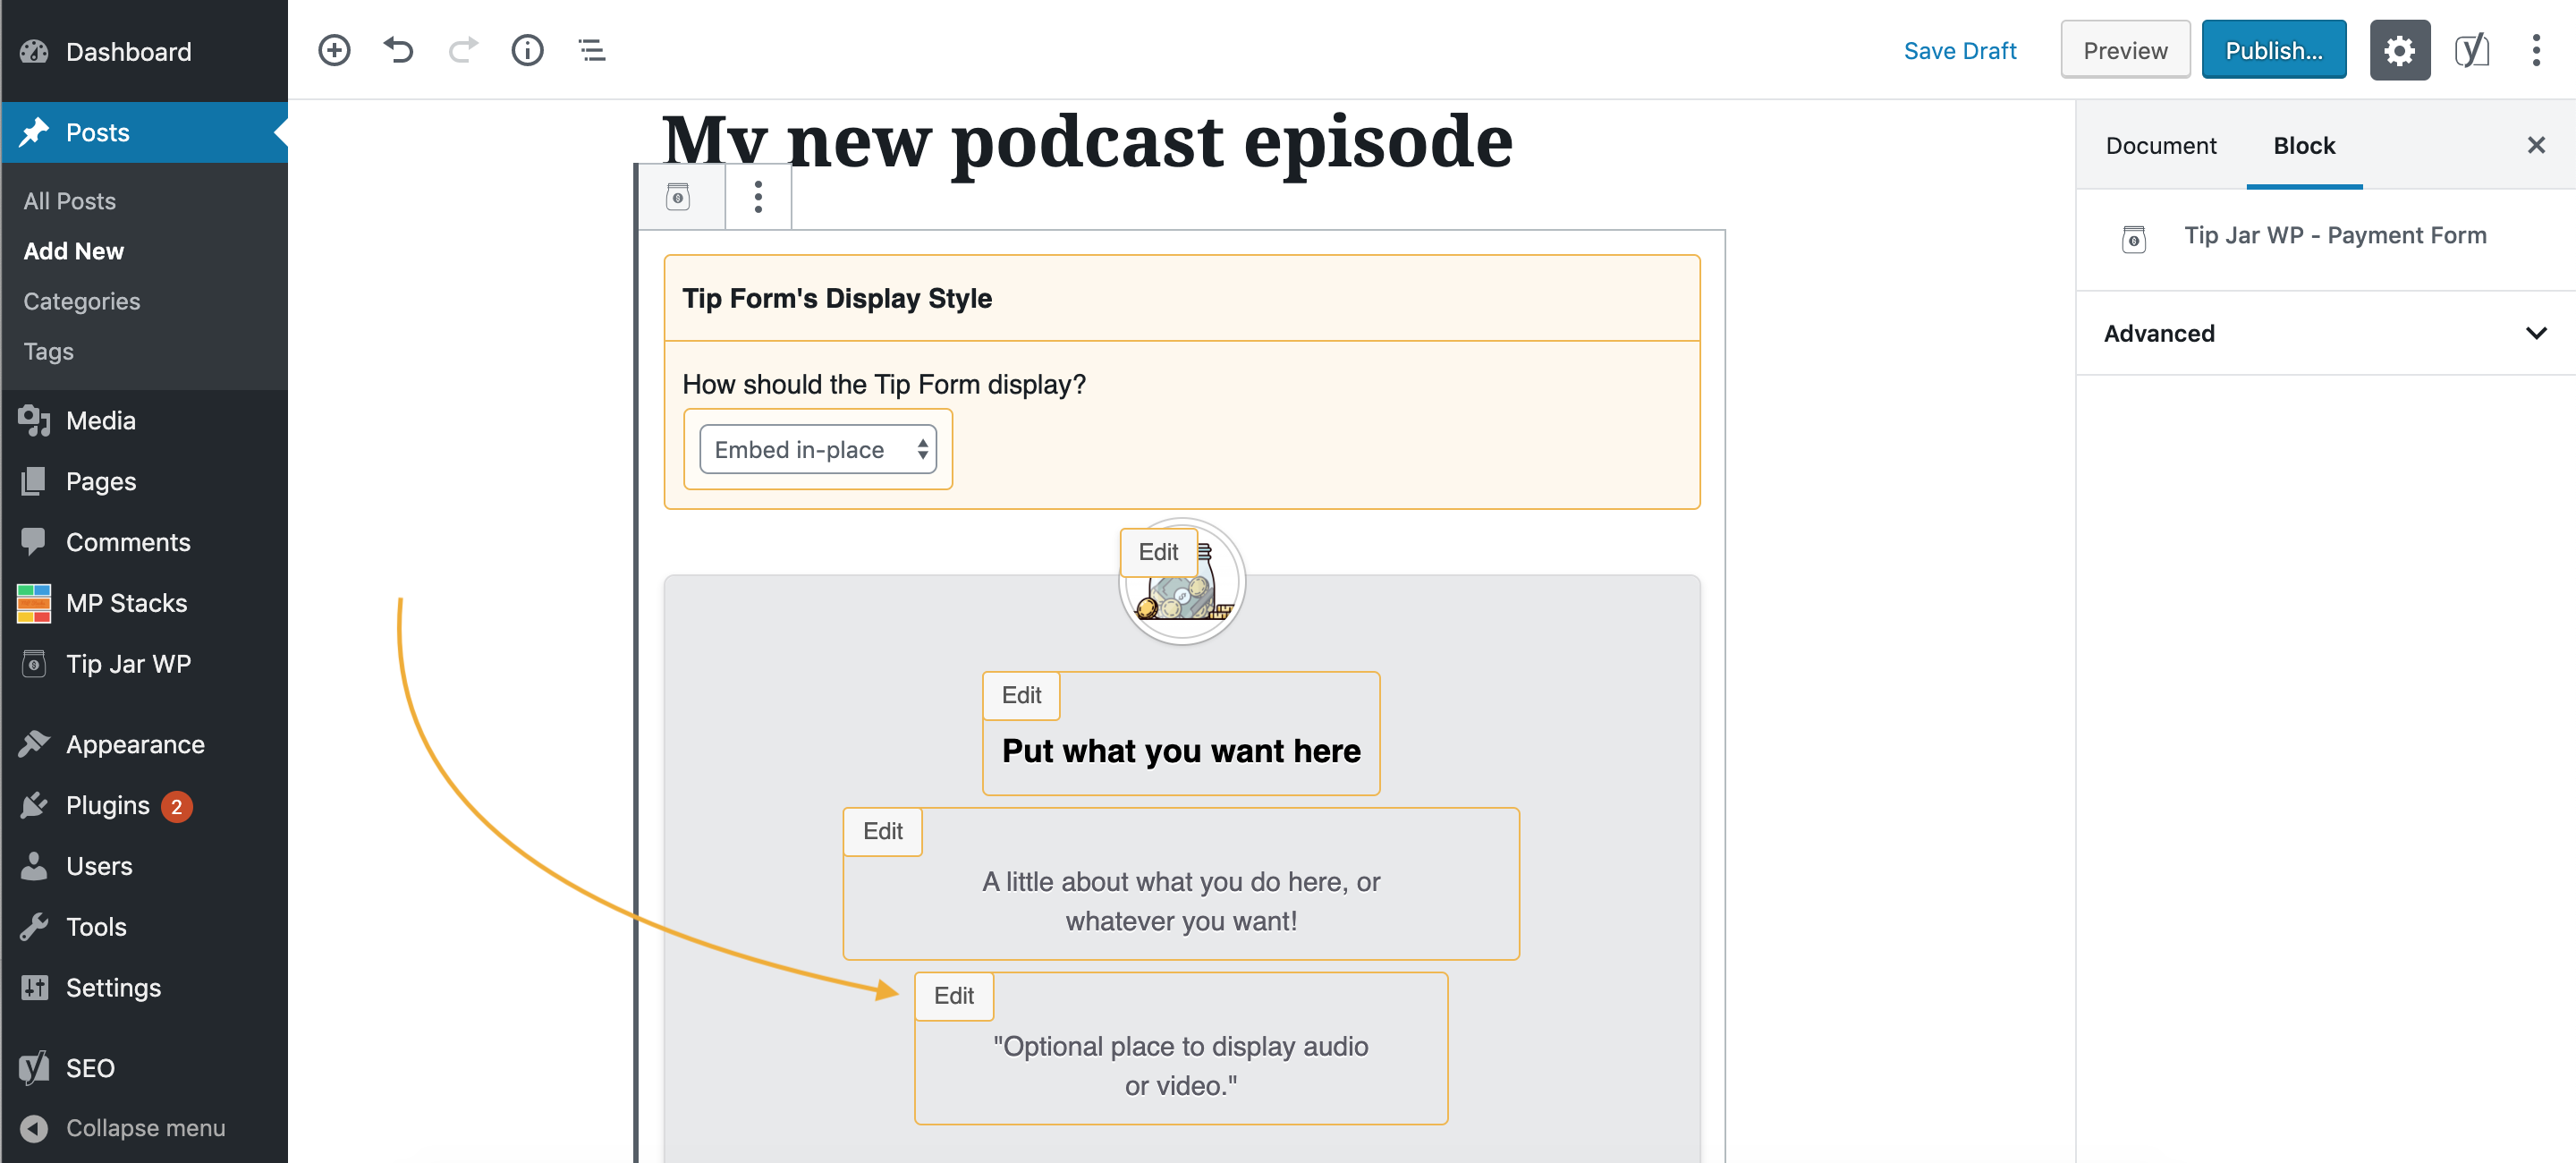
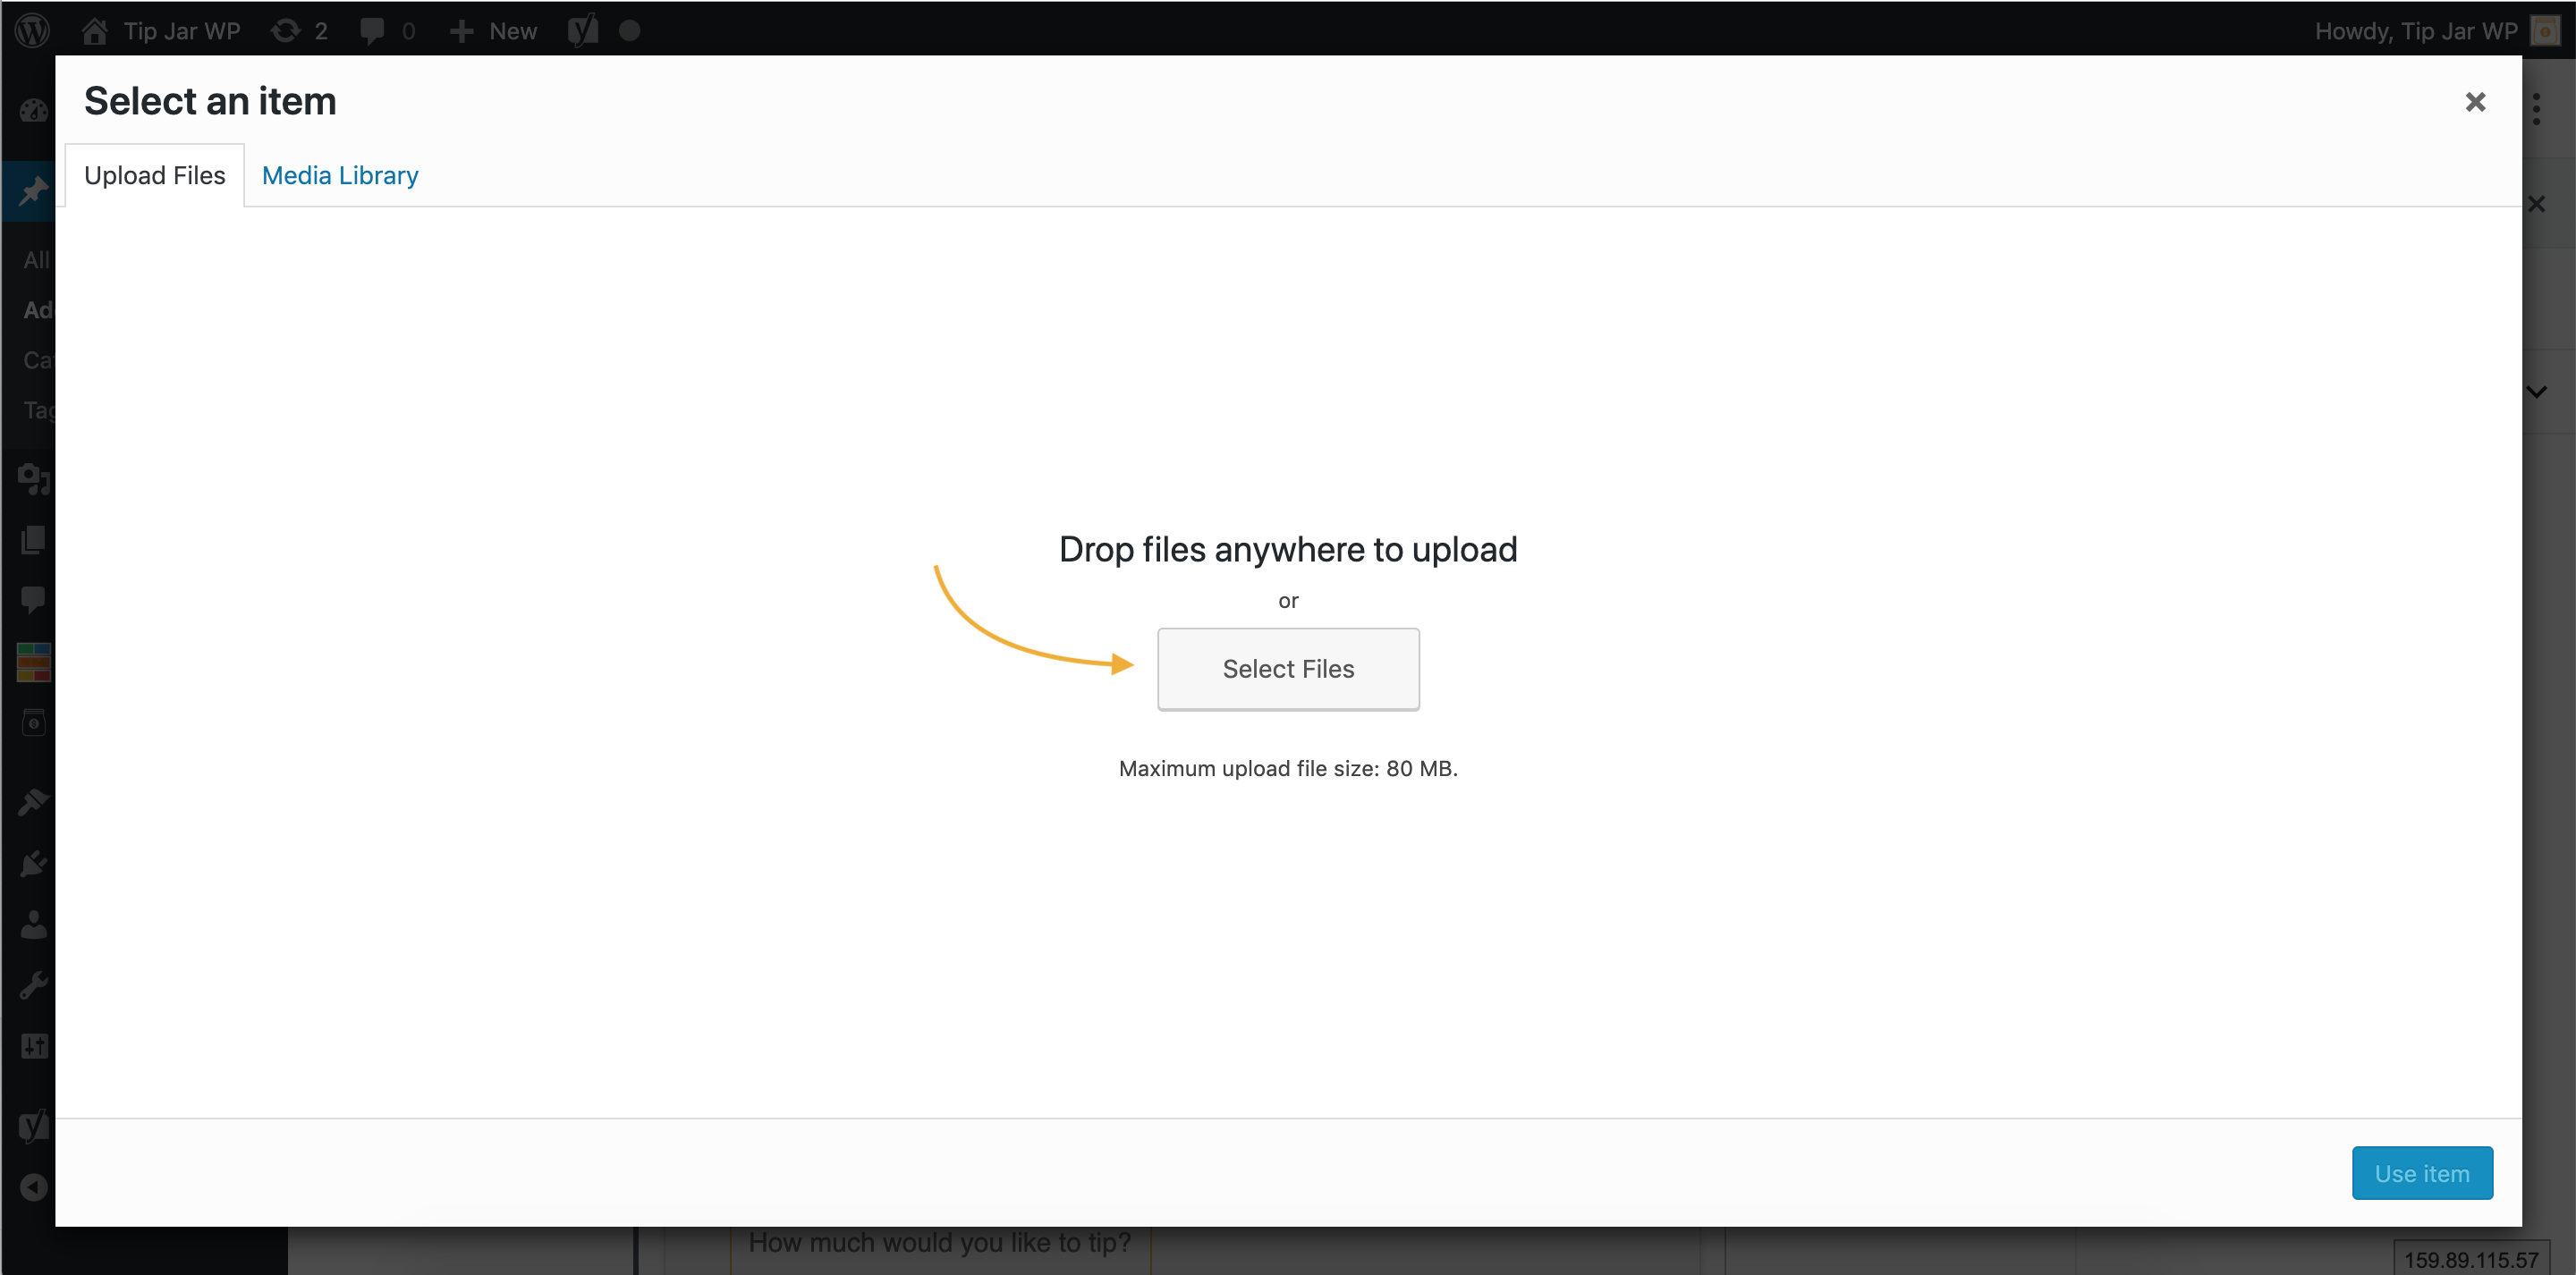
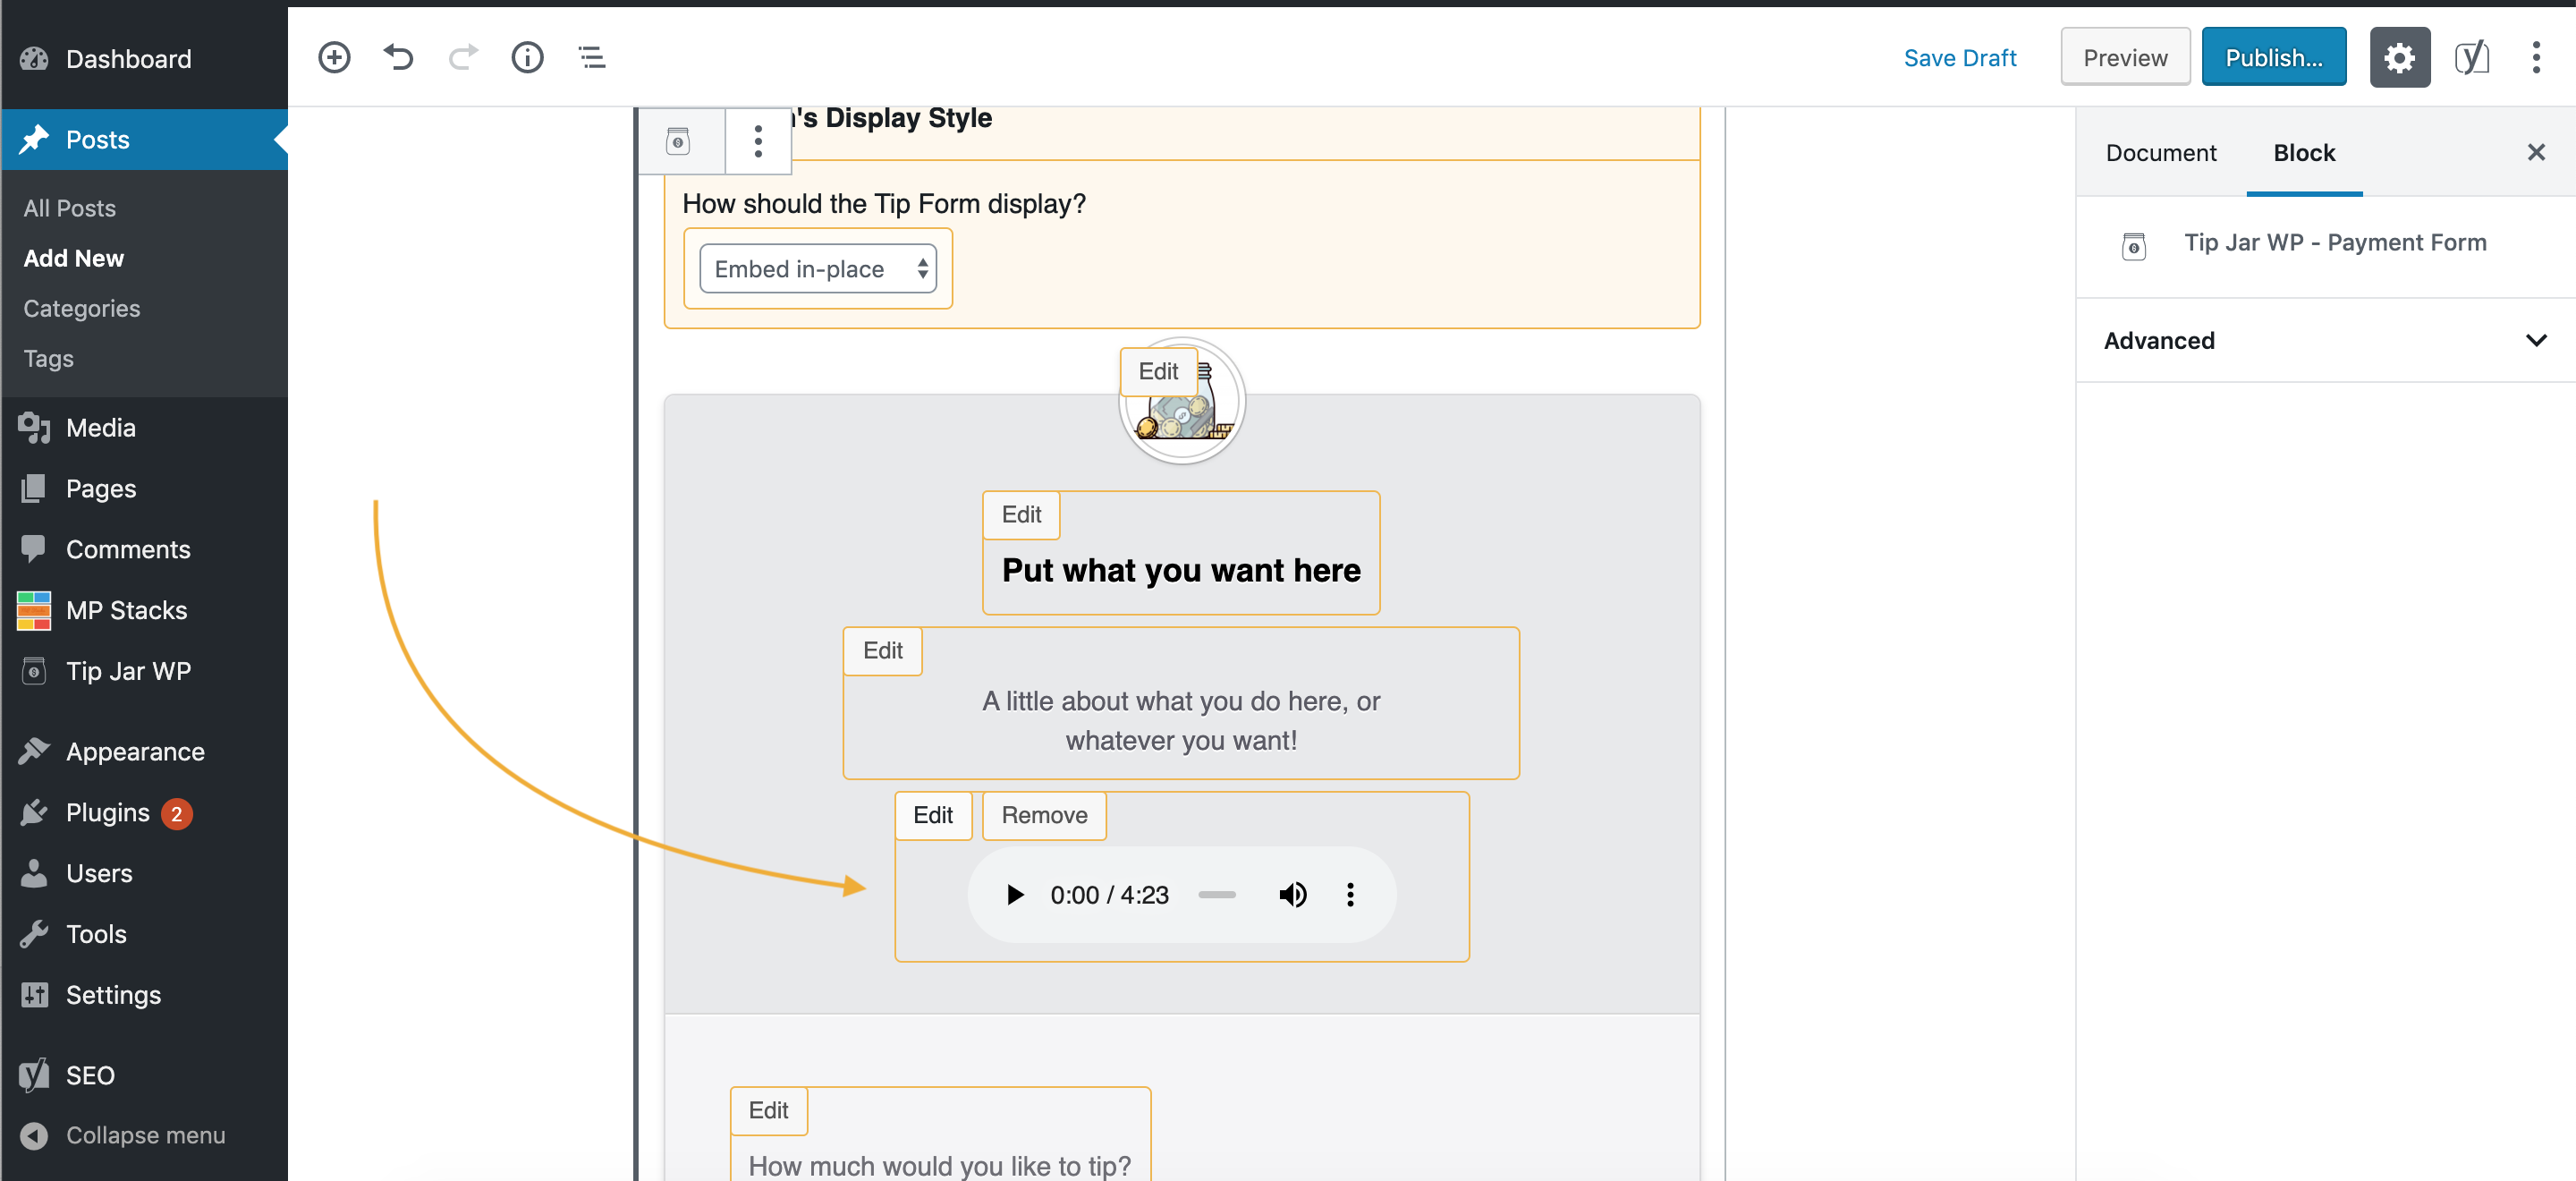
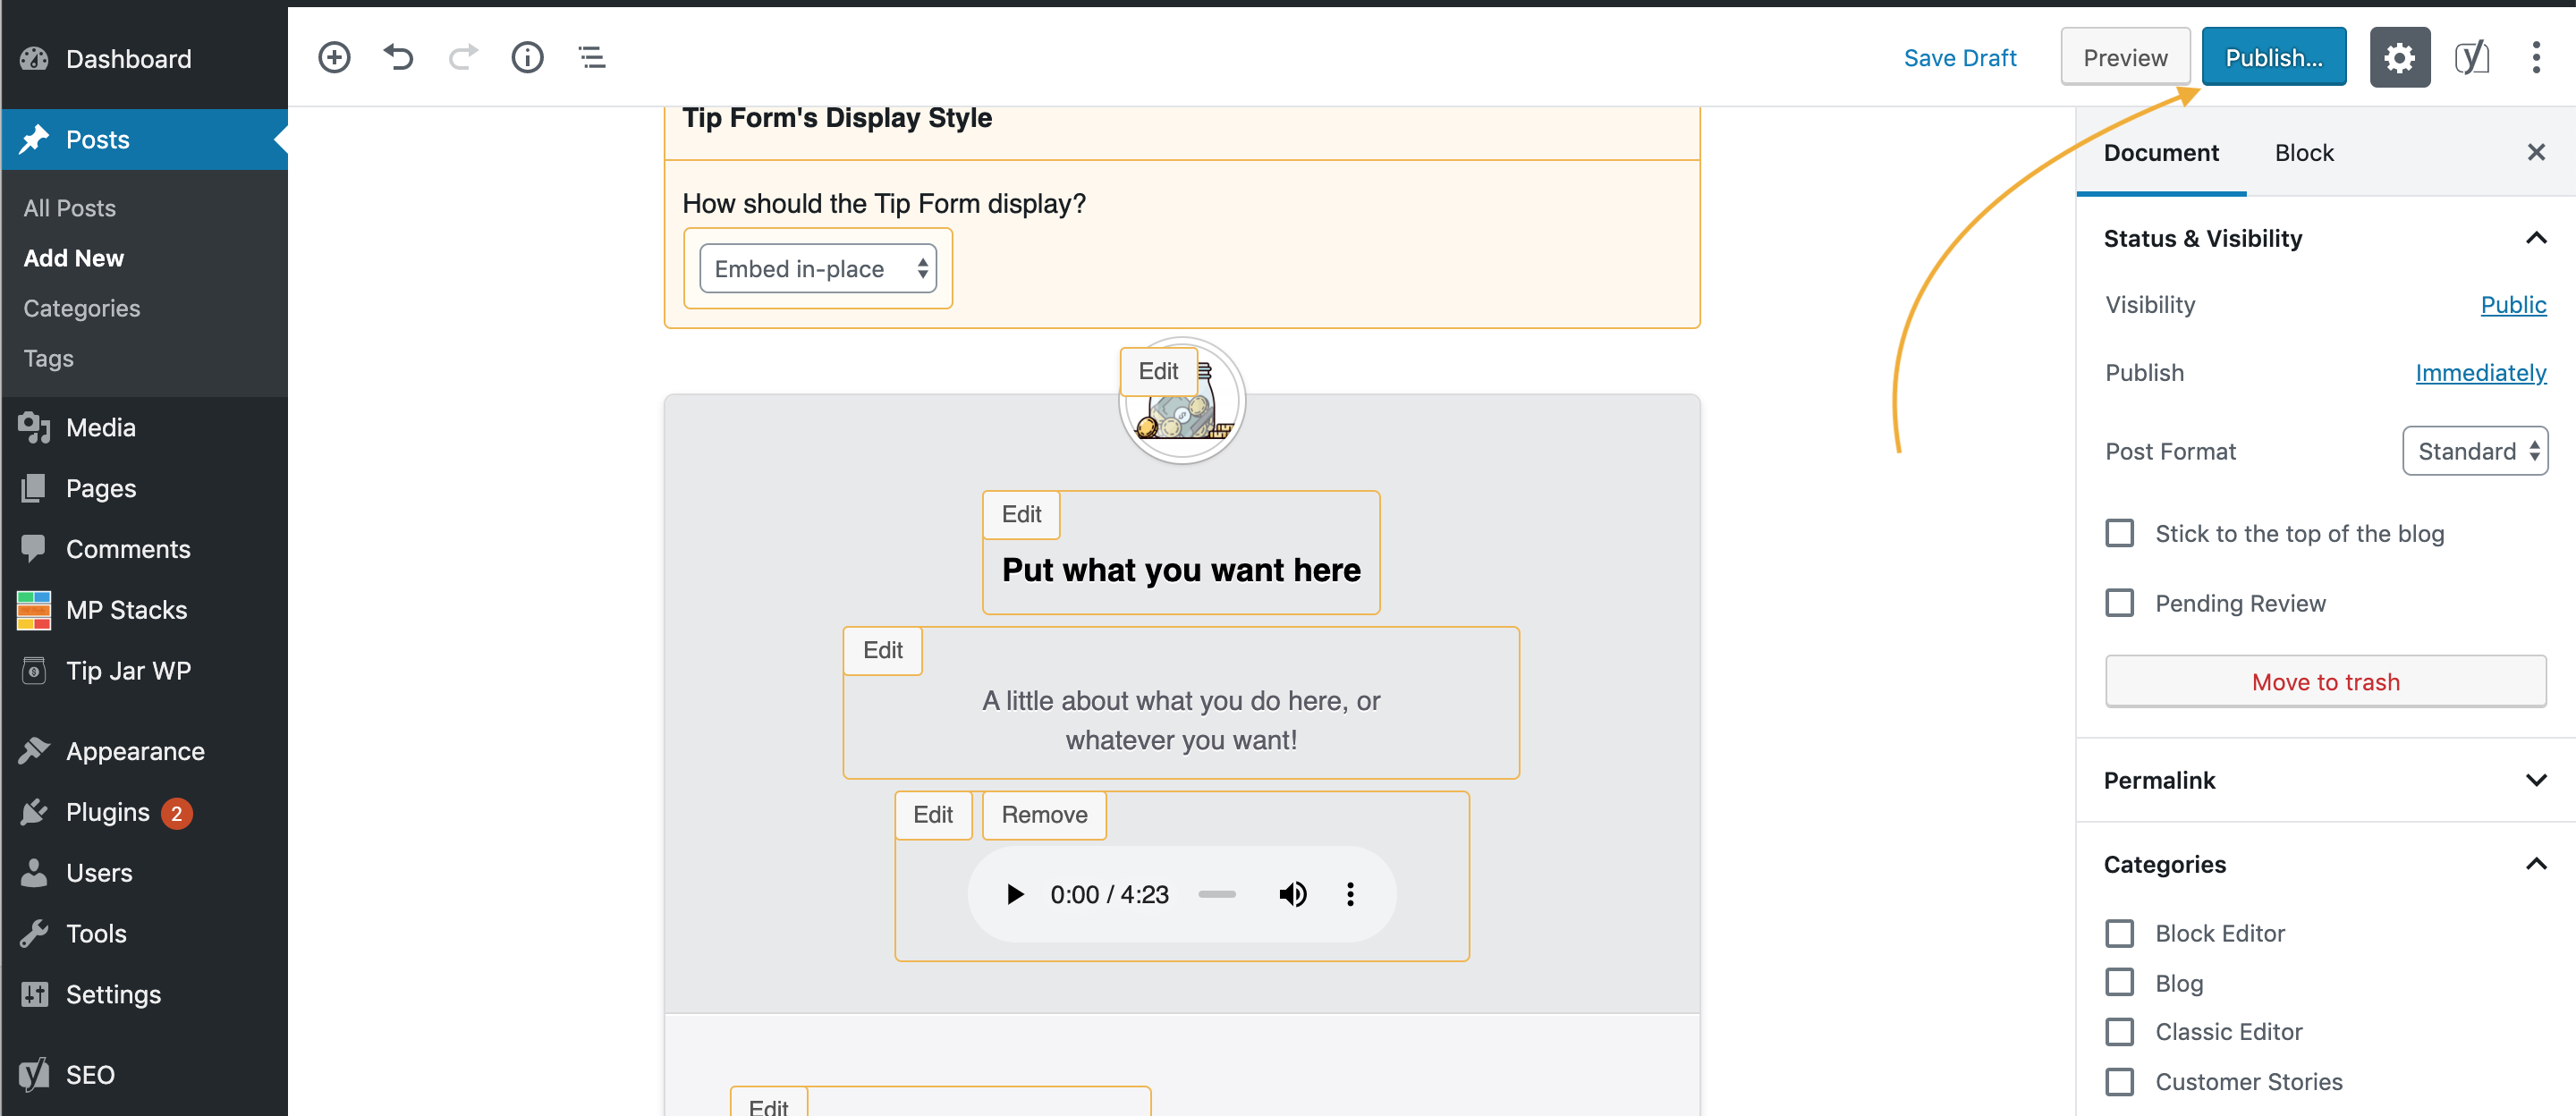
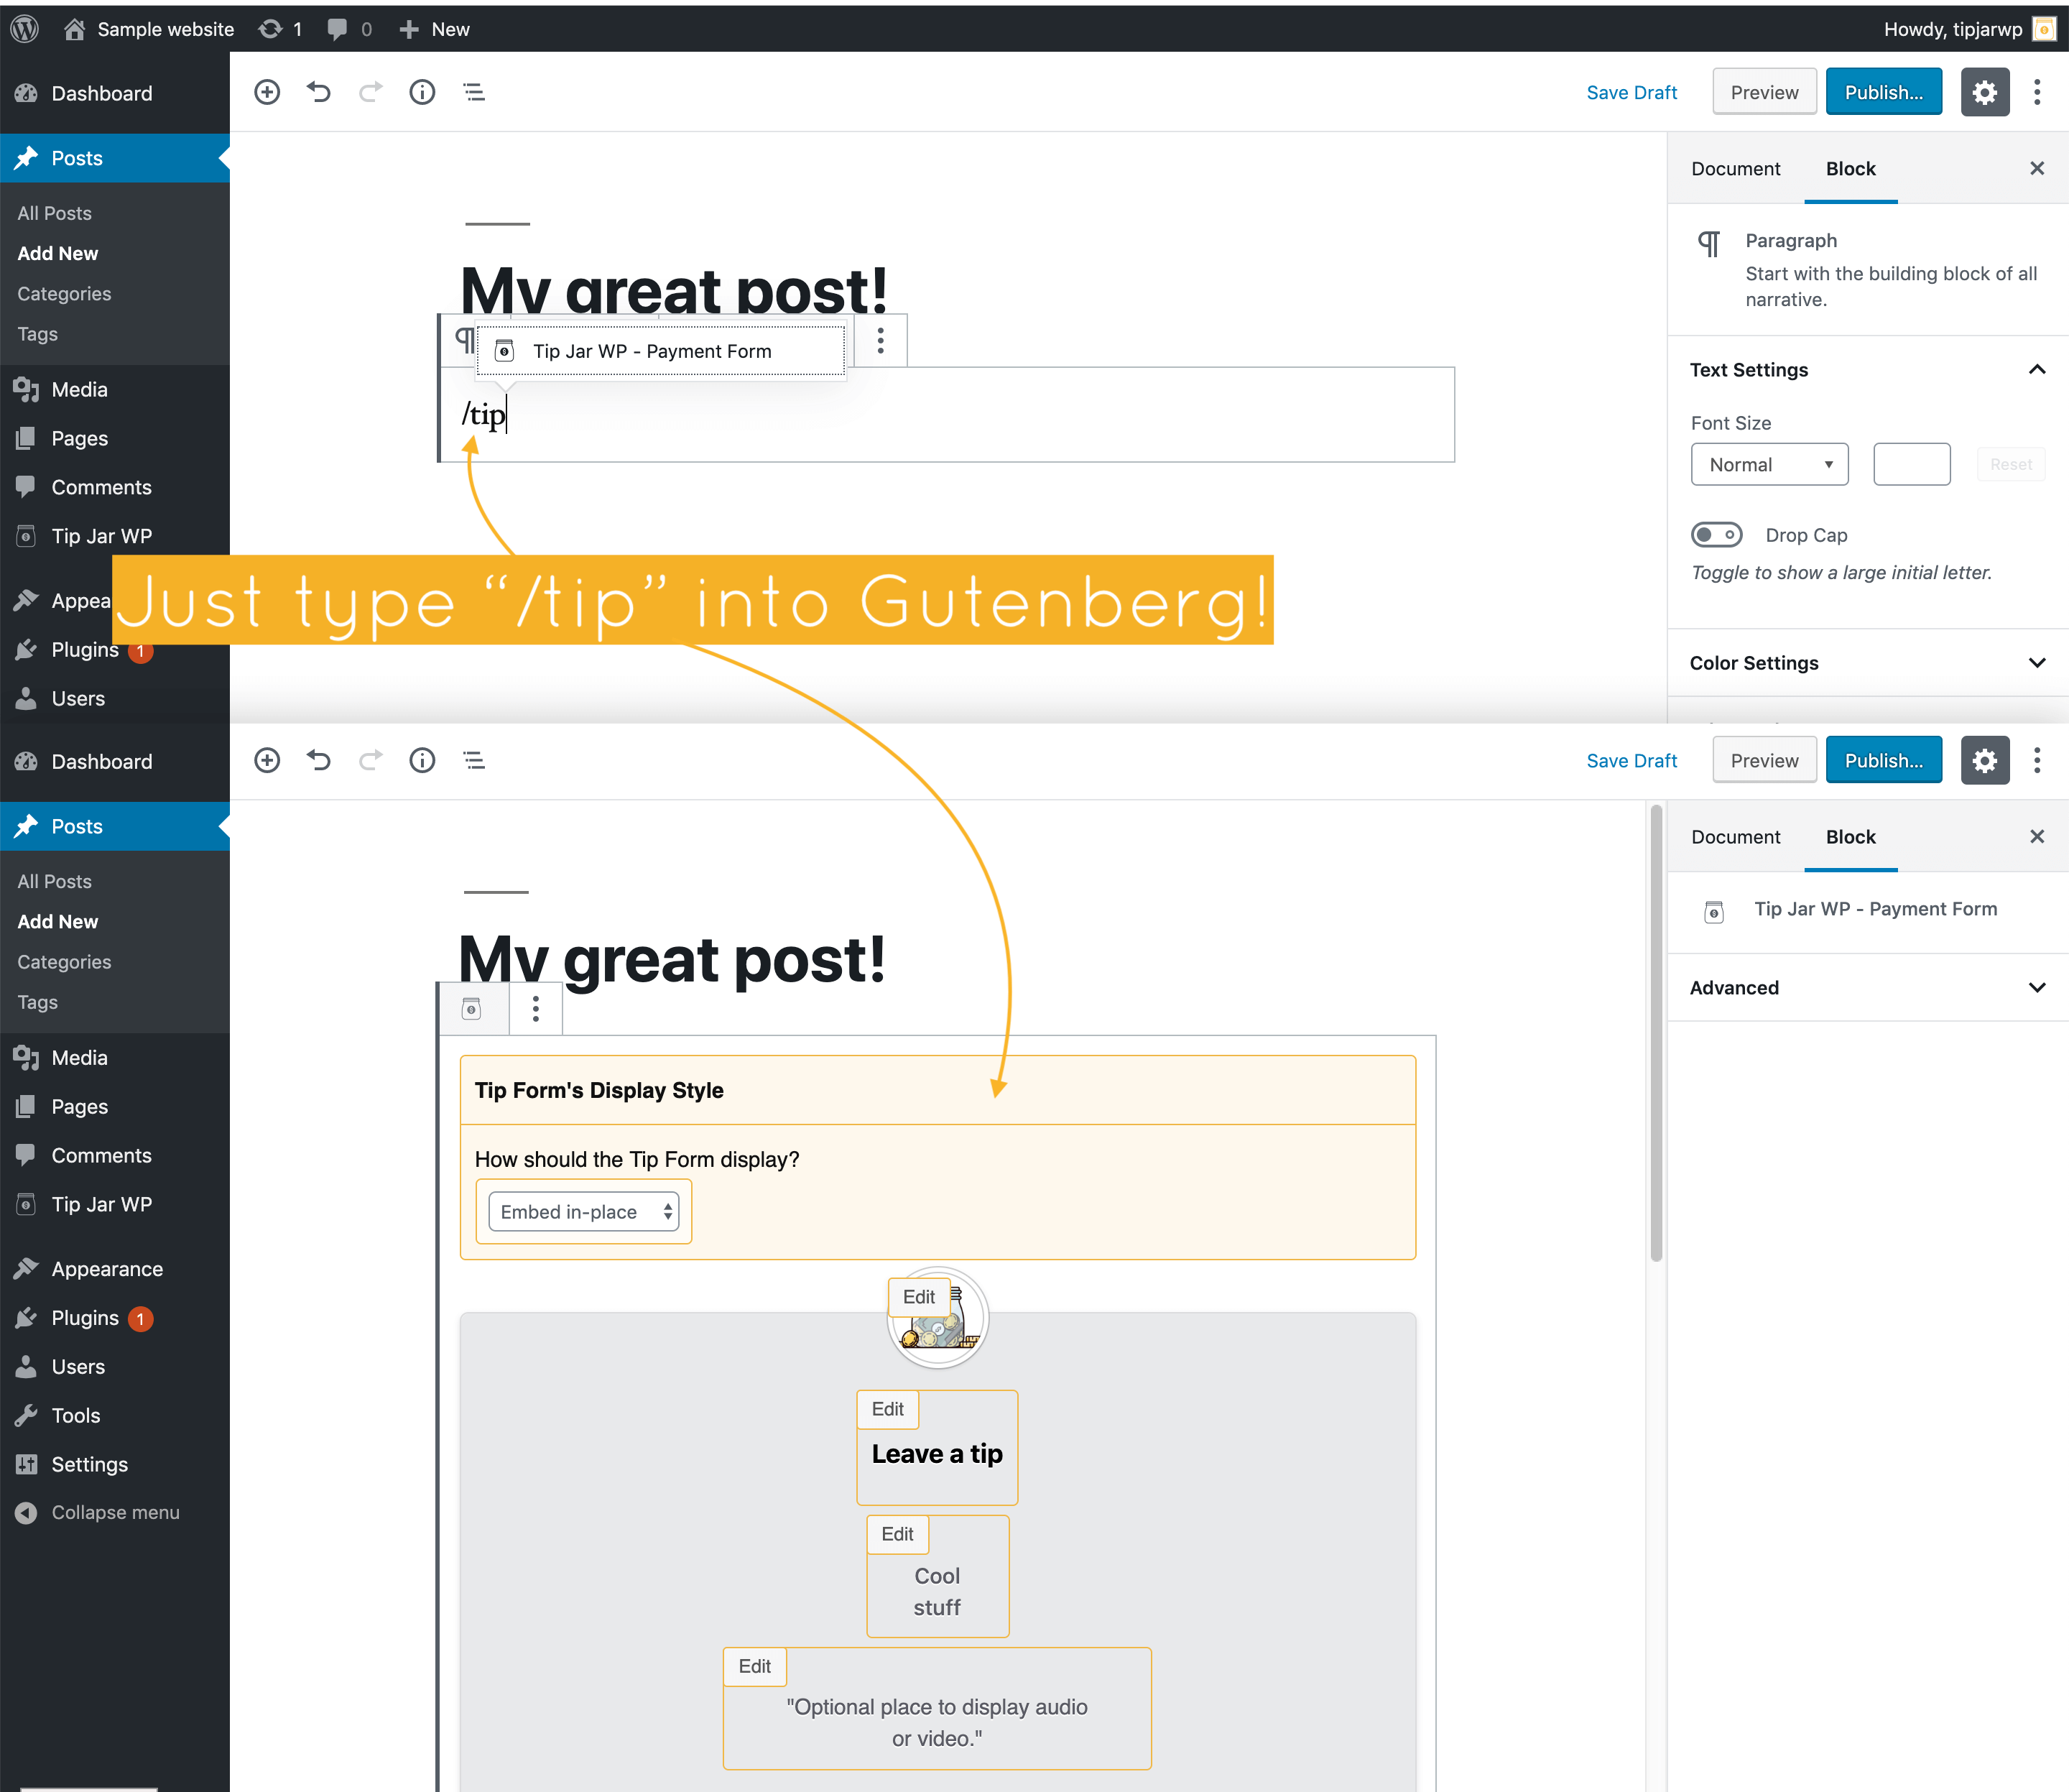
There’s also the WordPress Block Editor, where you can add a Tip Form Block by typing this into a new block, where you can control a ton of things for that specific payment form!
/tip
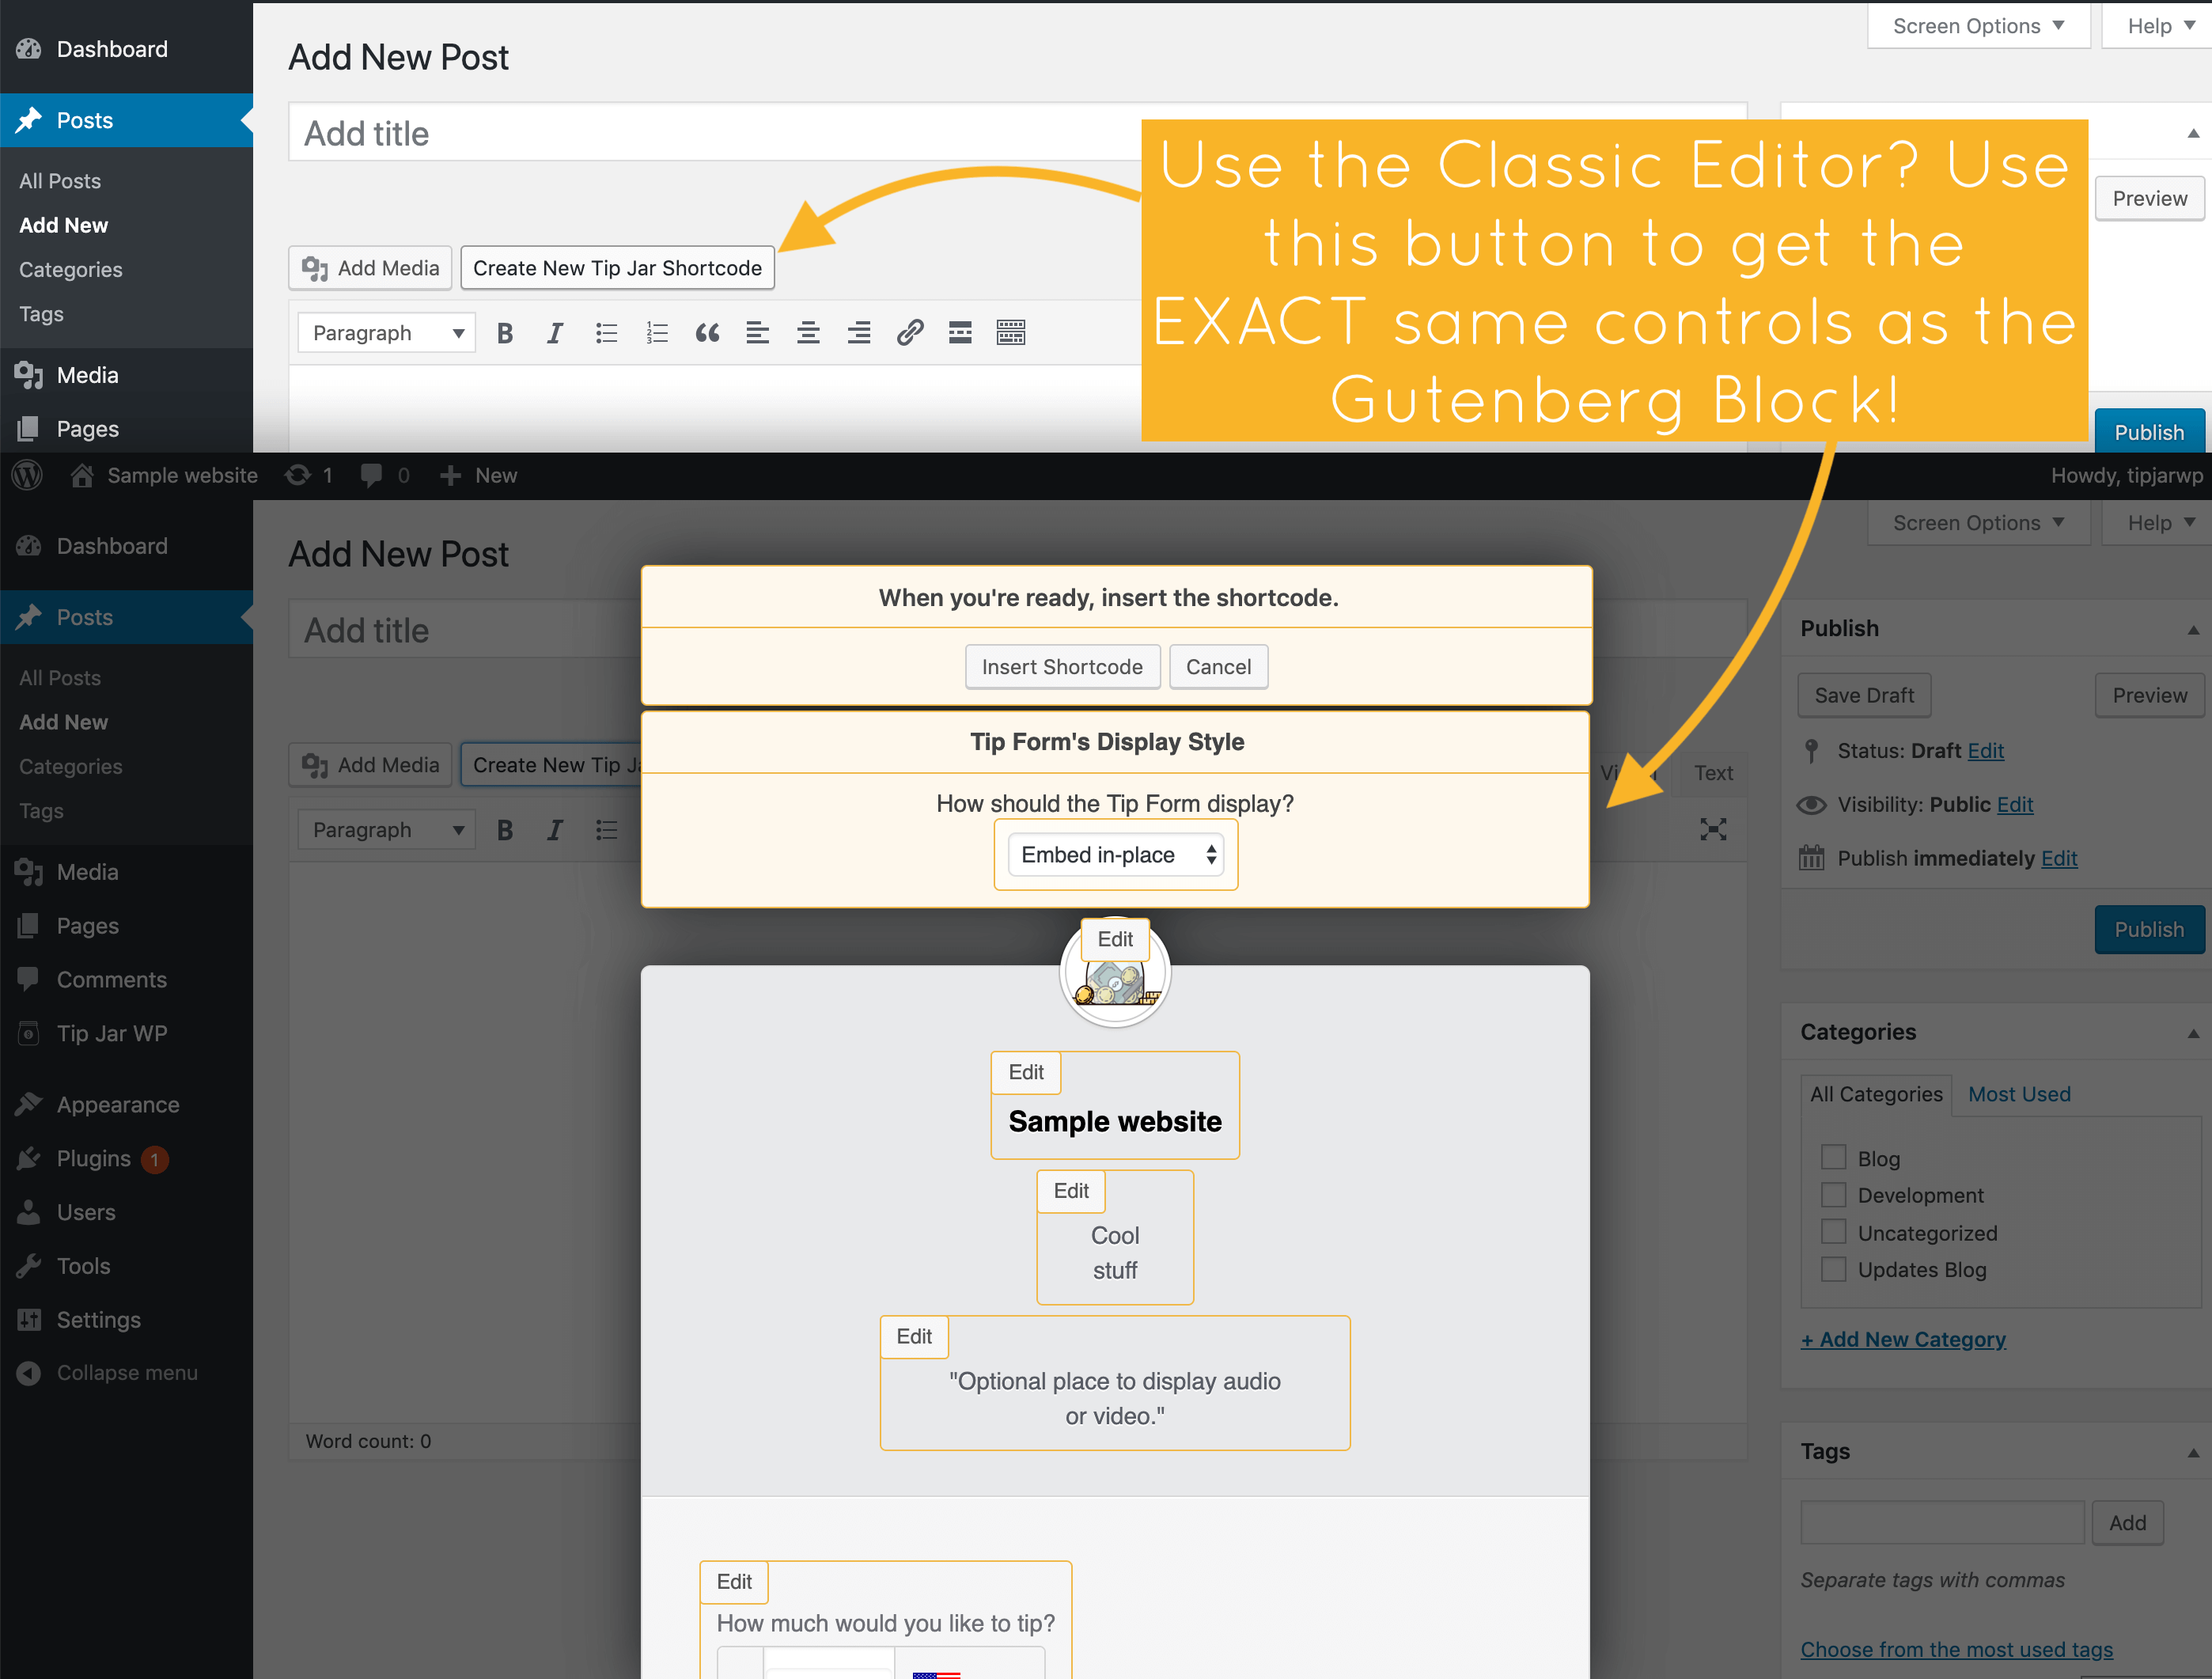
Use the Classic Editor? No problem at all! You can use the button above the Classic Editor, and you get all of the EXACT same controls as the Gutenberg Block!